1-8 (E)
RM-B750
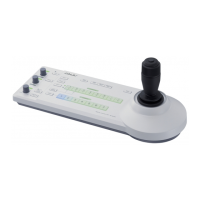
1-9. Installing the IRIS Knob Assembly
and WHITE Knob Assembly
1-9-1. Installing the IRIS Knob Assembly
1. Rotate the shaft of the IRIS knob fully in the direction
of the arrow.
2. To install the IRIS control knob assembly, align the
white mark of the IRIS control knob assembly with the
mark (shown in Fig. 1) on the operation panel.
Shaft of IRIS control knob
Mark on the operation
panel
Mark on the operation panel
White mark
IRIS control knob assembly
IRIS knob assembly
Fig. 1
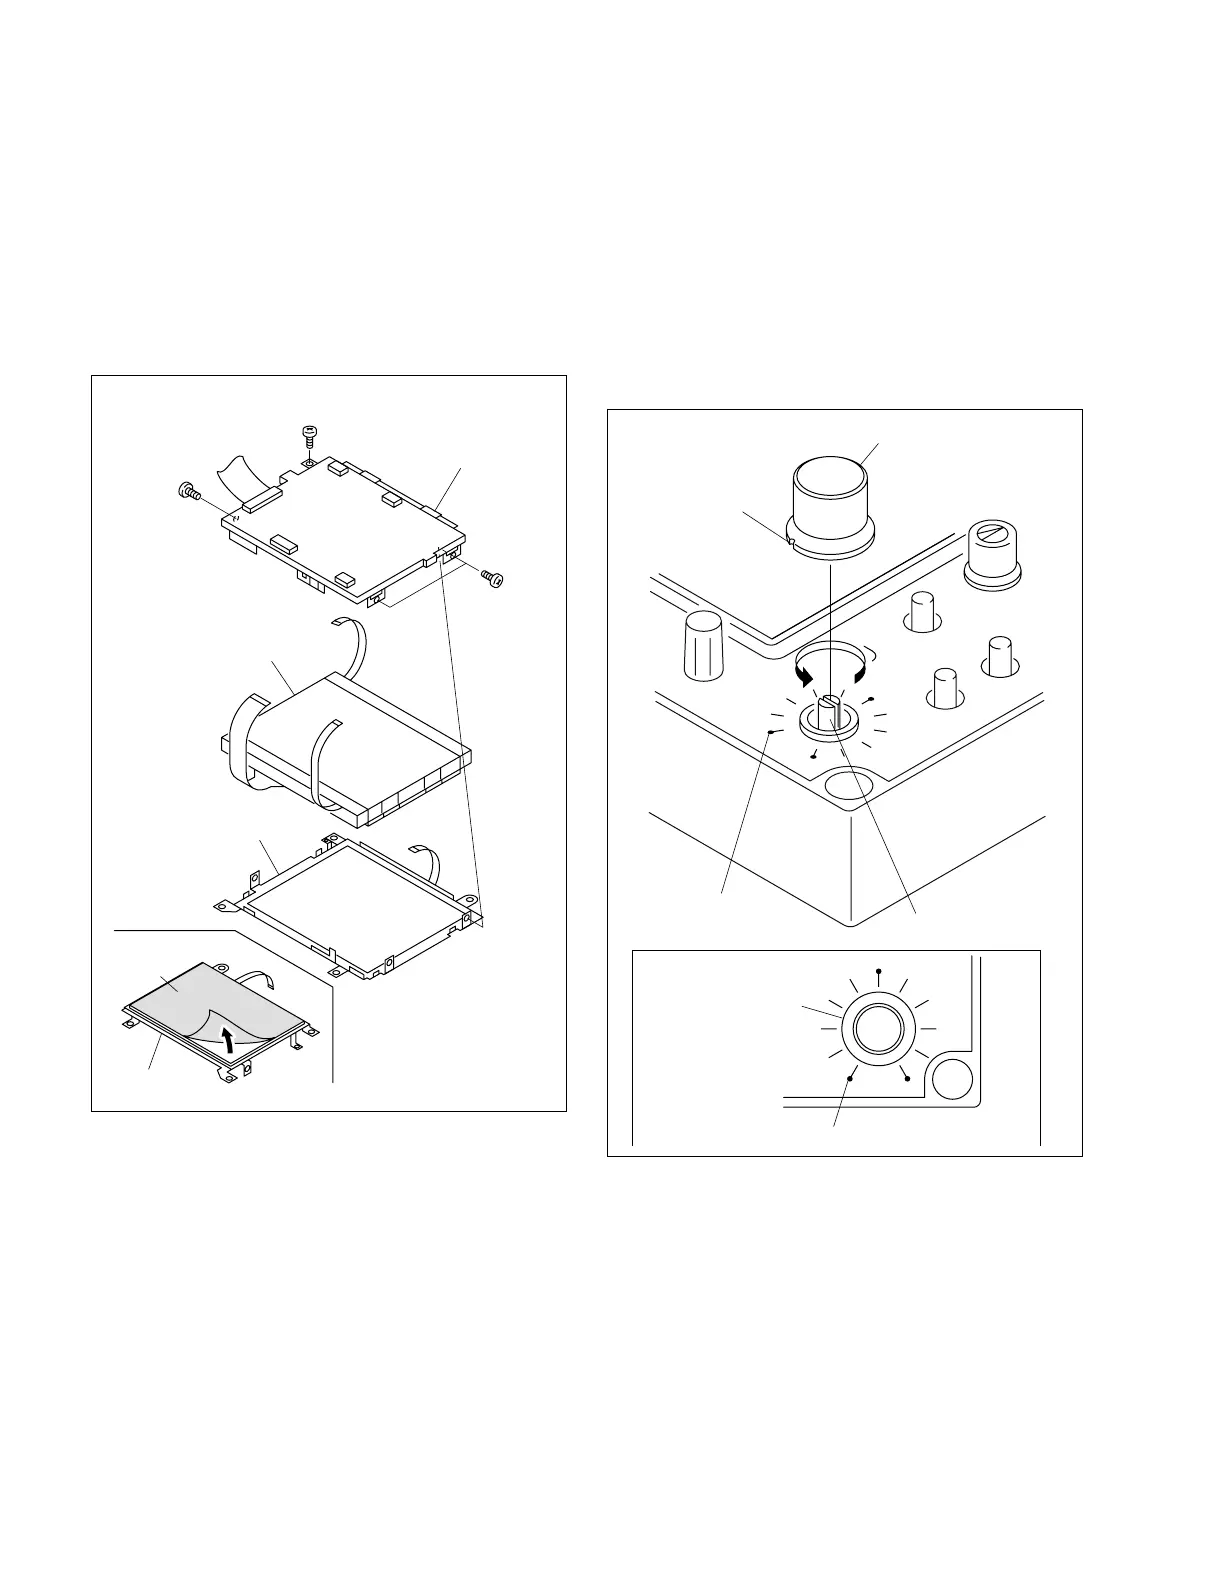
1-8. Replacing the Touch Panel and Backlight
1-9. Installing the IRIS Knob Assembly and WHITE Knob Assembly
3. Remove the four screws, the touch panel and the
backlight.
4. Install the new touch panel or the new backlight in the
LCD unit board.
n
The new touch panel is supplied with the protection
sheet attached. Peel off the protection sheet before
installation.
5. When installing the LCD unit in the RM-B750, reverse
the steps in Section 1-7.
Touch panel
Touch panel
Back light
LCD unit board
Precision
P1.7 x 2.5
Precision
P1.7 x 2.5
Precision
P1.7 x 2.5
Protection
sheet