12
Using On-Screen Menus
1c BRIGHTNESS menu (Factory setting: STD)
Adjust the brightness of the screen.
The screen becomes brighter by pressing the > button.
The screen becomes darker by pressing . button.
1d CHROMA menu (Factory setting: STD)
Adjust the color intensity of the video signal.
The color intensity strengthens by pressing the >
button.
The color intensity weakens by pressing . button.
Note
The color intensity of an composite video signal or a
Y/C separate signal can be corrected on this menu.
1e PHASE menu (Factory setting: STD)
Adjust the phase of the video signals.
The skin tone becomes greenish by pressing the >
button.
The skin tone becomes purplish by pressing the .
button.
Note
The phase of an NTSC composite video signal or a
Y/C separate signal can be corrected on this menu. The
PAL composite video signal or a Y/C separate signal
cannot be corrected.
2a COLOR SELECT menu
(Factory setting: AUTO)
Select the color system of the input signal.
AUTO: Input color systems are automatically
selected.
When you input NTSC signal, comb filter will
activate. To monitor NTSC signal with trap filter,
select NTSC in this menu.
2b DISPLAY menu
(Factory setting: SHORT TIME)
Select the period of displaying the color system of the
current input signals.
The items have the following functions.
Item
SHORT TIME
LONG TIME
OFF
2c LANGUAGE menu
(Factory setting: ENGLISH)
Select the menu language among the five languages,
English, German, French, Italian and Spanish.
Function
To display the kind of color system
being used for several seconds on the
screen each time you change the
signal input.
To display the kind of color system
being used for approximately five
minutes on the screen each time you
change the signal input.
Not to display the kind of the color
system.
13
Attaching the Side
Covers
2d USER MEMORY menu
The items have the following functions.
Item
STORE
RECALL
FACTORY PRESET
a) The current settings and adjusted values are reset to the
factory settings. The values and settings adjusted and
stored in the internal memory by using the STORE
menu, however, are not changed. To reset internally
stored adjusted values and settings to the factory setting,
select FACTORY PRESET, first, then select STORE.
When you press the ENTER (4) button, the following
message is displayed for about two seconds. The
currently selected item becomes active when pressing
the ENTER (4) button.
Using the Last Control Function
If you press the > or . button when the menu is not
displayed, one of the following menu items that you
adjusted last time is displayed.
•VOLUME
•CONTRAST
•BRIGHTNESS
•CHROMA
•PHASE
Then you can adjust the item immediately.
Function
To store all adjustments and
settings currently set on each
menu into the internal memory.
To recall all adjustments and
settings currently stored in the
internal memory.
To reset the adjustments and
settings currently set on each
menu to the factory settings.
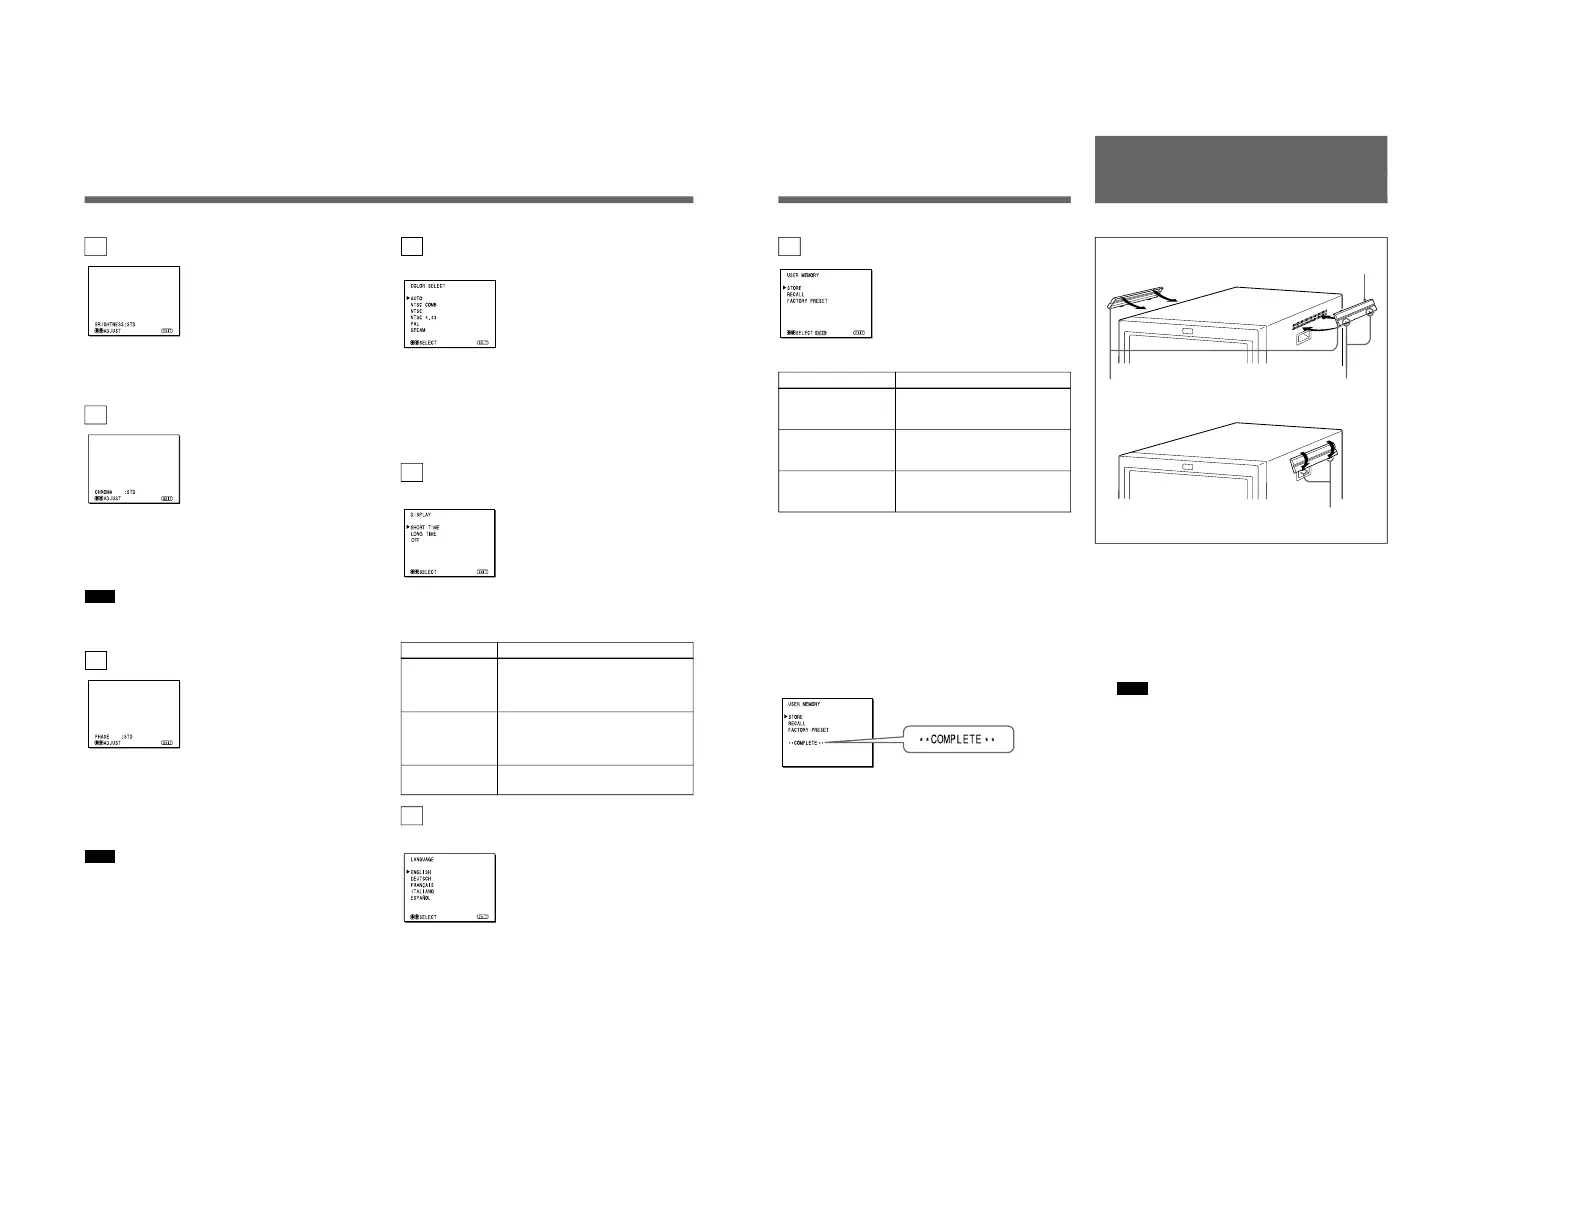
a)
In order to protect the ventilation holes from splashes
from medicines, etc., attach the supplied side covers as
illustrated.
1
Hook the tabs on the upper edge into the
ventilation holes, making sure that the arrows on
the cover are facing down.
Note
Attach the side covers on all ventilation holes.
2
Push up the tabs on the bottom edge and fit the
cover into the lowest ventilation holes.
Attach covers on both left and right vents.
2
Side covers
1
Tabs on the upper edge
Arrows
Tabs on the
bottom edge