29GB
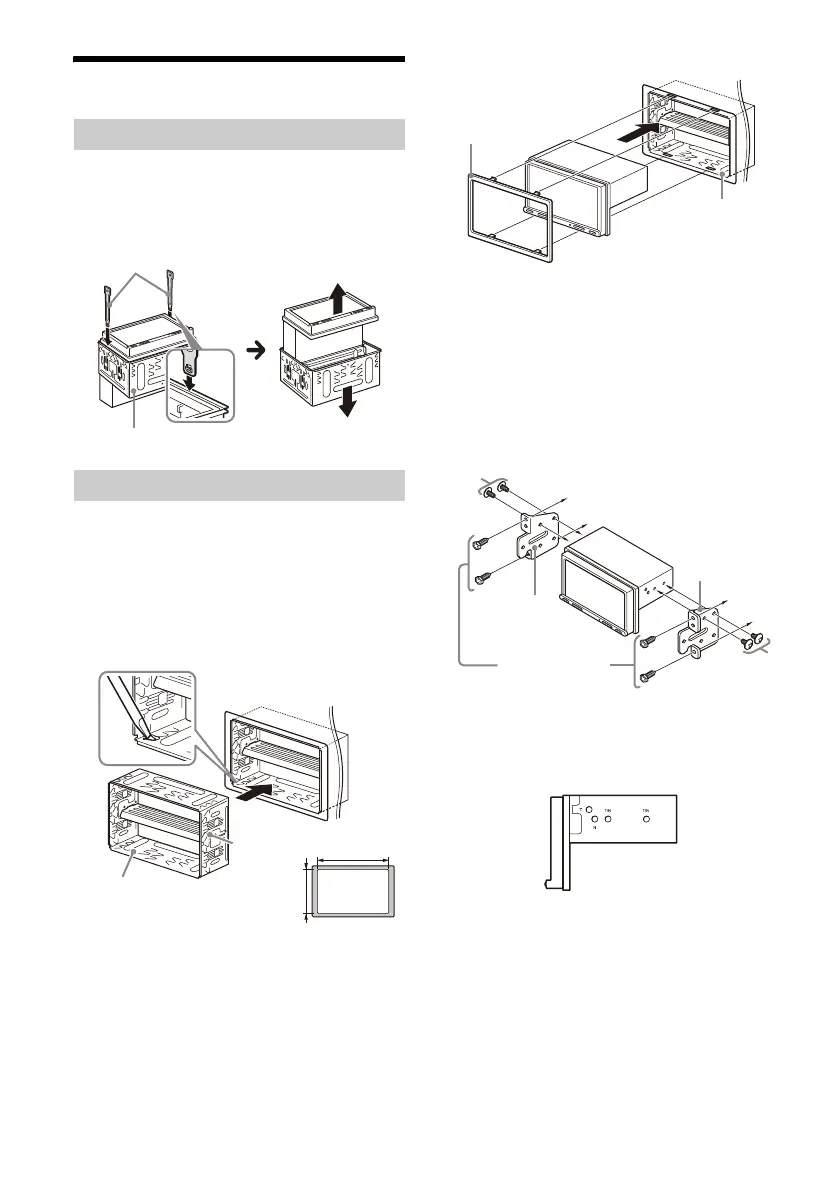
Installation
Before installing the unit, remove the bracket
from the unit.
1 Insert both release keys until they click,
and pull down the bracket , then pull up
the unit to separate.
•Before installing, make sure the catches on both
sides of the bracket are bent inwards 3.5 mm
(
5
/32 in).
•For Japanese cars, see “Mounting the unit in a
Japanese car” (page 29).
1 Position the bracket inside the
dashboard, then bend the claws outward
for a tight fit.
2 Mount the unit onto the bracket .
Notes
• If the catches are straight or bent outwards, the unit will
not be installed securely and may spring out.
• Make sure the 4 catches on the protection collar are
properly engaged in the slots of the bracket .
Mounting the unit in a Japanese car
You may not be able to install this unit in some
Japanese cars. In such a case, consult your Sony
dealer.
When mounting this unit to the preinstalled
brackets of your car, use the supplied screws in
the appropriate screw holes based on your car:
T for TOYOTA and N for NISSAN.
Note
To prevent a malfunction, install only with the supplied
screws .
Removing the bracket
Mounting the unit in the dashboard
Catch
Larger than
182 mm (7
1
/4 in)
Larger than
111 mm (4
3
/8 in)
To the dashboard/center console
Parts supplied with
your car
Bracket
Bracket
 Loading...