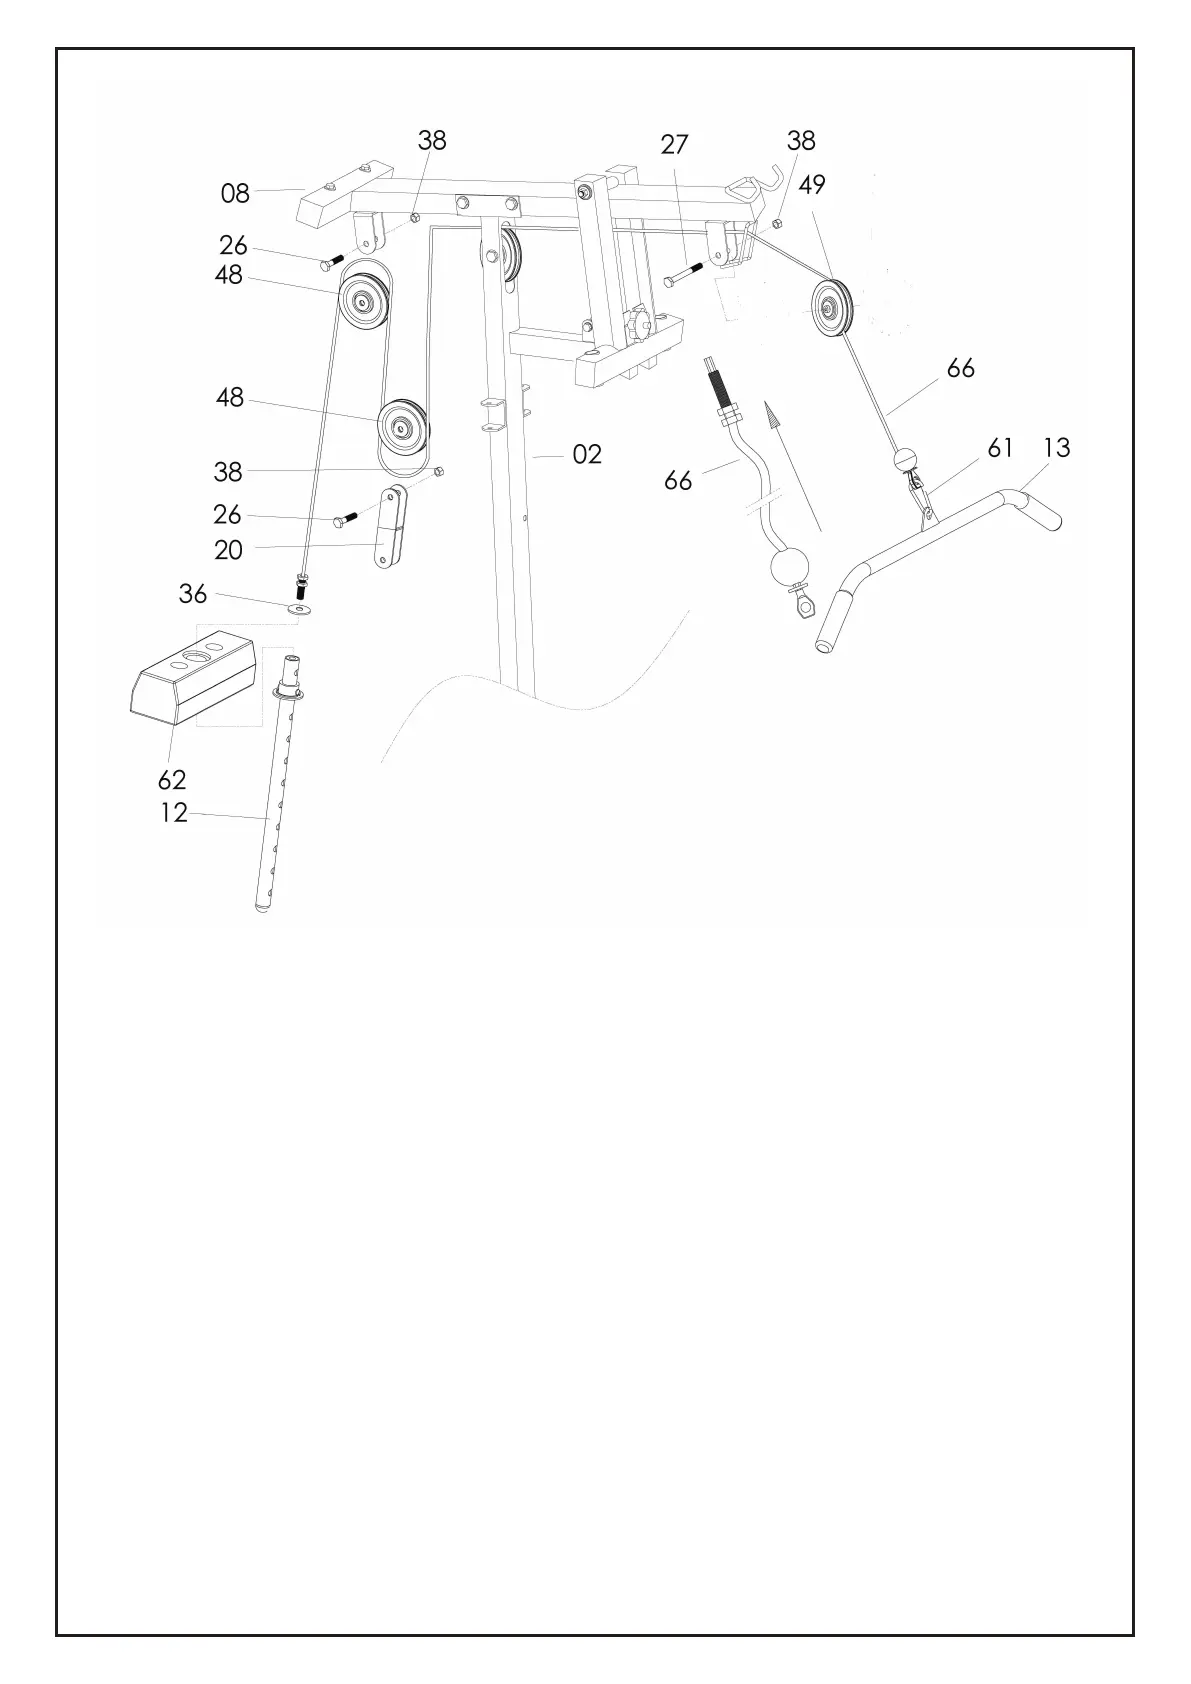
1) Attach the Cable for Lat Bar (66) to the opening bracket at the front of the Bridge Tube
(8).
Note: The ball stopper of the Cable (66) should be underneath the Bridge Tube (8). Attach
the Cable (66) onto the Small Pulley (49) and . Note: The Cable (66) has to come out of
the Cap (50) from the opening sides. Tighten to the bracket by X1 Hex Head Bolt (27) and
X1 Nylon Nut (38).
2) Draw the Cable (66) towards the back side of the machine through the upper opening of
Upright Support Tube (2) and around Pulley (48), then attach the Pulley (48) onto bracket
A as drawing, tighten by X1 Hex Head Bolt (26) and X1 Nylon Nut (38).
3) Draw the Cable (66) downwards and around Pulley (48). Attach the Pulley (48) with the
Bracket for Pulley (20) on two sides then tighten by X1 Hex Head Bolt (26) and X1 Nylon
Nut (38).
4) Draw the Cable (66) downwards between the two Guiding Tube (5) and fully thread the
bolt on the end of the Cable (66) into the top opening on the Select Bar (12).
5) Attach the Lat Bar (13) to the front end of the Cable (66), connect by X1 Hook (61).
6) Draw the Cable (66) upwards and around Pulley (48). Attach the Pulley (48) to bracket
B(20) and tighten by X1 Hex Head Bolt (26) and X1 Nylon Nut (38).
STEP 6
13