This document provides a QuickHelp guide for the Sorenson ntouch VP2, detailing its calling, video, and system management features. The device is designed to facilitate communication, particularly for users who rely on video communication, offering a range of functionalities to enhance the user experience.
Function Description
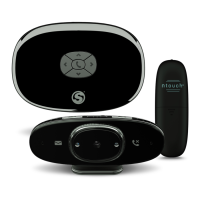
The Sorenson ntouch VP2 is a videophone device that enables users to make and receive video calls. Its primary function is to provide a reliable and feature-rich platform for video communication, including specialized features like Group Call and Voice Carry Over (VCO) calling. The device integrates various communication tools, such as a call history, phonebook, and a video center, all accessible from a user-friendly Home screen. It also includes settings for personalizing the device's behavior and appearance.
Usage Features
Group Call Feature:
The ntouch VP2 supports Group Calls, allowing conversations with up to four other participants simultaneously. A group call is initiated by joining two active calls, and then up to two additional calls can be added. This feature is compatible with all Sorenson endpoints for point-to-point calls but does not support Sorenson Video Relay Service (SVRS) calls.
To use Group Call:
- During an active call, press the OK key on the remote control to open the In-call options bar.
- Navigate to and select the Call button to open the Call menu.
- From the Call menu, select Call History (or Favorites, Phonebook, or use the Dialer) to choose a contact or dial a number.
- Select a phone number or name from the list to dial a new call. The first call will be placed on hold while the new call is being dialed.
- Once the new call is answered, a message will indicate that the new caller is in the call and the first caller is on hold.
- Press the OK key again to open the In-call options bar.
- Navigate to and select the Join button to merge the calls.
- A "Joining calls..." message will appear, followed by a "Starting your group call..." message with a Group Call ID.
- After the calls are joined, the video images from both calls will appear in the center of the screen.
- To add more participants (up to a total of four, including yourself), repeat the process of dialing a new call and joining it to the existing group call. All participants in the Group Call will see the same four video images on their screens.
Voice Carry Over (VCO) Calling:
VCO calling allows users to speak directly to a hearing person and read their responses via text on the videophone.
To set up VCO calling:
- From the Home screen, select the Settings button.
- Select Call Options.
- Select Voice Carry Over.
- Move to and select the Turn on Voice Carry Over (VCO)? checkbox. This will reveal VCO audio choices.
- Choose between Use 1-line VCO or Use 2-line VCO.
- If 1-line VCO is selected, the setup is complete. Press the Home key to return to the Home screen, and the selection will be saved.
- If 2-line VCO is selected, a "What is my 2-line VCO call back number?" field will appear.
- Enter the call back phone number for the voice telephone that will be used.
- Press the Home key to return to the Home screen, and the VCO selection will be saved.
In-Call Audio Level Meter:
The device can display an audio level meter during active calls to help users monitor their audio output.
To show the in-call audio level meter:
- From the Home screen, select the Settings button.
- Select Device Options.
- Select Sound.
- Move to and select the Use point-to-point audio? checkbox. This will reveal the Show audio meter? radio button.
- Move to and select the Show audio meter? checkbox.
- Press the Home key to return to the Home screen. The audio selections will be saved.
- During an active videophone call, a stack of seven bars representing the audio meter will appear over the Self-view image.
Options Bar Display Duration:
Users can adjust how long the in-call options bar appears when a call starts.
To change the options bar display duration:
- From the Home screen, select the Settings button.
- Select Call Options.
- Under "How long should I display my options bar?", use the + (more time) or – (less time) controls to set the desired duration.
- Press the Home key to return to the Home screen, and the options bar selection will be saved.
Self-View Image Video Settings:
The ntouch VP2 allows users to adjust their self-view image video settings during a call, including zoom, pan, view mode, focus, brightness, and saturation.
To change self-view image video settings:
- During an active call, press the OK key on the remote control to open the In-call options bar.
- Move to and select the Video button in the In-call options bar to open the Video menu.
- The Video menu offers several options:
- Zoom & Pan: Use this button to zoom in or out of the camera image and move the image being recorded by the camera (up, down, left, or right). Press OK to switch between Zoom and Pan controls.
- View Mode: Select the active View mode (Full-screen with Self-view, Split-screen, or Full-screen without Self-view).
- Focus: Adjust the camera's focus manually. Select Auto Focus to reactivate the auto-focus function. For best results with Auto Focus, remain still.
- Brightness/Saturation: Adjust the camera's brightness level and color saturation levels.
- After making adjustments, the settings are applied immediately.
Do Not Disturb Mode:
The Do Not Disturb mode allows users to temporarily prevent incoming calls from ringing or flashing the LightRing, sending them directly to SignMail.
To turn Do Not Disturb mode on or off:
- From the Home screen, select the Settings button.
- Select Do not disturb.
- A dialog box will appear, explaining that incoming calls will be sent to SignMail and the LightRing will not flash.
- Select OK to activate Do Not Disturb mode.
- When enabled, the Home screen will display a diagonal pattern and a "Do not disturb; please no calls" message next to a crescent moon icon.
- To turn off Do Not Disturb mode, repeat steps 1 through 3 and select the Do not disturb button again. This will disable the feature.
Maintenance Features
While the document does not explicitly detail "maintenance features" in the traditional sense (e.g., cleaning instructions or hardware upkeep), it does outline system management functionalities that contribute to the device's ongoing usability and performance. These include:
- Settings Menu: The comprehensive Settings menu allows users to manage various aspects of the device, ensuring it operates according to their preferences. This includes Call Options, Personal Info, Device Options, Controls, Network/Admin, and About this device.
- Software Updates: Although not explicitly mentioned as a user-initiated maintenance feature, the "About this device" section in the Settings menu typically provides information about software versions, implying that the device receives updates to maintain functionality and security.
- Troubleshooting Information: The "Support" section in the Settings menu suggests access to resources that can help users troubleshoot issues, which is a form of self-maintenance.
- Network/Admin Settings: These settings allow for configuration of network connectivity, which is crucial for maintaining reliable video calls. Proper network configuration helps ensure optimal performance and reduces call quality issues.
The Sorenson ntouch VP2 is designed with user control in mind, allowing for extensive customization of its communication and display features to suit individual needs and preferences.