Input Settings:
1. Press and Hold Auxiliary Button #1 and #3 until slide switch
#3 LED flashes.
a. Park Kill Polarity Mode
ON = Activate when input connected to +12V
OFF = Activate when input connected to Ground
b. Horn Ring Polarity Mode
ON = Activate when input connected to +12V
OFF = Activate when input connected to Ground
c. Tone Button
ON = ENABLED
OFF = DISABLED
d. Level 3 Tone Activation
ON = Siren Tone is always enabled
OFF = Siren Tone is enabled whenever is in
position #3.
e. Horn Ring Timeout
ON = Horn Ring has 8 second Timeout
OFF = Horn Ring will not Timeout
f. Park Latch
ON = Park Kill Latches, requiring operator reset
OFF = Park Kill resets when connection is
removed
g. Horn Ring Scroll
ON = Horn Ring will scroll through tones
OFF = Horn Ring will cycle between 2 tones
*Hands free mode must be enabled
h. Auxiliary Input
ON = Auxiliary Input activates Air Horn
OFF = Auxiliary Input activates Tone
2. When finished, momentarily depress Radio Rebroadcast button
to exit programming mode.
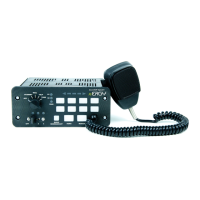
380 SERIES REMOTE SIREN
ETSA380R
ETSA380R 4.12
Programming Modes
Auxiliary Switch Settings:
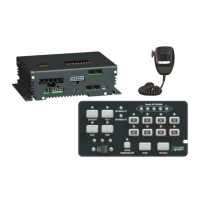
Refer to Figure at bottom center for Button and LED locations
and terminology
1. Press and Hold Auxiliary Button #1 and #8 until slide
switch #1 LED flashes.
2. Press the button which setting is going to be viewed/
changed 1 time.
3. Monitor the 5 LED’s for the arrow controller to determine
setting
- Arrow Controller (Left, Right, Center, OFF)
- Alternate Action Switch (Press ON / Press OFF)
- Momentary Action Switch (ON only when
depressed)
- 8 Second ON Time (ON for 8 seconds when
depressed)
- Level 1 Disable (Turns OFF Level 1 Output)
- Level 2 Disable (Turns OFF Level 2 Output)
- Left Arrow Output
- Right Arrow Output
- Center Arrow Output
- *Warning Bar Output
4. Press and release button until desired mode is selected.
5. Continue steps 2-3 for any other buttons that need to be
programmed.
6. When Finished, momentarily depress Radio Rebroadcast
button to exit programming mode.
LEGEND:
ON
OFF
Slide Switch Settings:
1. Press and Hold Auxiliary Button #1 and #4 until slide switch #2 LED
flashes.
2. Press Auxiliary switch 1, 2, or 3 depending on which configuration for the
slide switch is required.
3. Auxiliary Switch #1 Illuminated (Mode #1)
a. -Slide Switch Position 1
b. -Slide Switch Position 2
c. -Slide Switch Position 3
4. Auxiliary Switch #2 Illuminated (Mode #2)
a. -Slide Switch Position 1
b. -Slide Switch Position 2
c. -Slide Switch Position 3
5. Auxiliary Switch #3 Illuminated (Mode #3)
a. -Slide Switch Position 1
b. -Slide Switch Position 2
c. -Slide Switch Position 3
6. When finished, momentarily depress Radio Rebroadcast button to exit pro-
gramming mode.
Denotes Factory Default Setting
Slide Switch LEDs Arrow Control LEDs
AUXILLARY BUTTON #s
1-2-3-4
5-6-7-8
*Special function which will automatically
turn ON when Arrow function is selected
Default Settings:
Button #1: Arrow Controller
Button #2-7: Alternate Action Switch
Button #8: 8 Second ON Time
 Loading...