1.800.338.7337 / www.soundoffsignal.com
4
4" & 3" MPOWER
®
FASCIA LIGHTS
ENGLISH 0000JL 1123 REV C
4" & 3" MPOWER
®
FASCIA LIGHTS
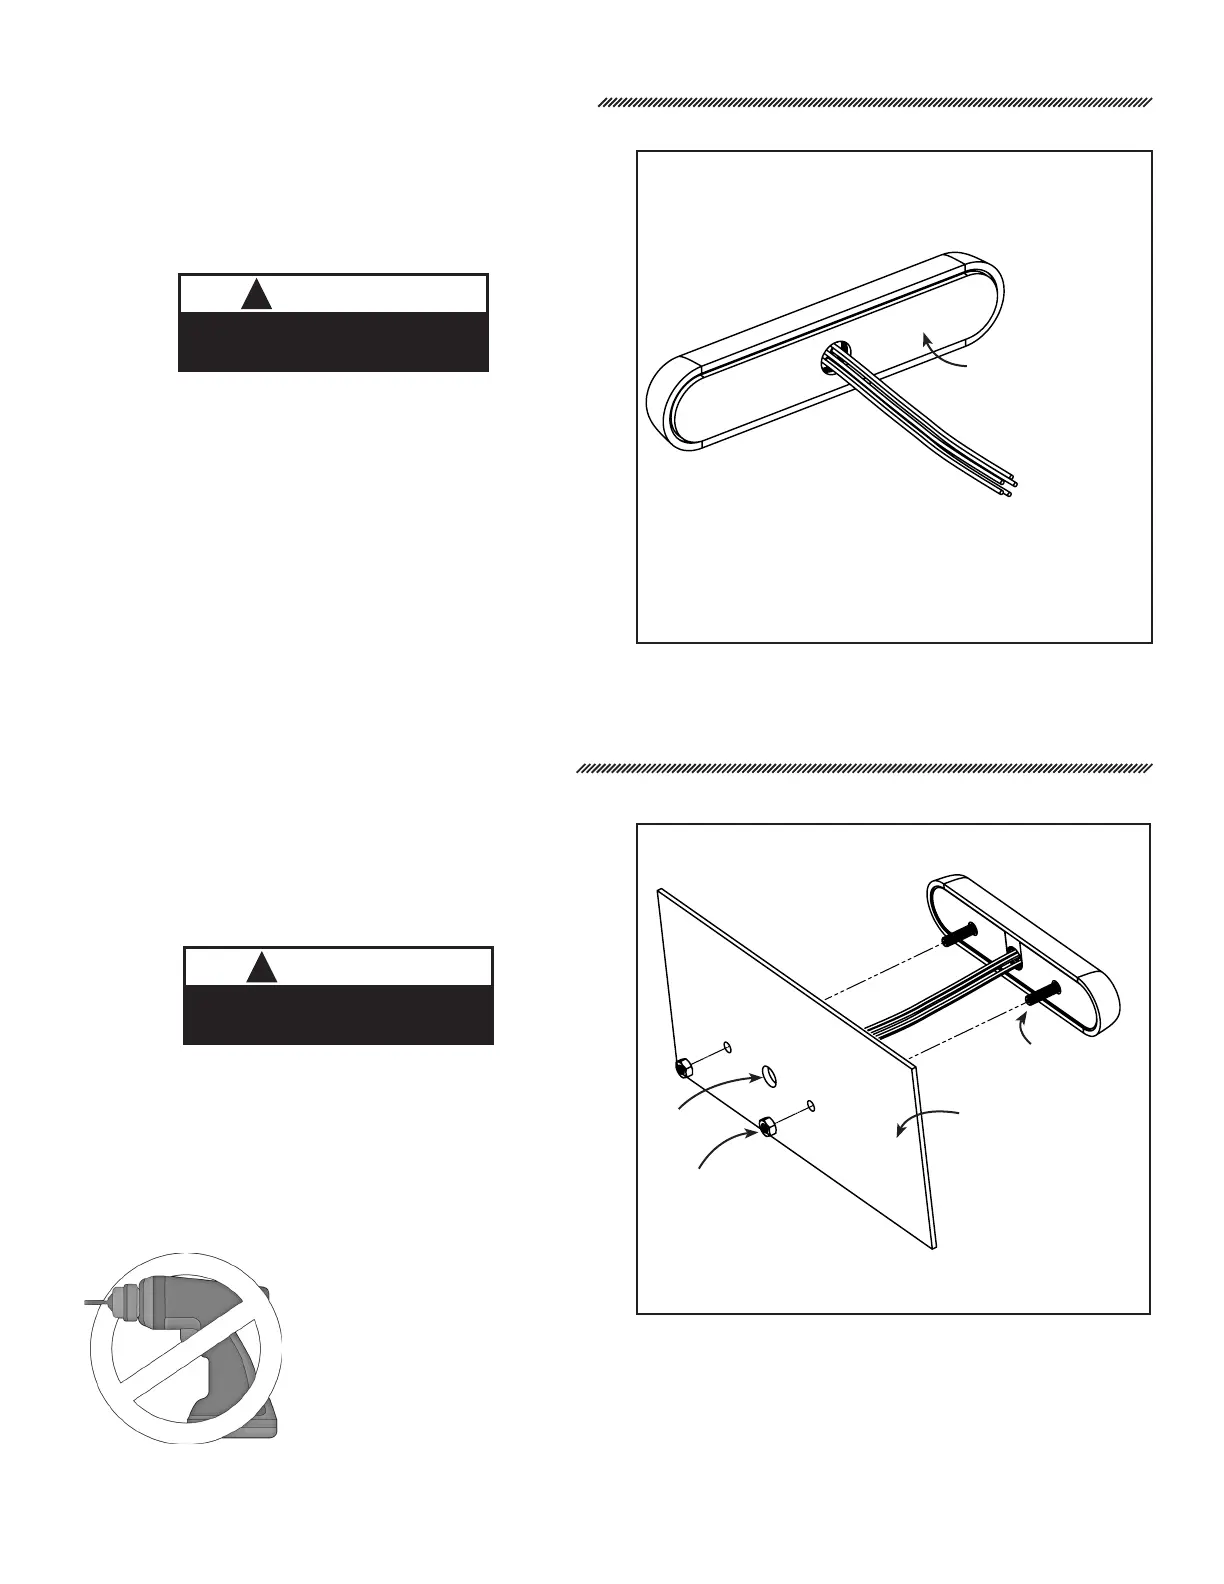
QUICK MOUNT INSTALLATION:
Quick Mount (FIG. 1)
1. Pre-Drill per quick mount pattern indicated on page 7
(4") or page 8 (3"). (Wire hole only).
2. Deburr hole as required.
3. Clean surface with supplied alcohol wipe.
4. Make wire connection and feed wire through the drilled
wire hole.
5. Remove adhesive backer and align light into desired
position. Apply to surface and hold firmly for 30
seconds.
NOTE: APPLY UNIFORM PRESSURE ACROSS FULL FACE
OF LIGHT.
STUD MOUNT INSTALLATION:
Stud Mount (FIG. 2)
1. Pre-Drill per quick mount pattern indicated on page 7
(4") or page 8 (3").
2. Clean the surface, as required.
3. Deburr hole, as required.
4. Make wire connections and feed wire through the drilled
wire hole.
5. Install light, inserting 2 studs into the 2 drilled holes.
6. Install 2 lock nuts onto studs behind mount surface. After
the nut makes full contact with the mounting surface,
hand tighten 1/8th turn (torque no more than 15 in-lbs.)
!
PETROLEUM/SILICONE BASED
LUBRICANTS WILL CAUSE THE
SILICONE LENS TO DISCOLOR.
WARNING
!
PETROLEUM/SILICONE BASED
LUBRICANTS WILL CAUSE THE
SILICONE LENS TO DISCOLOR.
WARNING
FIG. 1FIG. 1
QUICK MOUNT
ADHESIVE SURFACE
WIRE HOLE
THREADED STUD x2
LOCKNUT x2
MOUNT SURFACE
FIG. 2FIG. 2
STUD MOUNT - THREADED (SHOWN)
FORD STUD MOUNT - THREADED (SIMILAR, NOT SHOWN)
DO NOT USE POWER
TOOLS TO TIGHTEN
 Loading...