5
Operation
RANGE Button
When the meter is first turned on, it goes into the Autoranging mode.
This automatically selects the best range for the measurements being made
and is generally the best mode for most applications. For measurement
situations requiring that a range be manually selected, perform the following:
1. Press the RANGE button. The “AUTO” display indicator will turn off and
manual operation turn on.
2. Press the RANGE button to step through the available ranges until you select
the range you want.
3. Press and hold the RANGE button for 2 seconds to exit the Manual Ranging
mode and return to Autoranging.
MODE Button
To select Ω/Diode Test/Continuity/Capacitance, AC/DC Voltage, AC/DC Current
REL Button
The relative function allows you to make continuous measurements relative to
a stored reference value. A reference voltage, current, etc. can be stored and
measurements made in comparison to that value. The displayed value is the
difference between the reference value and the measured value.
(Relative does not work in Frequency or Duty Cycle.)
1. Perform measurements as described in the operating instructions.
2. Press the REL button to store the reading in the display and the "REL"
indicator will appear on the display.
3. The display will now indicate the difference between the stored value
and the measured value.
4. Press the REL button to return to normal operation.
HZ% Button
The HZ% button is used to select frequency or % duty cycle in when in the
frequency, voltage or current function. When in the voltage or current function,
press the HZ% button to switch to frequency. The “Hz” symbol will appear on
the LCD display. Press the Hz% button a second time to switch to duty cycle.
The “%” symbol will appear on the display. Press the Hz% button again to
return to voltage or current readings.
HOLD Button
To freeze the reading on the LCD display, momentarily press the HOLD button.
6
Operation
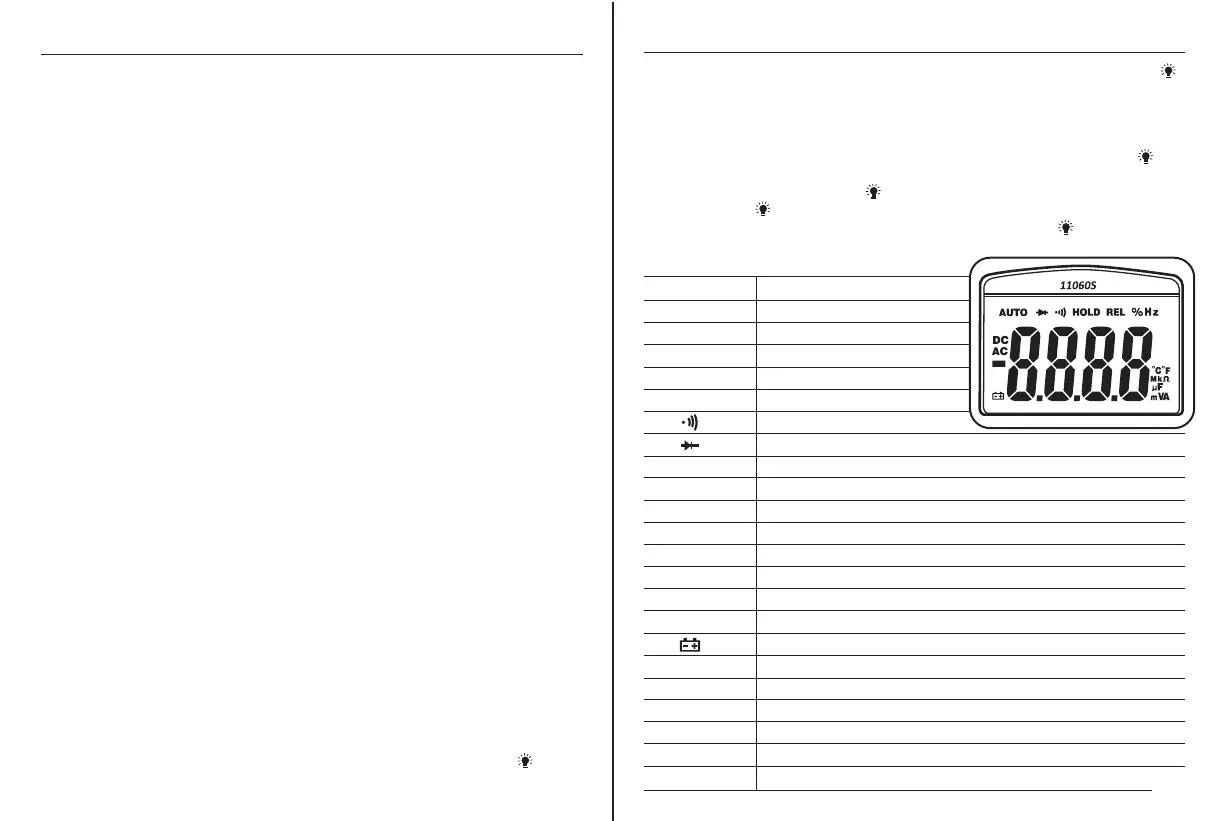
Symbols and Annunciators
The “HOLD” icon will be displayed on the LCD. Momentarily press the HOLD
button again to return to normal operation.
Backlight Button
The backlight illuminates the display when the ambient light is too low to permit
viewing of the displayed readings. To turn on the backlight, press the HOLD
button for > 1 second. The HOLD feature will activate when the backlight is turned
on. Momentarily, press the HOLD to exit HOLD. To turn the backlight off,
press the HOLD button for > 1 second. The HOLD feature will activate
when the backlight is turned off. Momentarily, press the HOLD to exit HOLD.
V Volts
A Amps
AC Alternating current
DC Direct current
- Display Minus sign
Ω Ohms
Continuity
Diode test
F Farads (capacitance)
Hz Hertz (frequency)
% Percent (duty cycle)
ºF Degrees Fahrenheit
ºC Degrees Centigrade
AUTO Autoranging
HOLD Display hold
REL Relative
Low Battery
n nano (10
-9
)
µ micro (10
-6
)
m milli (10
-3
)
k kilo (10
3
)
M mega (10
6
)
OL Overload