8.5H x 5.5”W
SETUP AND OPERATION
11 12
SETUP AND OPERATION
OVERHEAD PULL
1. Always wear gloves and eye protection
when working with pullers.
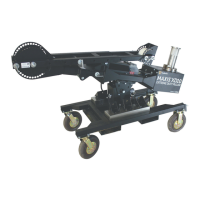
2. Attach proper conduit adaptor (Fig. 23).
Screw in and hand-tighten 5/8”
adaptor bolt (5).
3. Use manual hand crank on elevation control (21) to manually adjust
puller to level horizontal position by turning clockwise or counter
clockwise (Fig. 24). The use of an 18-volt drill on low setting with
7/16 nut driver can be used to raise or lower puller to horizontal
position. (Fig. 25).
Drill should be in low gear with clutch engaged to prevent damage
to gearing and prevent wrist injury.
CAUTION:
Drill should be in low gear with clutch engaged to prevent damage
to gearing and prevent wrist injury.
CAUTION:
(Fig. 23)
(Fig. 24) (Fig. 25)
OVERHEAD PULL cont.
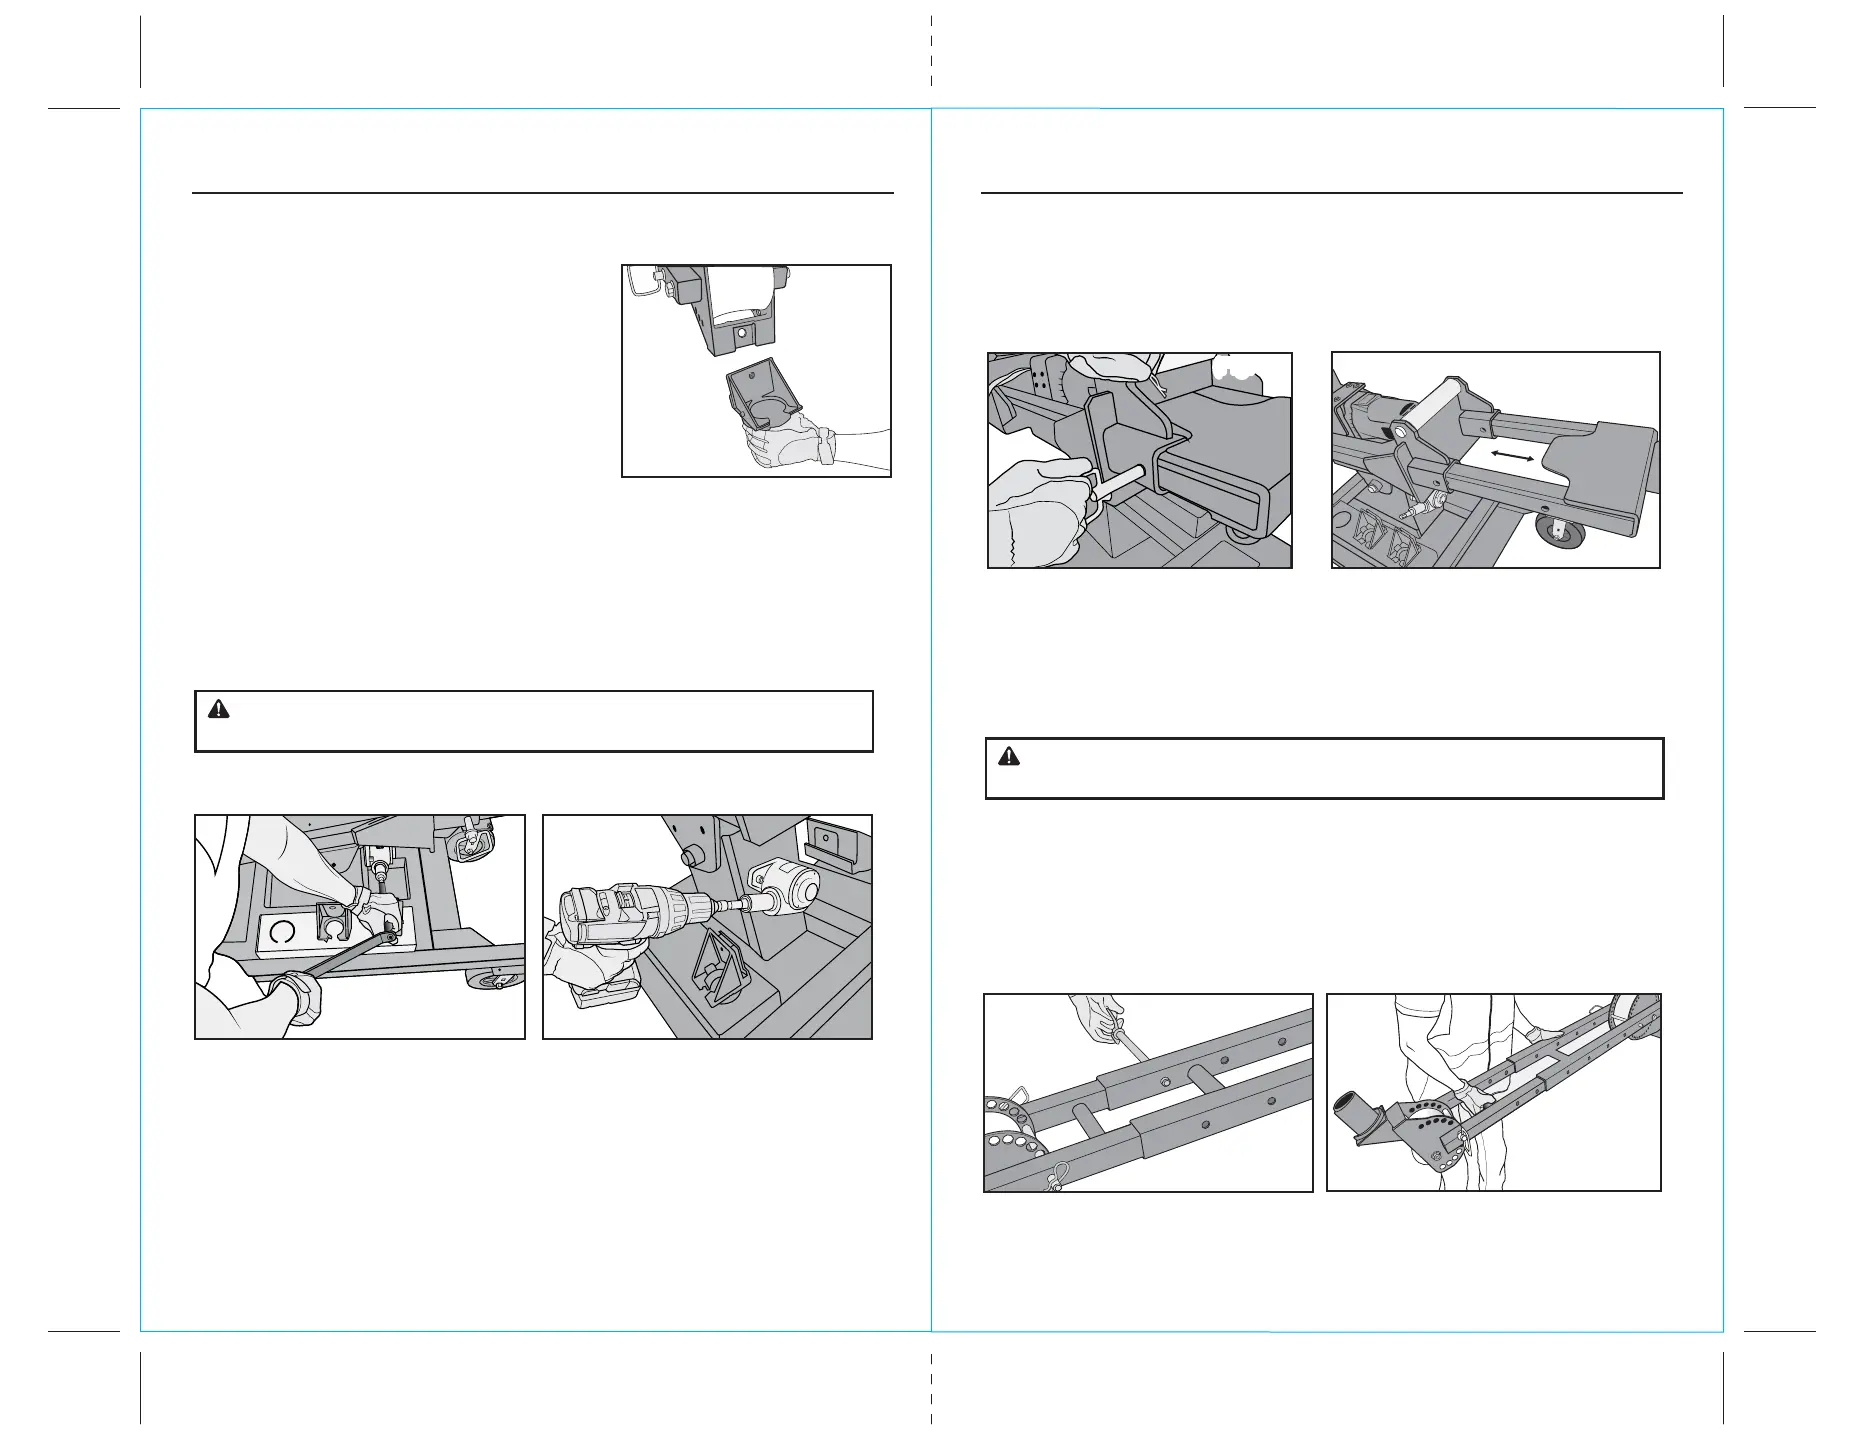
4. Pull Mid-Frame Hitch Pin and pull Mid-Frame (14) out until it is
in its fully extended position. Mid-Frame MUST be in the full
extended position for overhead pulls. (Figs. 26, 27)
5. Use manual hand crank on elevation control (21) to manually adjust
puller to elevated position by turning clockwise. The use of an
18-volt drill on low setting with 7/16 nut driver can be used to raise
puller to elevated position.
6. Remove front extension (9) by pulling pin (10) and sliding extension
outward (Fig. 28) and invert 180 degrees (Fig. 29).
Reinstall with conduit adaptor facing upwards and adjust to proper
length by sliding arm extension inward or outward and save pin to
reinstall at a later step.
(Fig. 27)
(Fig. 28)
(Fig. 29)
(Fig. 26)(Fig. 26)