Seaich Corporation, LLC. All rights reserved. www.seaich.com
|
Spacerails, LLC. www.spacerails.com Page 7
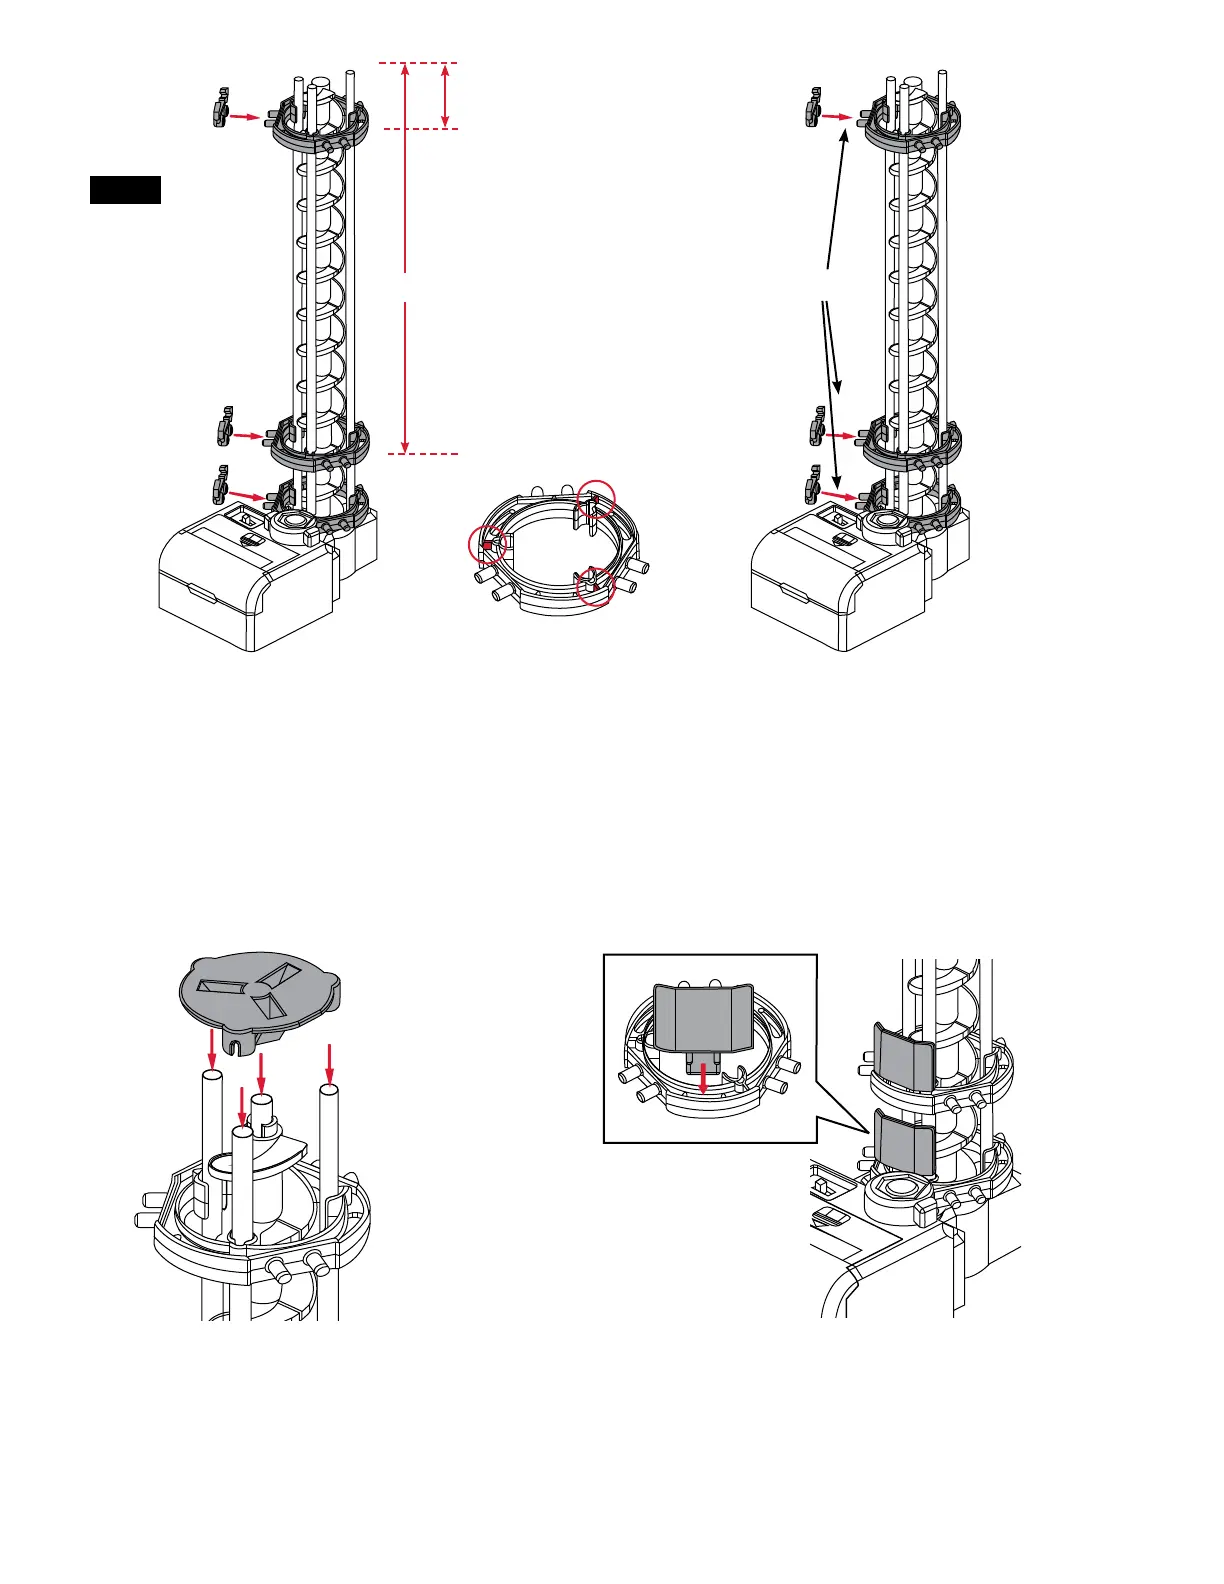
250 mm
35 mm
Step 8: Place the Elevator Cover onto
the top of the elevator assembly.
Step 9: Attach an Elevator Guard to each
of the three Elevator Rings as shown above.
Elevator Guards help prevent the Marble
from falling out because it enters fast.
Step 6: Install Elevator Rings with tabs facing up,
as shown in red above. Slide each ring from the
top down. Place 1 ring ush with the bottom.
Place the other 2 at measurements shown
measuring from top of the shaft to the center
of the ring.
NOTE:
Illustration
of shafts is not
to scale. Refer to
separate tri-fold
insert for a diagram
to scale if you
prefer to lay parts
out on a template.
Tabs facing up
Step 7: Connect one Rail Clip to each
Elevator Ring on the side shown above.
Rail Clips