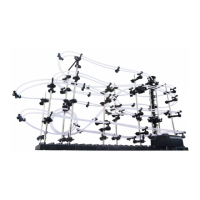
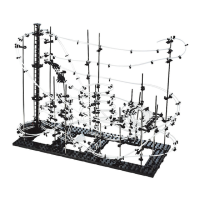
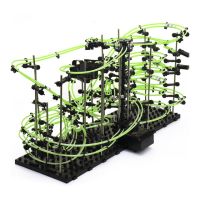
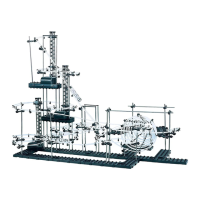
The Spacerails Level 3 is a marble run construction set designed for users 8 years of age and older. It allows for the creation of intricate, multi-level marble tracks with various features, including an elevator, loops, and splitters.
Function Description:
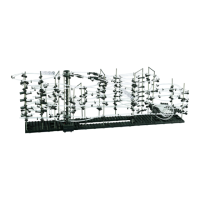
The primary function of the Spacerails Level 3 set is to provide a challenging and engaging construction experience, culminating in a functional marble run. Marbles are lifted by a battery-powered elevator to the top of the structure, where they then travel down a complex network of rails, navigating turns, loops, and splitters before returning to the elevator to repeat the cycle. The set encourages creativity and problem-solving as users design and build their own unique marble runs, or follow the provided instructions for a specific design.
Important Technical Specifications:
- Parts Included: The set includes a comprehensive array of components for construction:
- Arm Components: 40 Arm Clips, 40 Arm Sheaths, 40 Arm Holder A, 40 Arm Holder B, 80 Arm Locks. These are crucial for attaching rails to the support shafts and adjusting their angles.
- Rail Components: 45 Rail Clips, 10 Rail Couplings, 3 Marbles, 16000 mm of Rail, 1 Rail Splitter. The extensive length of rail allows for complex designs, and the Rail Couplings enable joining multiple rail sections.
- Elevator Components: 1 Power Box, 10 Shafts (300mm), 3 Shafts (200mm), 12 Elevator Helix pieces, 3 Elevator Rings, 1 Elevator Cover, 2 Elevator Guards, 1 Power Box Stand, 2 Shaft Connectors (90mm), 2 Shaft Connectors (50mm). The elevator is the core mechanism for continuous marble movement.
- Base Components: 6 Base Blocks, 2 Base Holder A, 2 Base Holder B. These form the stable foundation of the entire structure.
- Power Source: The elevator requires 3 AA batteries (newer models) or 1 C battery (not included).
- Rail Lengths (Pre-cut): The manual specifies initial rail lengths to be cut:
- R-A: 150 cm
- R-B: 270 cm
- R-C: 210 cm
- R-D: 150 cm
- Note: These are initial lengths and will require further trimming during assembly.
- Loop Dimensions: For optimal performance, specific loop dimensions are recommended:
- First loop diameter: 80 mm (1/2 the height of the fall).
- Second loop diameter: 70 mm.
- Shaft Dimensions: The set utilizes 200 mm and 300 mm shafts for vertical support.
Usage Features:
- Modular Construction: The set is built using modular components, allowing for flexible design and easy assembly/disassembly. Base blocks interlock, and shafts are inserted into designated holes.
- Adjustable Arms: Arm Holders and Arm Locks allow for precise adjustment of rail angles, which is critical for maintaining marble speed and flow. Arms can be rotated on shafts to match the incline of the rails.
- Rail Joining and Stability: Rail Couplings are used to connect rail pieces, and Rail Clips can be placed between arms on longer track segments to enhance stability and adjust rail angles.
- Elevator System: A battery-powered corkscrew elevator lifts marbles to the top, ensuring continuous play. Elevator Helix pieces stack to form the corkscrew, and Elevator Rings with Guards guide the marbles.
- Design Flexibility: While a specific Level 3 design is outlined, the modular nature of the components allows users to experiment with custom designs. The manual provides guidance on various track elements like corners, loops, and elevator entry/exit points.
- Choking Hazard Warning: Contains small parts, not for children under 3.
- Age Recommendation: Intended for users 8 years of age and older.
- Sharp Edges Warning: Use caution as the product contains parts with sharp edges.
- Marble Compatibility: Only the included marbles should be inserted into the elevator to avoid potential damage.
Maintenance Features:
- Tools Required (Not Included):
- Wire Cutters or Utility Scissors: Essential for cutting the rail sections to the correct lengths.
- Pen or Marker: For marking cutting points on the rails.
- Ruler (in centimeters): Crucial for accurate measurement of rail lengths and arm placements.
- Troubleshooting Guidance: The manual offers tips for common issues:
- Rail Clip Adjustment: Instructions on how to release and reposition Arm Locks to adjust Rail Clips without damaging parts.
- Smooth Rail Connections: Emphasizes ensuring rails connect smoothly without bumps, twists, or kinks for efficient marble travel.
- Corner Shaping: Advice on shaping corner rails with curves (using Rail Clips if needed) to maintain marble speed.
- Speed Control: Suggests lowering rail tracks via arms to reduce marble speed before corners.
- Elevator Entry/Exit: Detailed instructions on ensuring straight, appropriately angled, and close rail connections to the elevator to prevent marbles from bouncing out or getting stuck.
- Loop Construction: Guidelines for building effective space loops, including recommended diameters and the use of Rail Clips to maintain shape and vertical alignment.
- Broken Arm Clip Replacement: Provides a solution for broken arm clips by using a spare or a Rail Clip as a substitute.
- Part Organization: The manual advises keeping parts together to avoid misplacing them, which is important for managing the numerous small components.