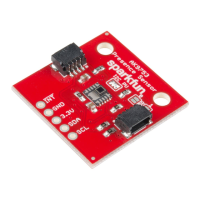
#include <Wire.h>
#include "SparkFun_AK975X_Arduino_Library.h" //Use Library Manager or download here: https://github.com/sparkfun/SparkFun_AK975X
_Arduino_Library
AK975X movementSensor; //Hook object to the library
int ir1, ir2, ir3, ir4, temperature;
void setup()
{
Serial.begin(9600);
Serial.println("AK975X Read Example");
Wire.begin();
//Turn on sensor
if (movementSensor.begin() == false)
{
Serial.println("Device not found. Check wiring.");
while (1);
}
}
void loop()
{
if (movementSensor.available())
{
ir1 = movementSensor.getIR1();
ir2 = movementSensor.getIR2();
ir3 = movementSensor.getIR3();
ir4 = movementSensor.getIR4();
float tempF = movementSensor.getTemperatureF();
movementSensor.refresh(); //Read dummy register after new data is read
//Note: The observable area is shown in the silkscreen.
//If sensor 2 increases first, the human is on the left
Serial.print("1:DWN[");
Serial.print(ir1);
Serial.print("]\t2:LFT[");
Serial.print(ir2);
Serial.print("]\t3:UP[");
Serial.print(ir3);
Serial.print("]\t4:RGH[");
Serial.print(ir4);
Serial.print("]\ttempF[");
Serial.print(tempF);
Serial.print("]\tmillis[");
Serial.print(millis());
Serial.print("]");
Serial.println();
}
delay(1);
}
The output should look similar to the image below, with the values of each channel, temperature, and timestamp of the reading in each row.
Click the image for a closer look.