1 1 Switch Mode
Switch mode is available if you want to avoid using I C altogether. In switch mode, data is written to the interrupt pin. The pin pulls high when the
difference between two outputs (ex. IR1-IR3 or IR2-IR4) is greater than the upper or lower thresholds set in EEPROM by the manufacturer. This mode
is a good solution if your project doesn’t need much accuracy.
Hardware Assembly
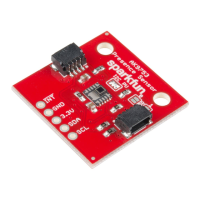
If you haven’t yet assembled your Qwiic Shield, now would be the time to head over to that tutorial. With the shield assembled, Sparkfun’s new Qwiic
environment means that connecting the sensor could not be easier. Just plug one end of the Qwiic cable into the AK9753 Human Presence Sensor, the
other into the Qwiic Shield and you’ll be ready to upload a sketch and start sensing humans. It seems too easy, but thats why we made it this way!
Software
Note: This example assumes you are using the latest version of the Arduino IDE on your desktop. If this is your first time using Arduino, please
review our tutorial on installing the Arduino IDE. If you have not previously installed an Arduino library, please check out our installation guide.
First, you’ll need to download and install the SparkFun AK975X Arduino library, this can be done using the button below or by using the Arduino Library
Manager.
DOWNLOAD THE SPARKFUN AK975X ARDUINO LIBRARY
Before we get started developing a sketch, let’s look at the available functions of the library.
int16_t getIR1(); — Returns the value from channel 1, there are also functions getIR2(); and so on and so forth.
void refresh(); — Reads the dummy register telling the sensor to calculate the next reading.
boolean available(); — Returns true if data is ready.
boolean overrun(); — Returns true if the overrun bit is set.
void softReset(); — Resets the IC via software.
void setMode(uint8_t mode = AK975X_MODE_0); — Set mode of the sensor. Mode 0 is continuous read mode.
void setCutoffFrequency(uint8_t frequency = AK975X_FREQ_8_8HZ); — Sets the filtering frequency. 8Hz is the fastest and least filtered.
float getTemperature(); — Returns sensor temperature in °C.
float getTemperatureF(); — Returns sensor temperature in °F.
void enableDebugging(Stream &debugPort = Serial); — Self explanatory, allows the output various extra messages to help with debugging.
void disableDebugging(); — Disables debugging messages.
uint8_t readRegister(uint8_t location); — Basic read of I C register.
void writeRegister(uint8_t location, uint8_t val); — Writes to an I C register.
uint16_t readRegister16(byte location); — Reads a 16-bit value from an I C register.
Example 1: Basic Serial Readings
The example code shown below will get you started taking basic serial readings from the Human Presence Sensor. This sketch is relatively simple,
pulling values using the getIRX(); functions and printing them over a serial terminal at 9600 baud.
2
2
2
2
 Loading...