2
WARNING! Correct tightening force on fasteners (nuts, bolts, screws) on your bicycle is important for your safety. If too little force is applied, the fastener may not hold
securely. If too much force is applied, the fastener can strip threads, stretch, deform or break. Either way, incorrect tightening force can result in component failure, which
can cause you to lose control and fall.
Where indicated, ensure that each bolt is torqued to specification. After your first ride, and consistently thereafter, recheck the tightness of each bolt to ensure secure
attachment of the components. The following is a summary of torque specifications in this manual:
WARNING! Seat collar torque requirements can vary depending on the specific frame and seat collar used. Exceeding the maximum torque limit can result in damage to the
seatpost and/or frame and also hamper return action, either of which can result in a loss of control of the bicycle.
LOCATION TORQUE (in-lbf) TORQUE (Nm) LOCATION TORQUE (in-lbf) TORQUE (Nm) LOCATION TORQUE (in-lbf) TORQUE (Nm)
Saddle rail clamp
58 6.5
Seat collar
55 6.2
Seal Head
150 17
Cable hanger barrel
10 1.1
Cable Hanger
17 (max) 2.0 (max)
CAUTION: Ensure that all contact surfaces are clean and bolt threads are greased or have a threadlocking compound (refer to the instructions for each bolt) prior to
installation.
GENERAL NOTES ABOUT MAINTENANCE
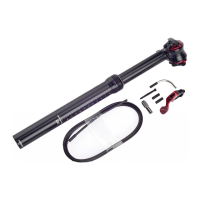
The Command Post 34.9 seatpost is a high performance component. All regular maintenance, troubleshooting, repair and parts replacement must be performed by an Authorized Specialized Retailer. For
general information regarding maintenance, please refer to the Owner’s Manual. In addition, routinely perform a Mechanical Safety Check before each ride, as described in the Owner’s Manual.
• The air chamber, accessed by removing the air valve cap at the top of the seatpost, must be fully discharged before performing any service.
• The upper tube’s smooth anodized finish is critical to the smooth function of the seatpost. Always store the seatpost in the DESCENDER position to prevent damage to the upper tube.
CAUTION: When placing the bike in a repair stand, clamp onto the lower tube of the seatpost, not the upper tube or the seal head.
• Lifespan and the type and frequency of maintenance depends on many factors, such as frequency and type of use, rider weight, riding conditions and/or impacts. Exposure to harsh elements, especially salty air
(such as riding near the ocean or in the winter), can result in galvanic corrosion of components such as bolts, which can accelerate wear and shorten the lifespan. Dirt can also accelerate wear of surfaces.
SERVICE INTERVALS
CAUTION: To ensure proper function of the seatpost and to maintain your warranty eligibility, follow the service schedule below. All internal service must be performed by
an Authorized Specialized Retailer or Specialized Service Center (except cleaning/greasing the hidden portion of the inner shaft, fig.1).
Before every ride:
• Gently clean the exposed portion of the inner tube with a clean rag, then apply a thin coat of grease or lubricant to the inner tube. Avoid pushing contamination into the seal.
• Make sure the lever action is smooth and that the cable is kink-free.
• Make sure the seal head is tight. If it is loose, use a crow’s foot to tighten to 150 in-lbf / 17 Nm.
• Inspect the seatpost for any damage (including but not limited to scratches, nicks, sticking bushings, excess friction, loss of air, proper seatpost function, bent saddle rails) that might require warranty service.
Every 3 months:
• Use a standard shock pump to check and increase/decrease air pressure to between 55 - 70 PSI / 3.8 - 4.8 Bar (recommended). Do not exceed 100 PSI / 6.9 Bar (maximum). It is ok to go lower than 55 PSI if a slower
post return is desired.
• Adjust the barrel adjuster as needed so that there is a small amount of slack in the cable (slightly tap the lever to feel the slack; there should be a small amount at the top of lever throw). If ridden in muddy/rainy
conditions, lubricate the cable and cable housing with a Teflon-based lubricant (e.g., Tri-Flow
®
).
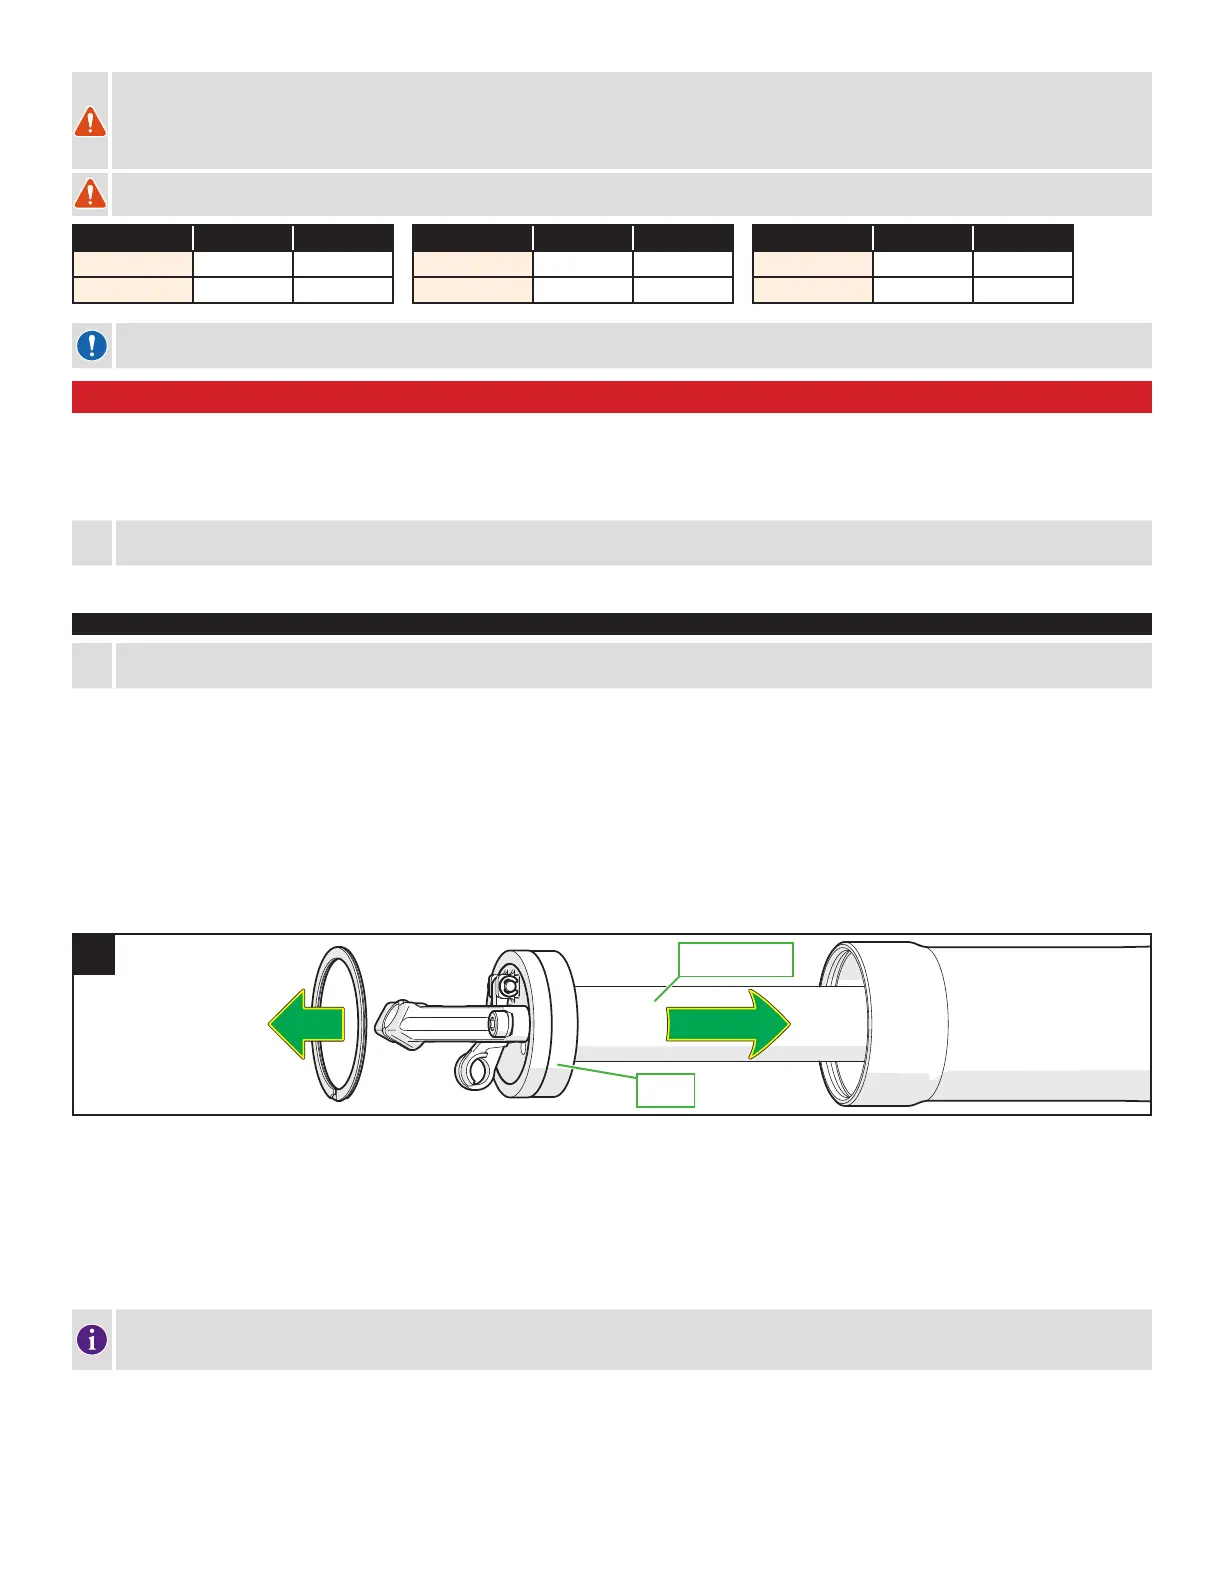
• Fig.1: Remove the circlip from the underside of the seatpost, then slide the outer tube up to the saddle clamp to expose the inner shaft. Clean the base and shaft, then grease the shaft using Slick Honey or similar grease.
CLEAN AND GREASE
THE SHAFT
CLEAN
THE BASE
1
Every 6 months:
• Have your Authorized Specialized Retailer inspect, adjust, clean and grease the seatpost according to Specialized recommendations. If you ride in extreme conditions (fine dust, mud, etc.), a full service involving
replacement of wear items may be required. Wear items include:
• Dirt wipers • Seals • Bushings • Top-out o-rings • Alignment keys • Expansion collet
After 1 year or 100 hours:
• Have your Authorized Specialized Retailer perform a full service of the seatpost.
• Replace the cable and housing, then check functionality.
A small amount of rotational movement in the seatpost is normal and will not cause long-term damage.
If there is excessive rotational play in the bushings or the seatpost is inoperable after a cable/housing change, see your Authorized Specialized Retailer.

 Loading...