6
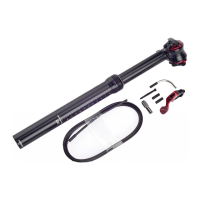
INSTALLING THE SEATPOST
Ensure the seat collar is positioned so the slot faces forward (fig.7).
Insert the seatpost into the seat tube.
The seatpost should slide into the seat tube smoothly and without twisting. There should not be any play between the seatpost and the seat tube. If you experience any fit
and/or torque problems, have the seatpost and frame inspected by your Authorized Specialized Retailer.
To prevent damage to the frame and/or seatpost, it is important to have a minimum amount of seatpost insertion in the seat tube. This minimum insertion must meet the following requirements:
• Specialized-branded frames: The seatpost must be inserted into the frame deep enough so the 100mm minimum insertion/maximum extension (min/max) mark on the seatpost is not visible.
• Non-Specialized-branded frames: Please consult your frame manufacturer for any additional information about required minimum seatpost insertion into the frame. If the seatpost and frame minimum insertion
requirements differ from each other, always use the longer minimum insertion requirement. For example, if the frame requires 120mm of insertion but the seatpost requires 100mm, then the seatpost must be
inserted 120mm.
WARNING! Your seatpost and frame BOTH require a minimum amount of seatpost insertion into the frame in order to maintain structural integrity. If your seatpost is not
inserted deep enough into the seat tube to meet BOTH requirements, it may result in damage to the frame and/or seatpost, which could cause you to lose control and fall.
WARNING! For general instructions regarding the installation of the seatpost, refer to the appropriate section in the Owner’s Manual. Riding with an improperly tightened
seatpost can allow the saddle to turn or move and cause you to lose control and fall.
7
COLLAR SLOT
FORWARD
A
B
C
D
8
E
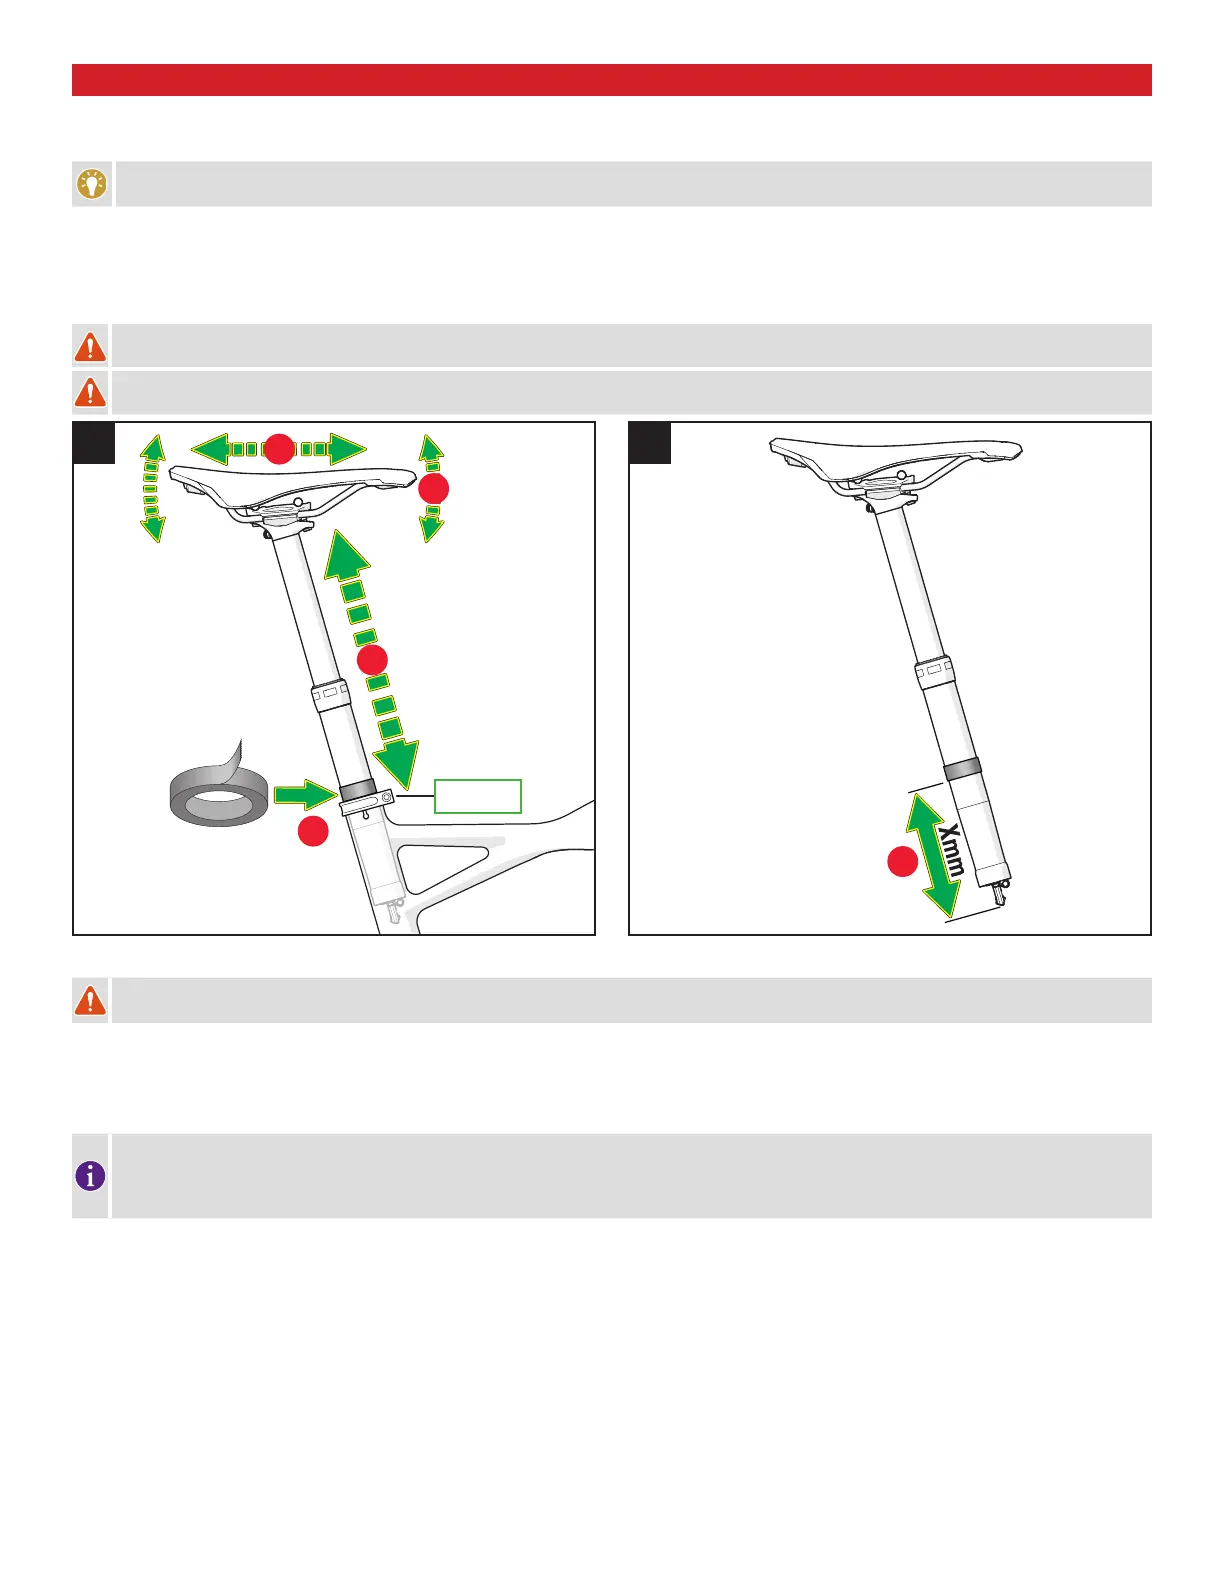
Fig.7: Make sure the seatpost is fully extended. Position the seatpost approximately to the desired height, then tighten the seat collar to
the frame manufacturer’s specification.
WARNING! Seat collar torque requirements may vary depending on the frame. For Specialized frames, torque the seat collar to 55 in-lbf / 6.2 Nm. For non-Specialized-branded
frames, torque the seat collar to the frame manufacturer’s specification. Do not exceed 90 in-lbf / 10.2 Nm, because it can cause damage to the seatpost and/or frame.
Fig.7: Adjust the saddle to the desired angle (A) and fore-aft (B) position for the extended Power setting, then torque the saddle rail clamp bolt to 58 in-lbf / 6.5 Nm.
Fig.7:
Once the saddle angle and fore-aft are in the desired position, adjust the height of the saddle (C) if necessary, then re-torque the seat collar.
Fig.7: Mark the saddle height by applying a piece of tape to the seatpost (D), directly above the seat collar, or take note of the graduation line on the seatpost.
Fig.8: Remove the seatpost and measure the distance (E) from the lower edge of the tape to the bottom of the seatpost cable housing assembly (Xmm).
When installed in a carbon frame, do not apply grease to the seat tube/seatpost interface,
and make sure the surface area is clean before install. Grease will reduce the friction
that is critical to a proper clamping of the seatpost.
To increase friction, carbon assembly compound (or carbon paste) can be used between the seatpost and seat tube. Before your first ride, test the system to make sure the
seatpost does not slip down in the frame.