8
5
Fig.5: Grease, then install the upper (small) and lower (large) headset
bearings in the frame’s headset cups.
Use of a marine grade grease can help reduce bearing
corrosion.
6
A
B
C
D
E
REVERSE
THREAD
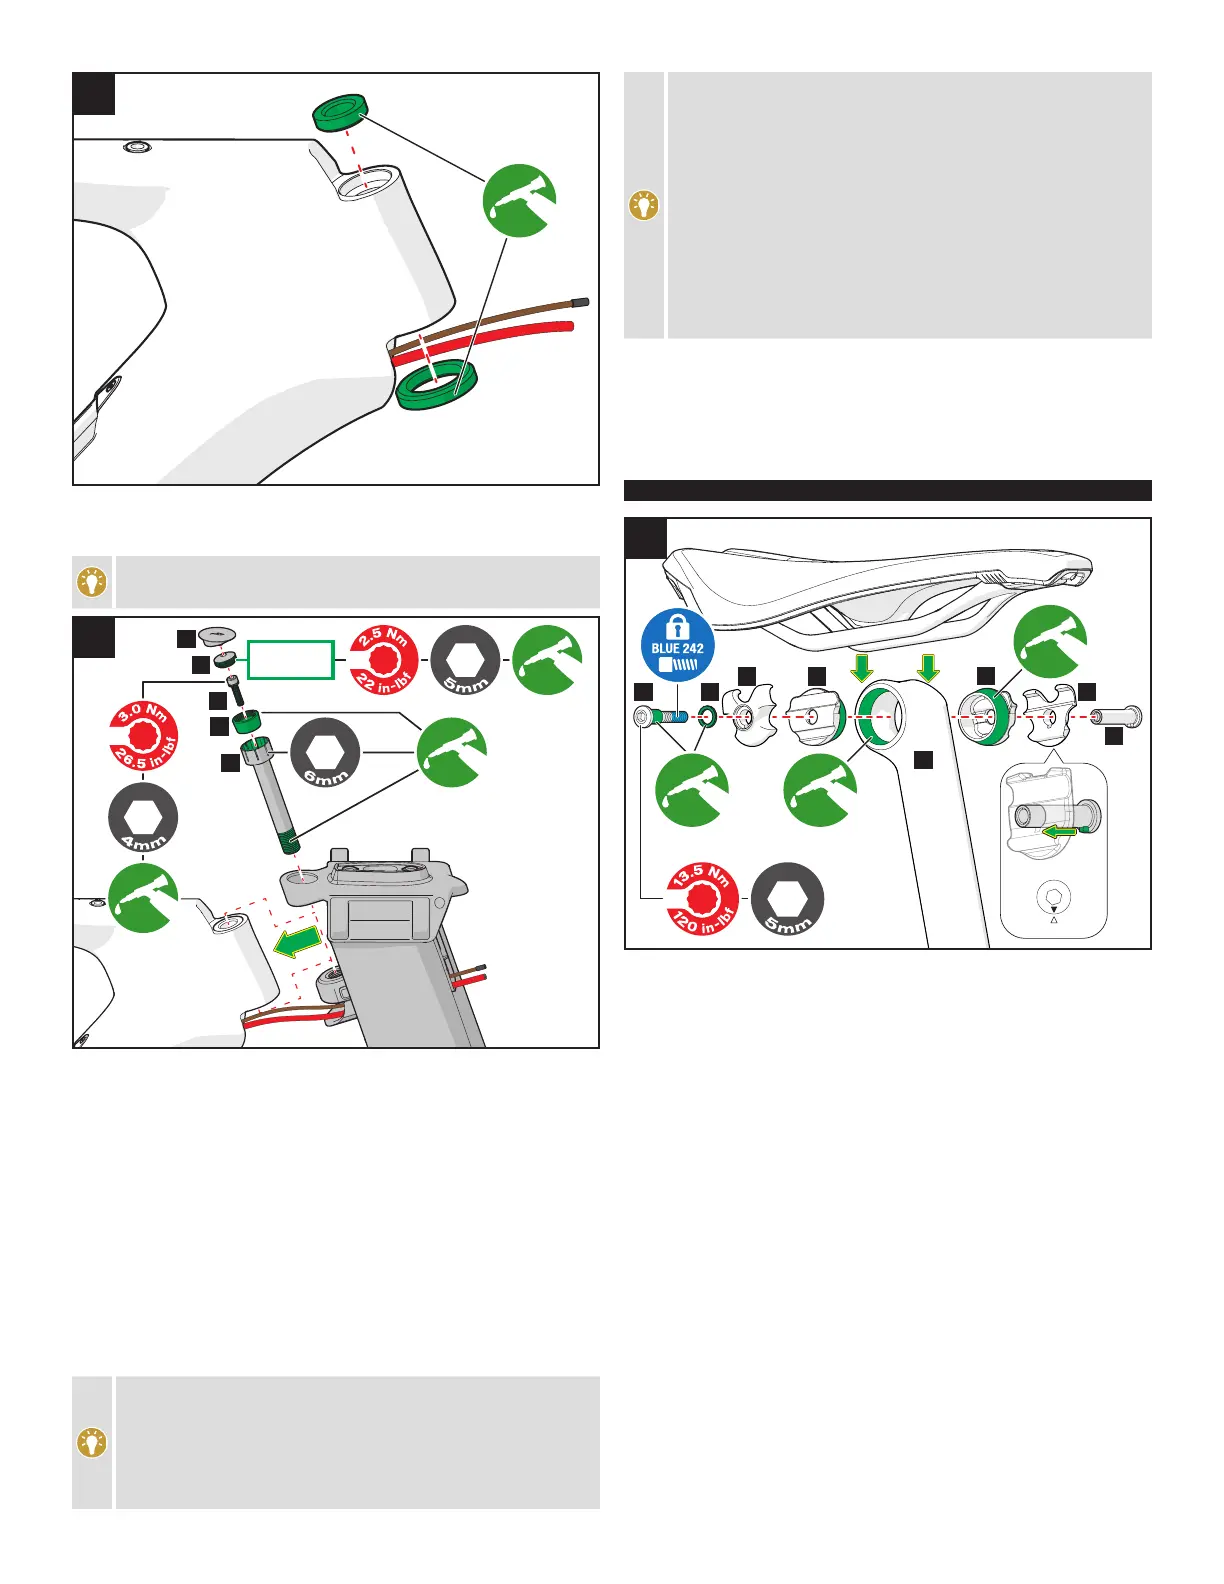
Fig.6: Install the fork on the frame.
• Place the fork’s upper and lower crown over the head tube, engaging
the lower bearing on the lower crown. While installing the fork, guide
the Di2 wire and rear brake hose between the lower fork bridge and
the nosecone bracket.
• Grease the head and threads of the steerer shaft (A). Install the
steerer shaft through the upper crown and headset bearings, then
thread into the lower crown.
• Once the headset is adjusted, grease then install the headset wedge
assembly (wedge (B), wedge bolt and spacer (C), wedge cap (D)).
Torque the wedge bolt to 26.5 in-lbf / 3.0 Nm. The wedge locks the
steerer shaft in place.
To perform future adjustments of the headset, loosen the
wedge bolt (C) and remove the wedge assembly from the
steerer shaft. Using a 6mm Allen key, adjust the steerer shaft
position, then re-install the wedge assembly as described in
Fig.6. Ensure that the steerer shaft doesn’t turn and tighten the
headset while tightening the wedge bolt.
There will be significant movement between the fork and head
tube until the steerer shaft is installed and adjusted.
Headset bearing adjustment is performed the same way as
a standard headset, gradually tightening the headset while
rocking the headset back and forth until the movement is
gone, and rotation is smooth and free.
The headset adjustment and steerer shaft wedge installation can
be done later in the assembly, once the front brake is installed.
The wedge cap has a reverse thread, and is for steerer shaft
extraction to remove the fork. It is not to adjust the headset
preload.
• Fig.6: Install the rubber headset plug (E). Align the plug so the shaft
of the plug aligns with the hole and the top is aligned with the crown.
Once properly aligned, the “S” logo will be oriented so as to be
readable when sitting on the bike. Press the plug in so the post at the
base of the plug goes into the headset wedge cap.
SEATPOST / SADDLE ASSEMBLY
ALIGN ARROWS
TAB INTO GROOVE
A B
C
C
D
D
E
F
7
Fig.7: Install the saddle on the saddle clamp.
• Grease the inboard rail clamp contact surfaces (D), then install them in
the seatpost head assembly (F).
• Position the saddle rails on the inboard rail clamps.
• Position the outboard rail clamps (C) over the saddle rails. Use
7x7mm clamps for alloy rails or 7x9mm clamps for carbon rails.
• Insert the female bolt (E) through one of the outboard rail clamps and
key the bolt tab in the outboard rail clamp groove.
• Apply loctite to the bolt threads (A) and grease to the bolt head and
washer (B), then place the washer on the male bolt.
• Install the bolt in the opposing outboard rail clamp, then thread it into
the female bolt.

 Loading...