EasyManua.ls Logo

Sperry instruments DSA600TRMS User Manual

Sperry instruments DSA600TRMS
9 pages
To Next Page IconTo Next Page
Page #1 background imageLoading...
Page #1 background image
Figure 1
OPERATING INSTRUCTIONS
DIGITAL CLAMP METER
Model DSA600TRMS
IMPORTANT: RECEIVING INSTRUCTIONS
Visually inspect all components for shipping damage. If you find damage,
notify the carrier at once.
Shipping damage is NOT covered by warranty. The carrier is responsible
for all repair or replacement costs resulting from damage in shipment.
Clamp Jaw
DSA600TRMS
OFF
NCV
°C°F
COM
CATIII
600V
- AUTO-POWER OFF Press 2 Sec
PEAK
HOLD
INR
REL
HZ%
SEL
HOLD
!
Ω
V/Ω/Hz
V/Ω/Hz
}
}
}
}
600A
60A
V
Hz%
Light
Trigger
Function Selection (SEL)
LCD Screen
COM Terminal Input Terminal
Peak Button (PEAK HOLD)
HOLD / Backlight /
Clamp Light
Dial
Frequency / Duty Cycle (Hz/%)
Inrush Current /
Relative Measurement (INR/REL)
1
Figure 2
Data Hold AC Alternating Current Low Battery NCV Non-contact Voltage Detection
-
Negative Value Diode Check nF, µF, mF
Nanofarad, Microfarad,
Millifarad (Capacitance)
°F Degrees Fahrenheit
REL
Relative Measurement Audible Continuity Check mV, V Millivolt, Volt °C Degrees Celsius
AUTO
Auto Ranging P MAX Peak maximum value A Ampere (Current) % Duty Cycle
INRUSH
Inrush Current Measurement P MIN Peak minimum value Ω, kΩ, MΩ
Ohm, Kiloohm, Megaohm
(Resistance)
OL Overload
DC
Direct Current
P MAX-
MIN
Peak to Peak value Hz, kHz, MHz
Hertz, Kilohertz,
Megahertz (Frequency)
EF Electric Field Detection
Question and Answer IconNeed help?

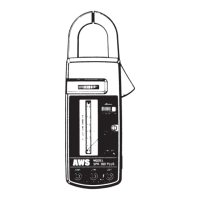
Do you have a question about the Sperry instruments DSA600TRMS and is the answer not in the manual?
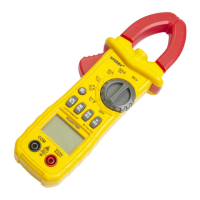
Sperry instruments DSA600TRMS Specifications

General IconGeneral
CategoryMeasuring Instruments
ModelDSA600TRMS
TypeDigital Multimeter
AC Voltage Range600V
DC Voltage Range600V
AC Current Range10A
DC Current Range10A
Resistance Range40 MΩ
ContinuityYes
Diode TestYes
DisplayLCD
True RMSYes
Safety RatingCAT III 600V
Battery Type9V
Low Battery IndicatorYes
Data HoldYes
Auto Power OffYes
Current Range10 A AC/DC
Frequency Range10 MHz

Summary

Receiving Instructions

Features and Measurement Functions

Safety Warnings

DANGER

Conditions and actions that are likely to cause serious or fatal injury.

WARNING

Conditions and actions that can cause serious or fatal injury.

CAUTION

Conditions and actions that can cause injury or instrument damage.

Measurement Categories

Defines safety standards for electrical environments (CAT I-IV).

Specifications

Measuring Range & Accuracy

Details the measuring ranges and accuracy for various electrical parameters.

General Specification

Accessories

Lists the items included with the digital clamp meter.

Preparation for Measurement

Check the Condition of the Meter

Inspect the meter housing and terminals for visible signs of damage before use.

Check the Battery Voltage

Verify the low battery symbol is not displayed on the LCD.

Check Test Lead Condition, Continuity and Rating

Examine test leads for damage and ensure they meet CAT rating requirements.

Checking the Switch Setting & Operation

Confirm dial position matches measurement function and Data Hold is disabled.

Measurement Procedures

Temperature Measurement

Instructions for measuring temperature using the K-type thermocouple.

Resistance / Continuity / Diode / Capacitance

Steps for performing resistance, continuity, diode, and capacitance measurements.

DC Voltage Measurement

Procedure for measuring DC voltage using the meter.

AC Voltage Measurement

Procedure for measuring AC voltage using the meter.

AC Current Measurement

Steps for measuring AC current using the clamp jaws.

Frequency Measurement

How to measure frequency using the meter's AC voltage or current functions.

Duty Cycle Measurement

Procedure for measuring the duty cycle of a signal.

Inrush Current Measurement

Steps to measure inrush current for motor start-up.

Relative Measurement

How to use the meter in relative value measurement mode.

Peak Hold Measurement

Instructions for capturing and holding the highest and lowest measured values.

Other Features

Clamp Jaw Light / Backlit LCD Screen

How to activate and use the clamp jaw light and backlit display.

Auto Shut Off / Auto Shut Off Disable

Information on the meter's auto power off feature and how to disable it.

Low Battery Indicator

Explanation of the low battery indicator and when to replace batteries.

Data Hold

How to use the data hold feature to retain measured values.

Polarity Indication

How the meter indicates negative values.

Overload Indication

How the meter indicates when a measuring range is exceeded.

Non-contact Voltage Detection

Battery Replacement

Maintenance

Limited Lifetime Warranty

Related product manuals