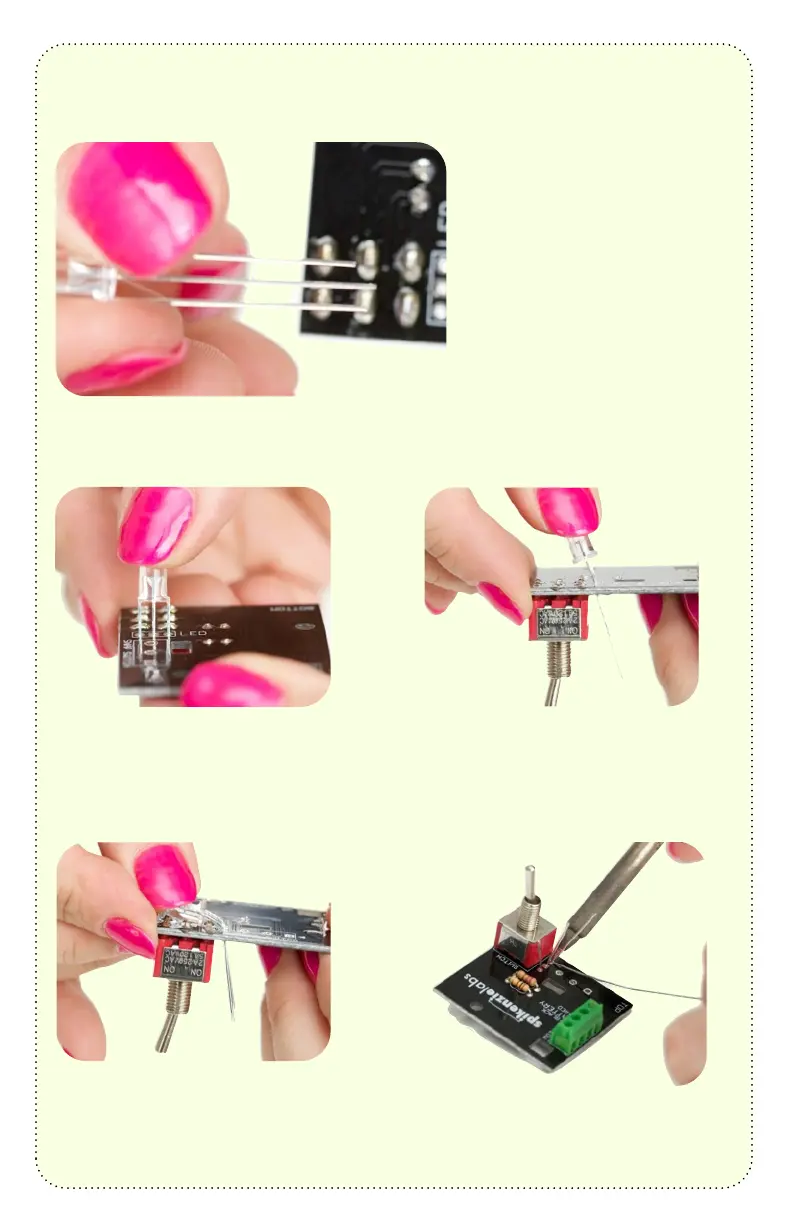
Aligning and soldering the LED:
1- Notice the different lengths of
the legs on the LED. Leg #2 is
the longest. #1 is the second
longest, and #3 is the shortest.
The LED gets installed with leg
#1 closest to the edge of the
PCB.
Important to note:
The LED gets installed on the
bottom side of the PCB.
1
2
3
2- Slide the 3 LED legs down
through the holes in the PCB.
3- Leaving about
.25” of leg bend the LED so that it
can bend like the photo in step #4.
4- Bend the led like in this photo,
and hold it in place.
5- Solder the three legs of the LED,
and snip the excess.