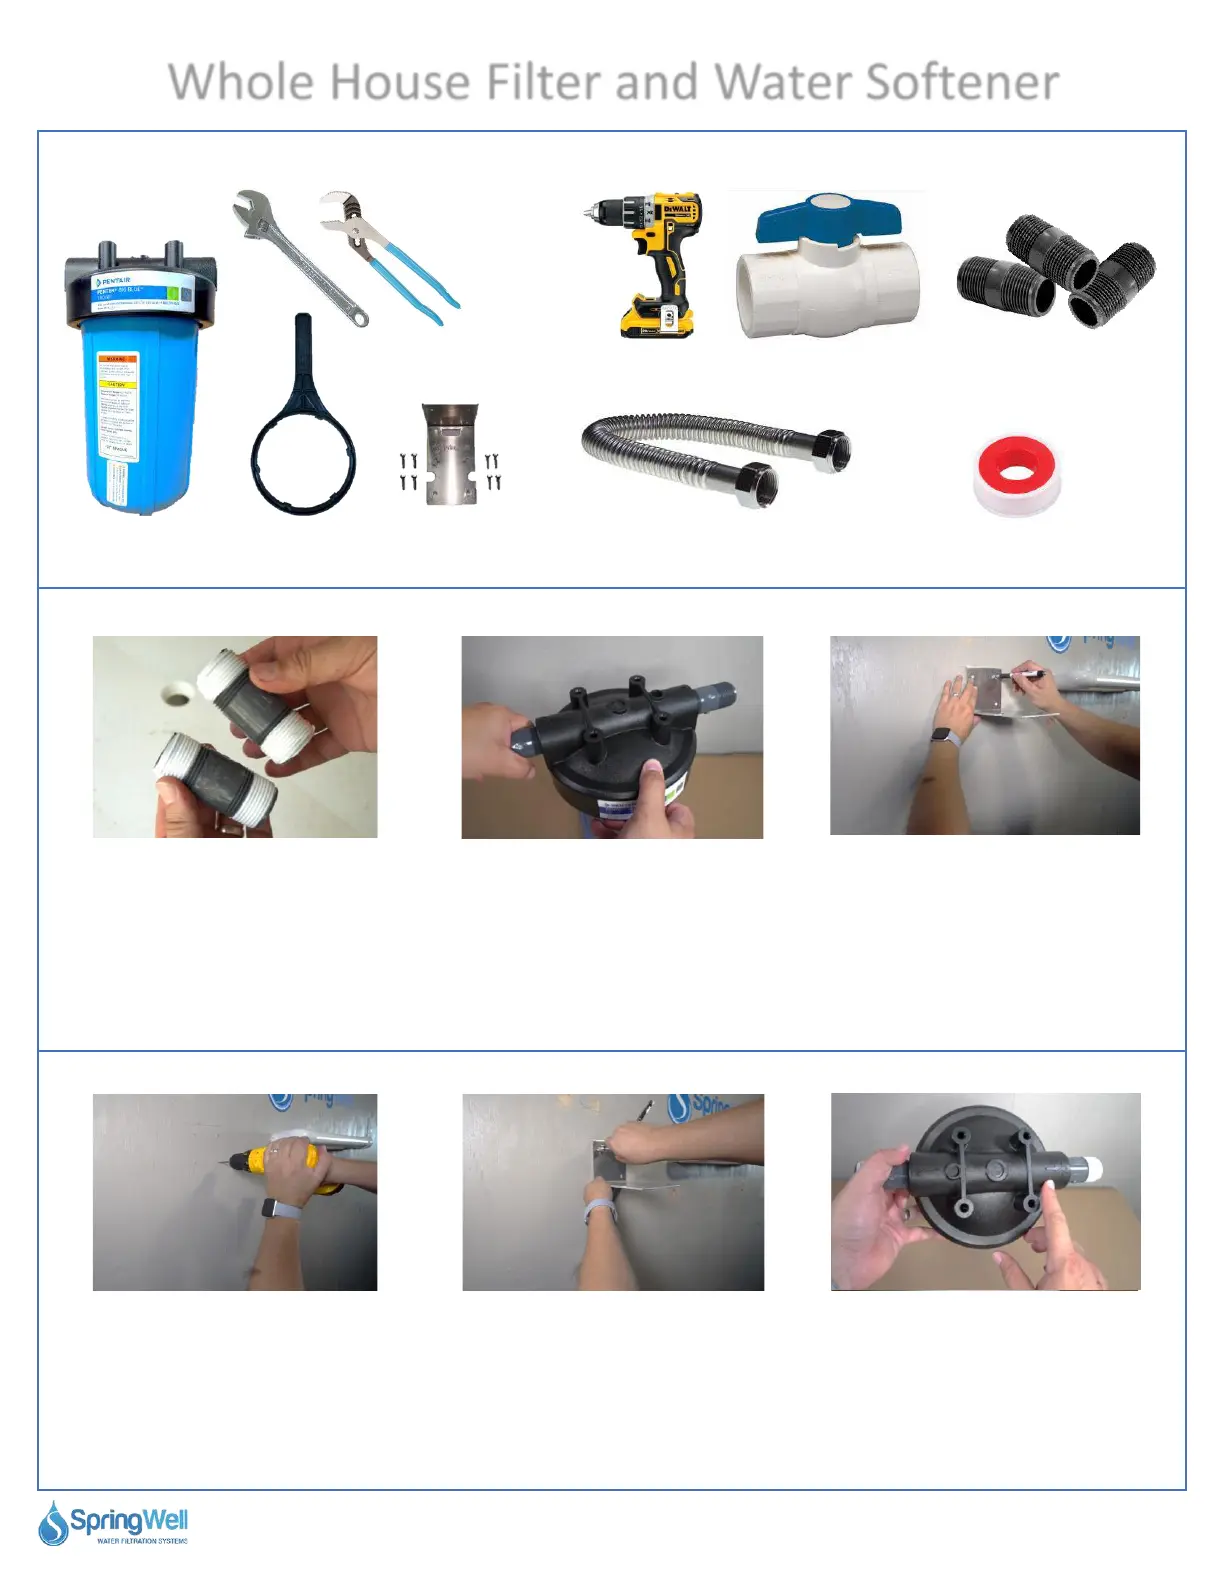
Installing the Pre-Filter
This step will require the materials listed below
Prepped Pre-Filter
Housing
27) Note: Plumbers tape will
need to be applied to all PVC
threads during the installation.
28) Install a PVC nipple onto
each the inlet and outlet of the
pre-filter housing. Fully tighten
using pliers avoiding damage to
the threads on the PVC nipples.
29) Identify the optimal area to mount
the pre-filter. Ensure that it aligns to
allow a connection from the pre-plumb
into the inlet of the pre-filter. Mark
your holes for pre-drilling.
30) Use a 3/16” drill bit to pre-
drill the holes for the pre-filter
mounting bracket.
31) Use 4 of the provided bolts
and washers to secure the bracket
to the wall using a 1/2” socket.
Spanner
Wrench
Mounting
Bracket
1-inch (3-inch long)
PVC Nipples (x3)*
Plumbers Tape
1-inch (24-inch Long) Corrugated
Water Connectors (x1)
1-Inch PVC Shut Off
Valve*
Wrench and Pliers
32) Before mounting the pre-
filter, identify the inlet and
outlet by using the markings on
top. Be sure to orient it so the
incoming water can be
connected to the inlet.
Drill with 3/16” drill bit
Questions? Call (800)-589-5592 9
Whole House Filter and Water Softener