EasyManua.ls Logo

Springfield 90173-1 User Manual

Springfield 90173-1
3 pages
To Next Page IconTo Next Page
Page #1 background imageLoading...
Page #1 background image
INSTRUCTION MANUAL
DUAL VIEW INDOOR/OUTDOOR THERMOMETER
MODEL #90173-1
FEATURES
1.5”H x 1.5”W LCD window with 2 readouts
12 hour clock
Displays temperature in °F or °C
Indoor temperature range of 14˚F to 122˚F (-10˚C to 50˚C)
Outdoor temperature range of -58˚F to 158˚F (-50˚C to 70˚C)
Temperature tolerance +/-2°F (+/-1.1°C)
Min./Max. temperature memory recall function
Detachable, weatherproof sensor probe with 10 ft. long cable
Tabletop or wall-mountable
Requires one AAA alkaline battery (included)
BATTERY INSTALLATION
1. The battery door is located in the back of the unit. To open remove the screw and open the door.
2. Insert (2) LR44 batteries according to the polarity markings located on the inside of the battery
compartment.
3. Place the battery door back on and insert screw to secure door.
LCD READOUTS
This unit scrolls through three different modes which are activated by pressing the “CLOCK, TEMP
IN/OUT” button.
Mode 1 Mode 2 Mode 3
Upper Display Indoor temperature Clock Clock
------------------- ------------------------- -------------------- ------------------
Lower Display Outdoor temperature Indoor Temperature Outdoor Temperature
NOTE: Probe must be plugged into the jack or LL.L will appear where the outdoor temperature is to be
displayed.
OPERATION
Setting the Clock:
Select the modes with clock display. The buttons to set the clock are located on the back of the unit.
Press the “HR” button to set the hour and the “MIN” button to set the minutes.
Question and Answer IconNeed help?

Do you have a question about the Springfield 90173-1 and is the answer not in the manual?

Springfield 90173-1 Specifications

General IconGeneral
BrandSpringfield
Model90173-1
CategoryThermometer
LanguageEnglish

Summary

Features Overview

LCD Display and Clock

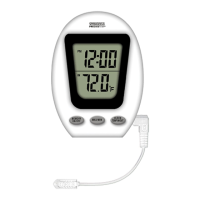
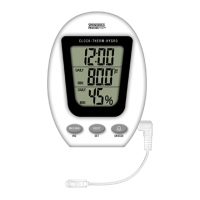
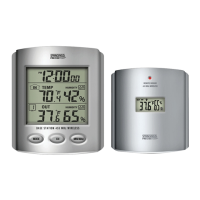
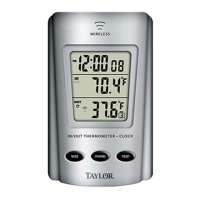
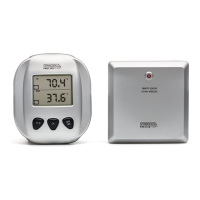
Details about the 1.5"x1.5" LCD, 12-hour clock, and temperature display in °F or °C.

Temperature Specifications

Indoor and outdoor temperature ranges, and tolerance levels for the thermometer.

Additional Features

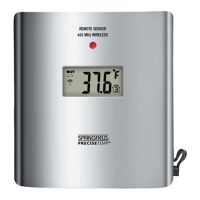
Min/Max memory, detachable weatherproof probe, wall-mountable design, and battery requirement.

Battery Installation Guide

Open Battery Compartment

Locate and open the battery door on the unit by removing the screw.

Insert Batteries Correctly

Insert (2) LR44 batteries according to polarity markings inside the compartment.

Secure Battery Door

Replace the battery door and secure it with the screw.

LCD Display Readouts and Operation

Display Modes Overview

Describes the three different display modes (Mode 1, Mode 2, Mode 3) for indoor/outdoor temperature and clock.

Setting the Clock

Instructions on how to set the hour and minutes for the clock using HR and MIN buttons.

Temperature Settings and Memory

Temperature Unit Selection

Choose between Celsius (°C) or Fahrenheit (°F) using the switch on the back of the unit.

Temperature Range Indicators

Explains HH.H (above range) and LL.L (below range) indicators, including outdoor probe status.

Memory Function Operation

How to activate, view Max/Min readings, and exit the memory function.

Product Installation Guide

Unit Placement Recommendations

Place unit near a window, away from direct sunlight/heat sources for accurate readings. Can stand or wall-mount.

Wall Mounting Instructions

Steps for mounting the unit on a wall using a screw and slot.

Outdoor Sensor Mounting

Instructions for mounting the outdoor sensor probe for accurate readings, including optimal placement.

Warranty and Safety Information

Battery Safety Precautions

Warnings regarding battery handling, choking hazards, and disposal in fire.

One Year Limited Warranty

Details warranty coverage, exclusions, and procedure for service or replacement.

Contact and Legal Information

Contact details, website, copyright, and trademark information.

Related product manuals