10 Springfree™ Trampoline Model SF90E Trampoline and Enclosure Assembly, Installation, Care, Maintenance and Use Instructions Version 6.4
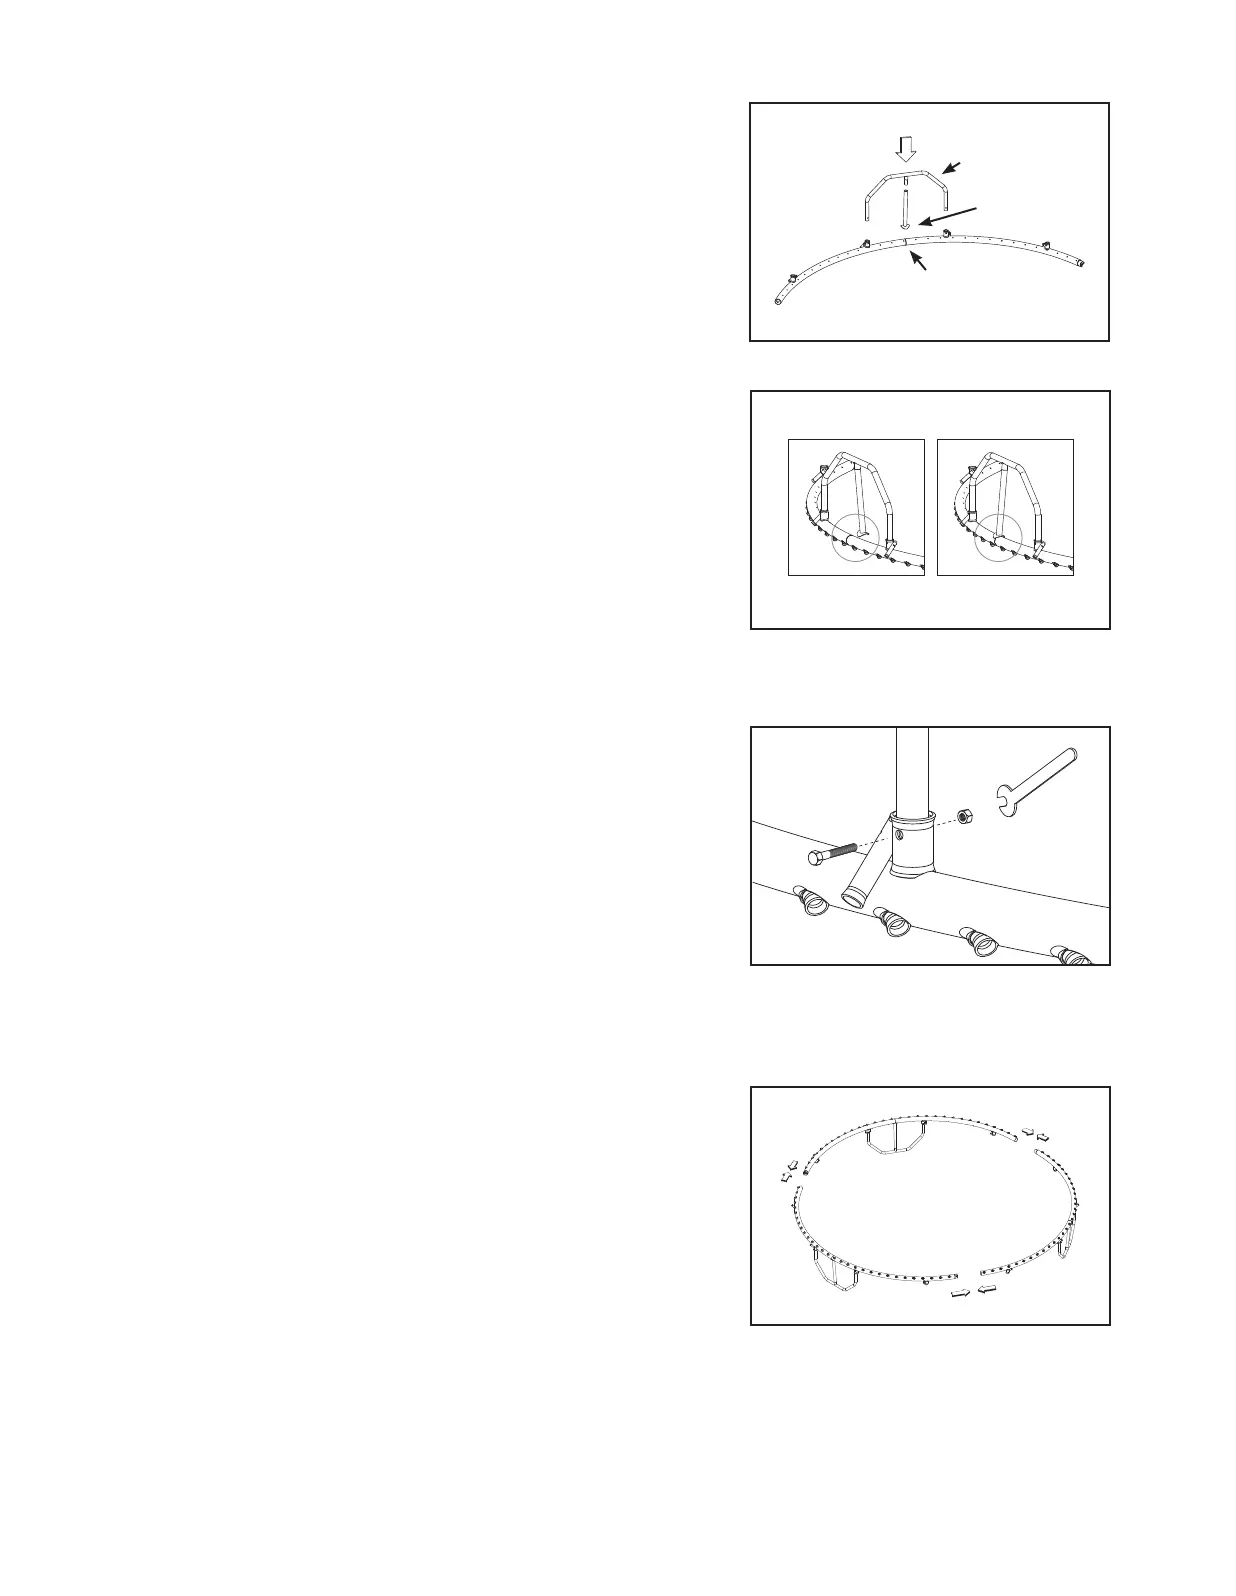
Step 3: Fastening the legs to
the frame
Fasten the legs to the frame with the bolts and
nuts provided. Do not over-tighten.
If the holes do not line up, check that the leg
has been inserted properly (refer to Figure 2-B)
or lift the leg slightly.
The nut should be towards the mat centre;
the bolt head should be towards the outside.
Figure 3: Fastening the legs to the frame
Figure 2-A: Inserting a leg piece and vertical support
Step 2: Attaching legs to
frame sections
Locate the joint between two connected frame
sections.
Insert a vertical leg support into a leg piece
(Figure 2-A). Next, insert the leg with the
support into the sockets on the frame.
Note that the vertical leg support is o to
one side. Make sure the saddle of the vertical
leg support meets at the joint in the frame. This
will ensure the middle support leg saddle is
positioned correctly. If it does not, remove the
leg and turn it around (Figure 2-B).
¸
˚
Figure 2-B: The wrong orientation (left) and the right
orientation (right) for the vertical leg support
leg
nut
vertical leg support
bolt
wrench
Step 4: Connecting frame pairs
Repeat Step 1 through Step 3 for the remaining
frame sections.
Turn the three groups over, and then connect
them together to complete the frame.
Figure 4: Connecting the frame sections
joint