11Springfree™ Trampoline Model SF90E Trampoline and Enclosure Assembly, Installation, Care, Maintenance and Use Instructions Version 6.4
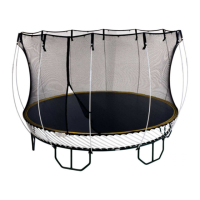
Step 6: Fastening the nal legs
Fasten the remaining legs to the frame with the
bolts and nuts provided. Do not over-tighten.
Check that there is a bolt properly installed in
each of the twelve leg uprights.
Again, the nut should be towards the mat
centre; the bolt head should be towards the
outside.
It is essential for the stability of the frame that
there is a bolt in each leg upright.
Figure 5: Attaching the nal legs and vertical supports
Figure 6: Fastening the last three legs
Step 5: Attaching the nal legs
Install a leg unit with a vertical support into
each of the three remaining socket pairs.
As before make sure the saddle of each verti-
cal leg support meets at the joint in the frame. If
not, remove the leg and turn it around.
nut
bolt
wrench
Note:
The frame will
not be rigid until the
mat is installed.
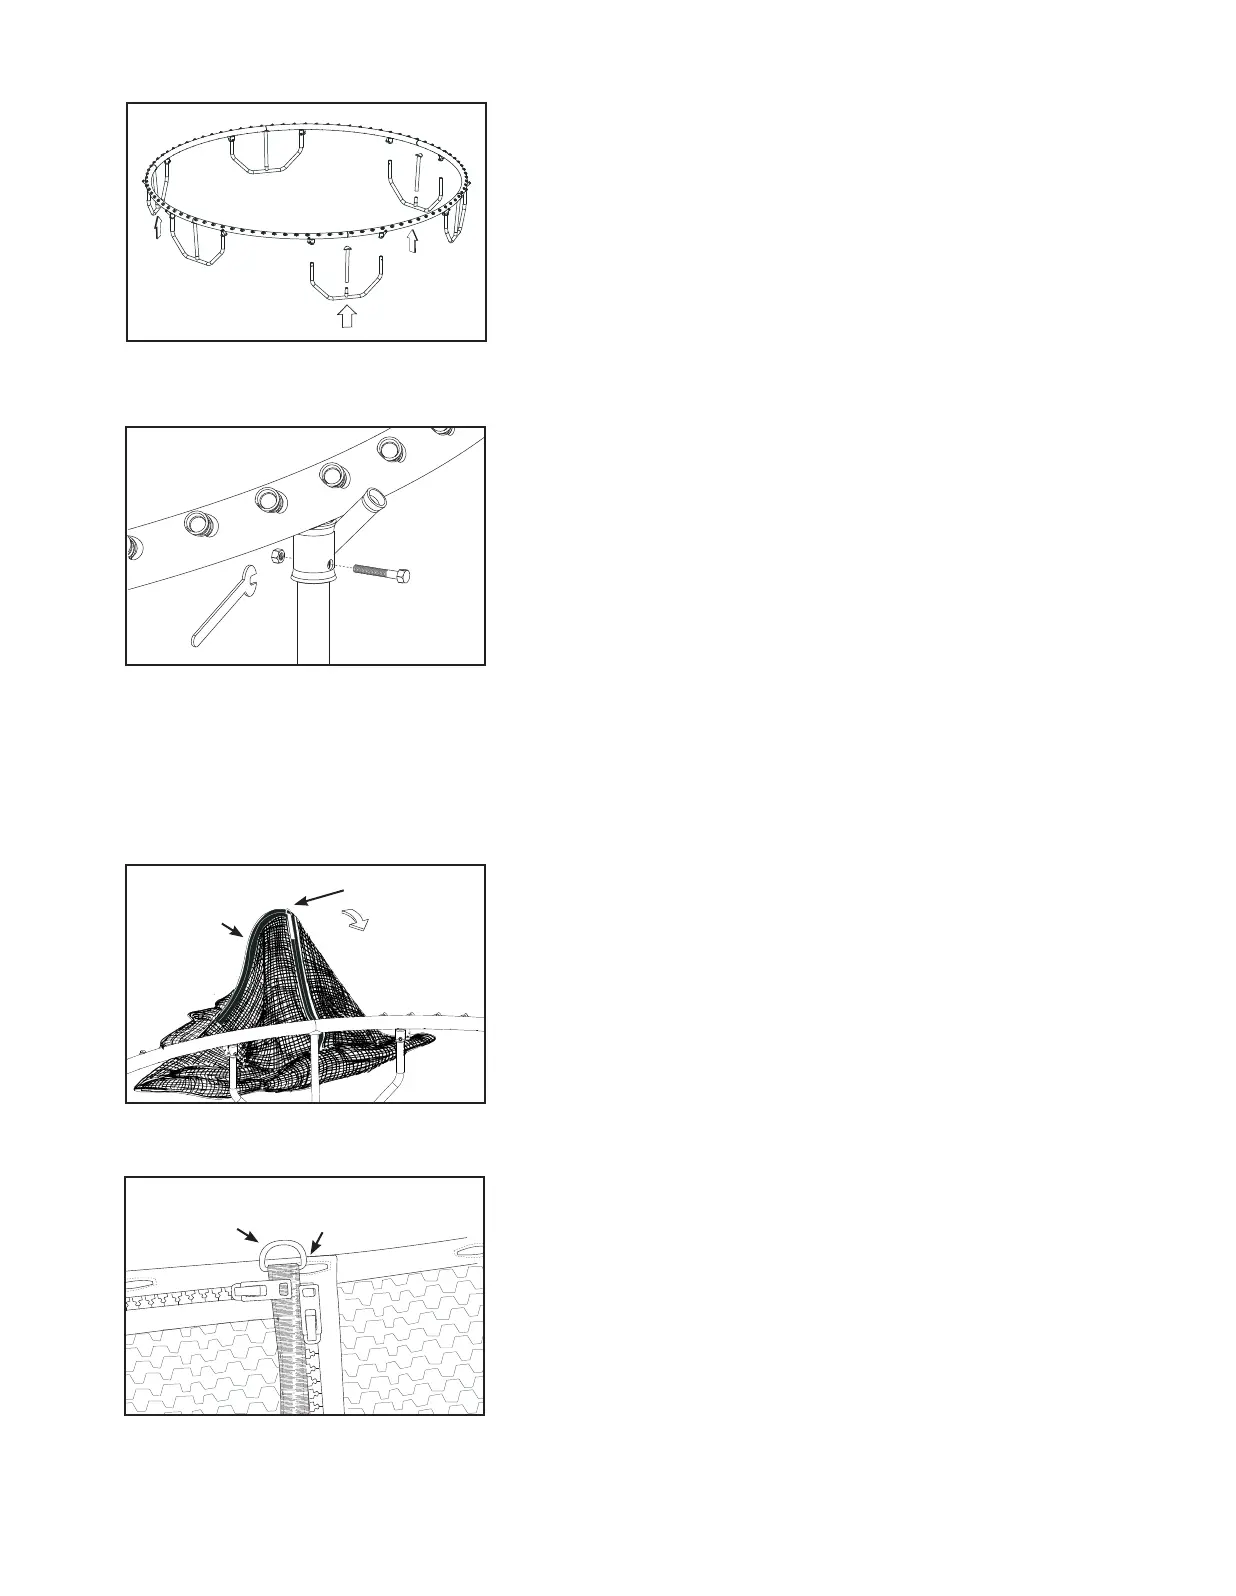
Step 7: Positioning the enclosure net
Place the enclosure net at the base of one of
the legs. Locate the zippers (the door) of the
enclosure; at the intersection of the vertical and
horizontal zippers there is a steel D-ring. Adjust
the net so the D-ring side faces the ground and
the horizontal zipper runs parallel to the frame
from left to right (Figures 7-A and 7-B).
The enclosure pockets are located on the
outside at the top of the net, and should be
down.
Figure 7-A: Postioning the enclosure net (as viewed
from within trampoline frame)
Figure 7-B: The D-ring at the horizontal and vertical
zipper intersection
Tip: Follow Steps 7
and 8 very carefully to
place the enclosure
net properly. Not
following these steps
carefully may result in
the enclosure being
installed inside out.
D-ring will be facing down
horizontal zipper
D-ring rod hole