12 Springfree™ Trampoline Model SF90E Trampoline and Enclosure Assembly, Installation, Care, Maintenance and Use Instructions Version 6.4
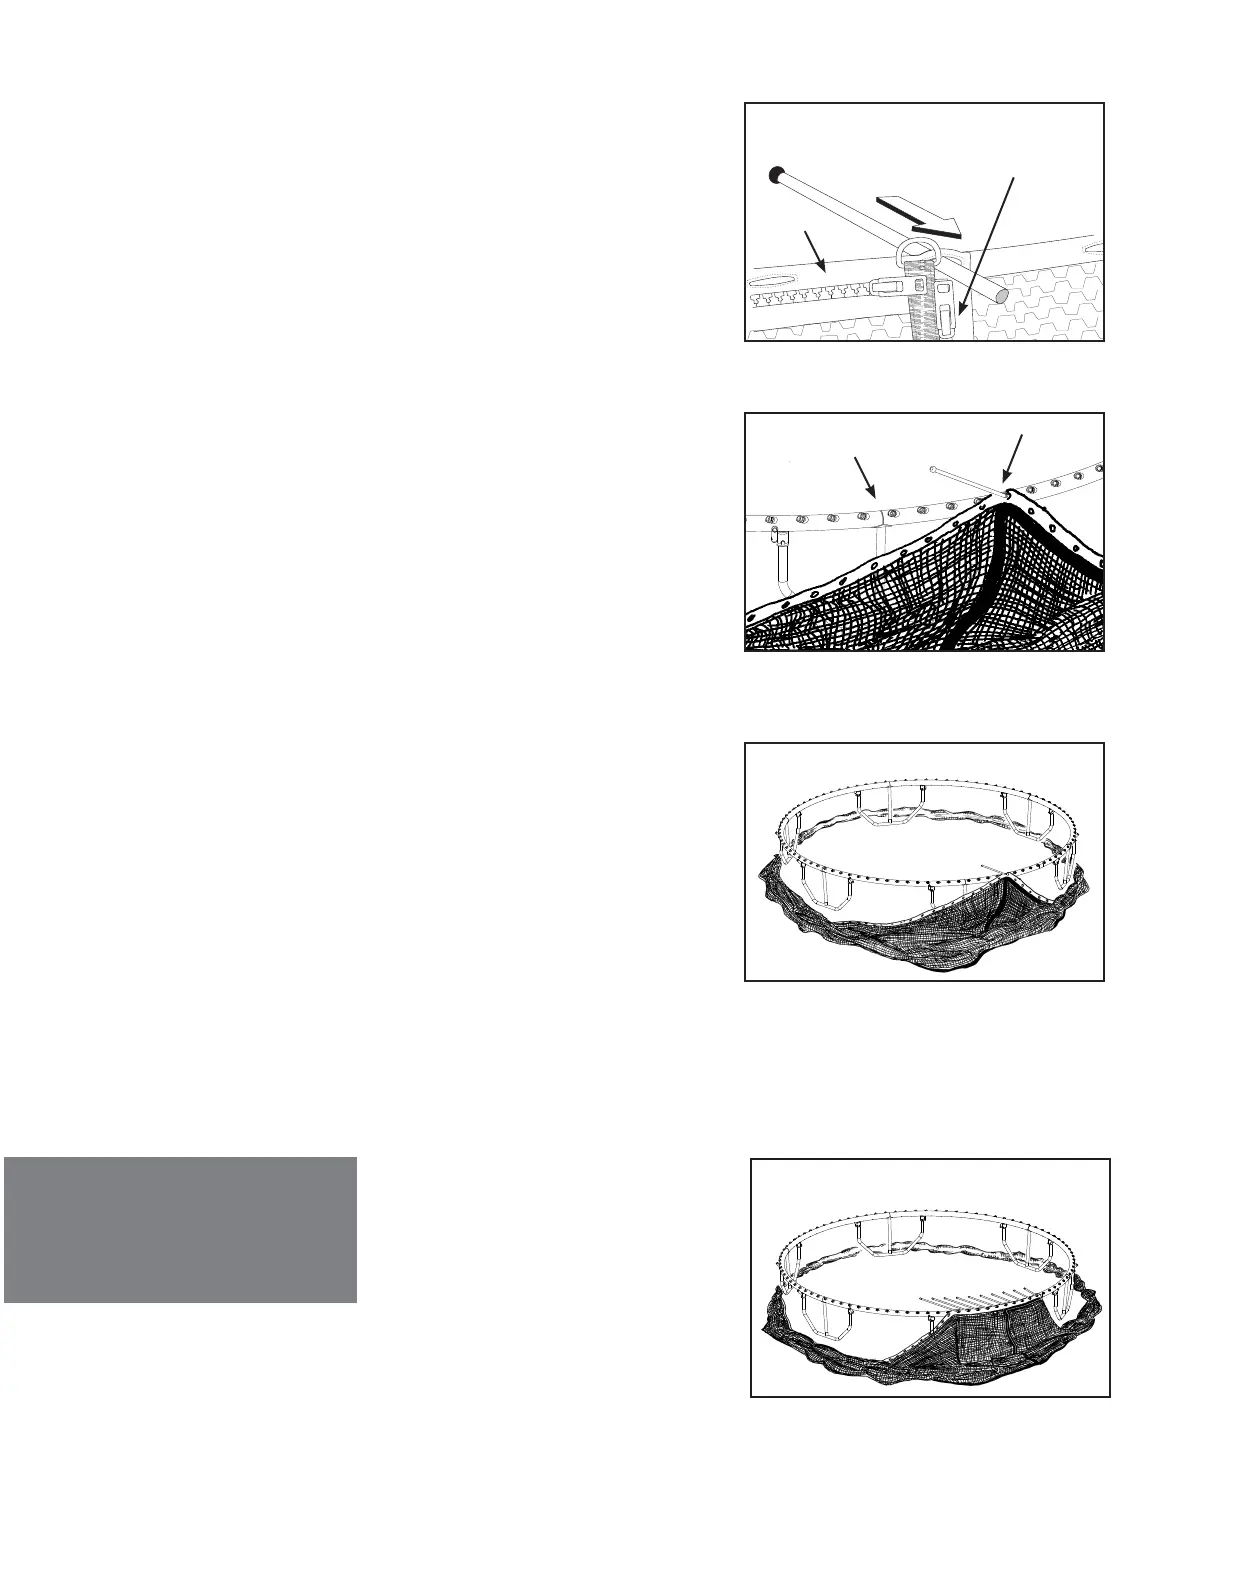
Step 8: Inserting the rst rod
Find the net anchor strip with the holes in it
(along the base of the net). Insert a rod through
the hole where the vertical zipper comes to a
close.
Now, insert this rod into the fth socket to
the right of the frame joint. If the rod is in the
correct (fth) socket, its ball will be above this
frame joint when viewed straight on.
Figure 9: The net laid around the frame
Step 10: Inserting the remaining
rods
Insert the remaining rods through each hole in
the bottom strip of the enclosure and into the
respective sockets.
Ensure the rods are seated right down to the
bottom of each socket.
Figure 10: Inserting the remaining rods
WARNING: Ensure the rods are seated
right down to the bottom of each
socket. Rods that are improperly
seated may eject unexpectedly,
which may cause injury.
Figure 8-A: Placing the rst rod
Figure 8-B: The rst rod through the net and in its socket
Step 9: Laying the enclosure net
At this point, lay the enclosure net around the
outside of the frame of the trampoline (Figure 9).
1st rod
vertical zipper
horizontal zipper
5th socket
joint