10|Page
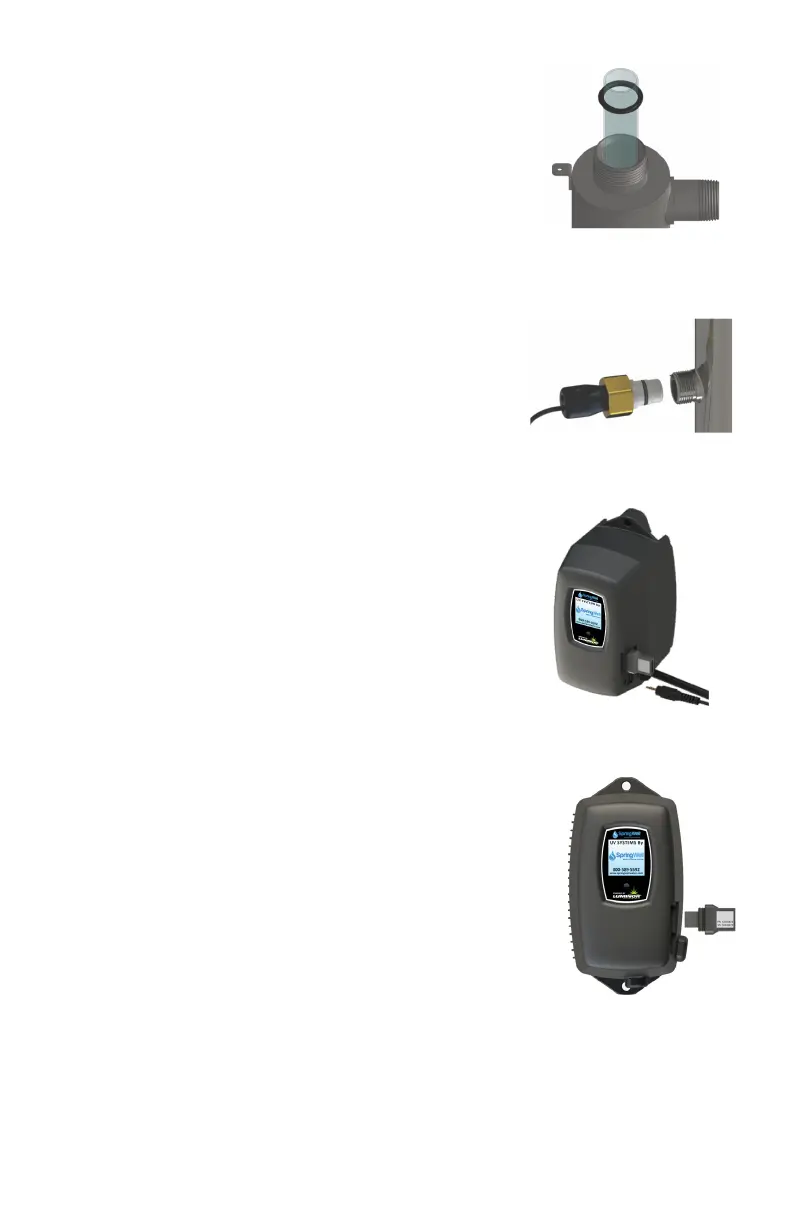
Step 7: Hand ghten the provided gland nut over the quartz
sleeve onto the threaded end of the reactor. It has a posive
stop to prevent over-ghtening. A rm force may be required
to fully ghten the gland nut, but DO NOT USE TOOLS for this
step. Insert the provided stainless steel compression spring into
the quartz sleeve. The spring works with the lamp and lamp
connector to create the proper lamp alignment. PLEASE NOTE:
DO NOT install a UV lamp inside the quartz sleeve without the
sleeve spring in place.
Step 8: Install the UV sensor (ordered separately). Align the
at poron so it faces the gland nut end and matches up with
the half metal lip on the sensor port (see Figure 5). Insert the
sensor so it is fully seated and hand ghten the sensor nut.
Step 9: The reactor is now ready for water ow. When all
plumbing connecons have been completed, slowly turn on the
water supply and check for leaks. Make sure the by-pass valves
are funconing properly and that the water is owing through
the reactor. The most common leak is from the o-ring not making
a proper seal on the reactor. For new installaons, review steps 6
and 7. For older systems drain the reactor, remove the o-ring, dry
it and reapply silicon grease. Reinstall the o-ring ensuring that it is
properly sealed against the reactor and check again for leaks.
Step 10: Mount the controller to the wall so it is above or
beside the reactor to ensure that no moisture can deposit
on any of the connecons (see Figure 1). Always mount the
controller vercally. For monitored systems, insert the sensor
connector into the IEP port located on the right side of the
controller (Figure 6). For the sensor to be recognized by the
controller, the controller power must be plugged in last. Do not
plug the controller power cord in before the last step.
Step 11: Always hold UV lamps by their ceramic ends, not by
the lamp quartz. Remove the lamp from its packaging. Again,
the use of coon gloves is recommended. Remove the lamp key
from the lamp’s connector and set it aside for the next step. Be
careful to not touch the key’s exposed contacts. Insert the UV
lamp into the reactor, being careful not to drop it.
Step 12: Install the lamp key into the controller (UV5 & UV6
systems only). The key always comes packaged with the lamp
and sits on the connector. With the key removed from the lamp,
orient it so the label is upright and facing you. The key will plug
into the lamp key port on the right side of the controller (Figure
7).
Figure 4. Quartz
Sleeve Installaon
Figure 5. UV Sensor
Installaon
Figure 6. IEP
Connecon
Figure 7. Lamp Key
Installaon
 Loading...