2 3
9
8
7
11
12
13
14
15
16
17
18
19
20
9
10
21
22
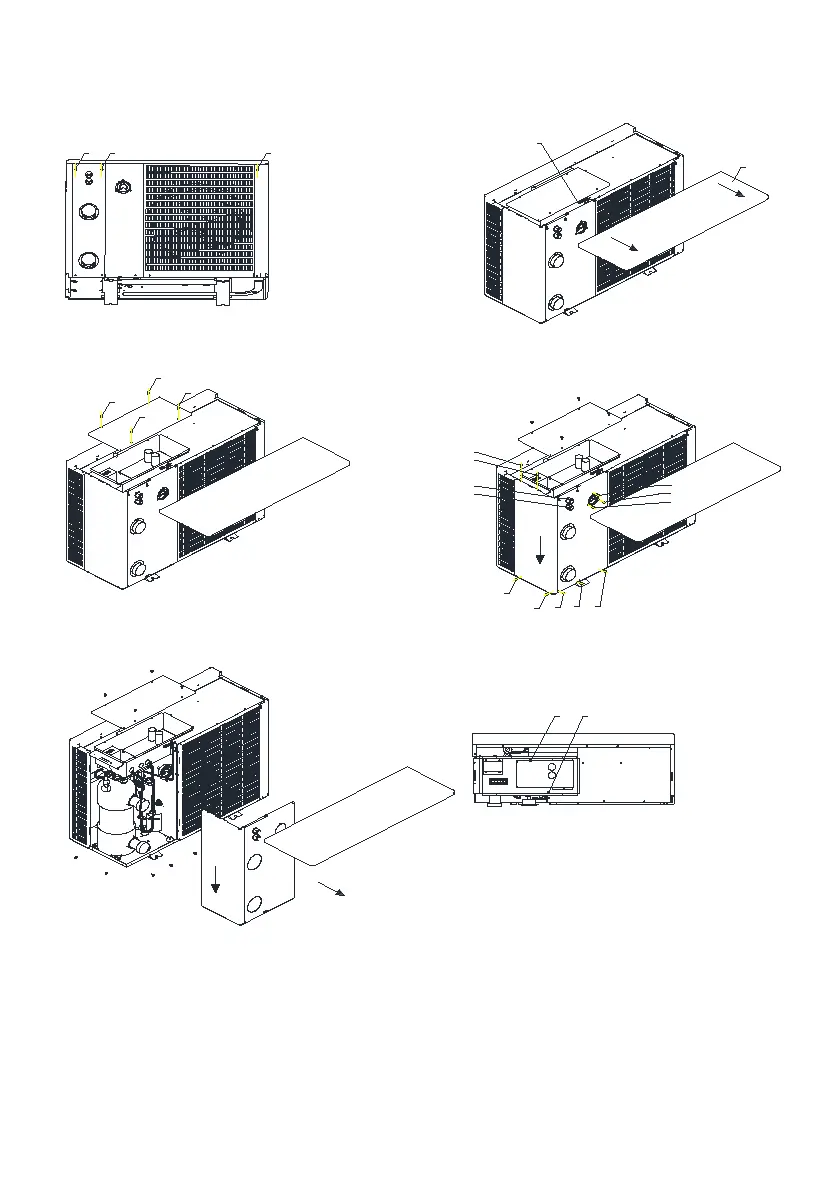
Step 1: first rem ove the 1-2-3 screw s
fixing the top cover, water outlet plate
and rear screen plate
Step 2: push back the 4 top cover, and then the
top cover will come out. W e can see the inside
of the m achine and the refrigerant filling port
5
Step 3: rem ove the 6-7-8-9 screw s to
rem ove the cover plate of the electric
box, and you can see the inside of the
electric control box
Step 4: rem ove the screw s
9-10-11-12-13-14-15-16-17-18-19-20, and
then take down the water outlet plate to
rem ove the water outlet plate
Step 5: shoot the w ater outlet plate
down to rem ove the water outlet plate
Step 6: rem ove the 21-22 screws shown on the PCB
board of the electrical box. At this tim e, the
electrical box can be moved, but the wires are
mainly pulled. Be careful not to break the wires
1
5
4
6


 To Next Page