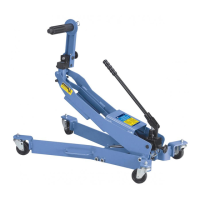
The High Lift Transmission Jack is a specialized piece of equipment designed for the safe and efficient installation, removal, and transportation of automobile transmissions, transfer cases, and transaxles. Its robust construction and dual-stage operation (air and hydraulic) make it suitable for professional automotive repair environments.
Function Description
The primary function of this jack is to assist technicians in handling heavy and often awkwardly shaped automotive components like transmissions. It achieves this through a two-stage lifting mechanism:
- Air Stage: This stage is designed for rapid positioning of the adapter. When the UP pedal is pressed and shop air is supplied, the air cylinder quickly raises the adapter to a predetermined height (approximately 20 inches) where a mechanical lock automatically engages. This lock prevents accidental loss of load and ensures stability during initial positioning.
- Hydraulic Stage: Once the air stage is locked, the hydraulic stage takes over for fine-tuning the adapter's position. Pumping the jack handle raises the adapter further, allowing for precise alignment with the transmission. This stage also incorporates controls on the adapter itself, enabling technicians to roll or tip the adapter as needed for perfect mating with the transmission.
The jack's design emphasizes safety and precision. It includes a universal saddle that can be adjusted to accommodate various transmission shapes, and a restraint system (chains and chain hardware) to securely fasten the transmission to the adapter, preventing movement or tipping during lifting, lowering, or transport. The ability to adjust both raising and lowering speeds through metering valves is a critical safety feature, ensuring controlled movement of heavy loads.
Usage Features
The High Lift Transmission Jack is engineered for ease of use and adaptability within a workshop setting:
- Mobility: Equipped with swivel casters, the jack can be easily maneuvered under a lifted vehicle. The casters are assembled to the jack legs, allowing for smooth movement across hard, level surfaces.
- Adjustable Saddle: The universal saddle is a key feature, designed to adapt to different transmission housings. It can be rolled or tipped using integrated controls, providing the necessary flexibility for precise alignment. Corner support brackets and chains are provided to further customize the saddle's configuration and secure the load.
- Dual Pedal Operation: The jack features separate UP and DOWN foot pedals for controlling the air stage. This hands-free operation allows the technician to maintain focus on the load and surrounding environment.
- Handle for Hydraulic Control: A dedicated handle is used to operate the hydraulic stage, providing manual control for fine adjustments and final lifting. A release knob on the handle allows for controlled lowering of the hydraulic stage.
- Air Supply Requirement: The air stage requires a shop air supply (90 psi of clean, dry air) for operation. Once the air cylinder is locked into position, the air hose can be disconnected, allowing for greater freedom of movement.
- Safety Chain System: Chains and associated hardware are integral to the jack's safety. They are used to firmly secure the transmission, transfer box, or differential to the saddle assembly, preventing accidental dislodgement during any operation. Both ends of the chain should be anchored to the bracket for maximum security.
- Adjustable Speeds: Before initial use, the raising and lowering speeds of both the air and hydraulic stages can be adjusted using metering valves. This allows technicians to set a comfortable and safe operating speed, crucial for preventing sudden drops or uncontrolled movements of heavy loads.
- Pre-use Setup Procedure: A mandatory setup procedure ensures the jack operates correctly and safely. This involves adjusting the metering valves, attaching the air supply, and performing initial lifts and lowers to verify proper function.
Maintenance Features
To ensure longevity, reliable performance, and continued safety, the High Lift Transmission Jack incorporates several design considerations for maintenance:
- Preventive Maintenance Schedule: The manual outlines a clear preventive maintenance schedule, emphasizing the importance of regular lubrication and inspection. This includes lubricating moving parts monthly and wiping cylinder columns with a clean cloth to remove dirt and abrasives.
- Dirt Prevention: The greatest cause of hydraulic unit failure is dirt. The jack is designed to be stored in a well-protected area, away from corrosive vapors, abrasive dust, rain, snow, or grit, to minimize contamination of the hydraulic system.
- Regular Inspection: Before each use, technicians are instructed to inspect the jack for any signs of damage, wear, or alteration, such as cracked housing, excessive wear, bending, leaking fluid, scored piston rods, or loose hardware. Prompt corrective action is required for any identified issues.
- Hydraulic Fluid Management: The jack is designed to use only approved hydraulic fluid (e.g., Chevron AW Hydraulic Oil MV). The use of incorrect fluids like alcohol or hydraulic brake fluid is explicitly warned against, as it can damage seals and lead to jack failure. Instructions are provided for checking oil levels and bleeding air from the hydraulic system.
- Troubleshooting Guide: A comprehensive troubleshooting guide is included in the manual, offering solutions for common operational problems related to both the air and hydraulic stages. This empowers technicians to diagnose and resolve minor issues, such as dirty air valves, engaged mechanical locks, or low oil levels, without immediate need for specialized repair services.
- Repair Environment: The manual stresses that repair procedures must be performed in a dirt-free environment by qualified personnel, highlighting the precision and cleanliness required for maintaining hydraulic systems.
- No Wash Rack Use: A specific warning advises against using the jack as a wash rack for transmissions, as steam cleaning or washing can introduce contaminants into the system.
Overall, the High Lift Transmission Jack is a robust, versatile, and user-friendly tool, designed with both operational efficiency and safety at its core, supported by clear guidelines for proper use and maintenance.