3
Mounting
Important notes on mounting
• When making modications to the vehicle due to the installation, make
sure trafc safety and stability of the vehicle is not impaired.
• When drilling or cutting any holes on your vehicle, make sure the fuel
tank, fuel lines, hydraulic lines and electrical wiring are not damaged.
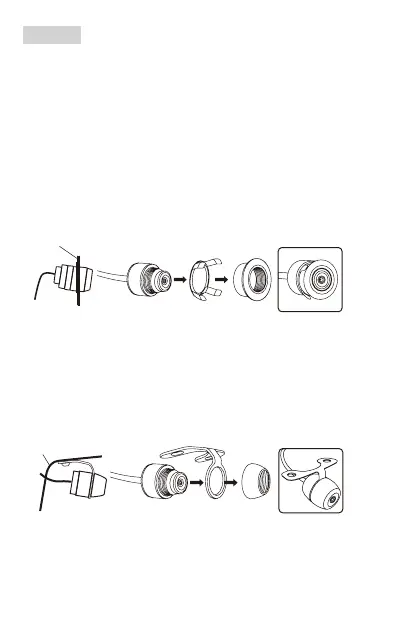
Option 1: Flush mount
1. Select a suitable location on the front or rear of your vehicle (e.g. front
or rear bumper). Then use the supplied installation bit (0.73”/18.5mm) to
drill a hole which is used to secure the camera.
2. Flush mount the camera as illustrated below. No screws are required.
Vehicle body
Option 2: Hanging mount
1. Select a suitable location on the front or rear of your vehicle (e.g. front
or rear bumper). Then cut an appropriate hole for the camera cable, and
drill two screw holes for the mounting bracket.
2. Use two proper screws to x the supplied bracket then attach the
camera to the bracket as illustrated below.
Vehicle body