6
nicht abgeklemmt werden, dieser
kann durch eine Linksdrehung gelöst
werden.
13 Das Modul an den 2 Rastnasen
entriegeln und nach vorne aus dem
Modulträger drücken.
Beim Einsetzen des Modules auf
die richtige Einbaulage achten
(Einhängung der Halteschnur ist
OBEN). Falls erforderlich, kann der
am Modulträger befestigte Klemm-
block durch eine Links drehung ent-
fernt werden.
Pegehinweise
Regelmäßige Reinigung und Pege
empfehlen wir vor allem bei Auf-
stellung in Küstennähe, in Industrie-
gebieten und an verkehrsreichen
Straßen.
Besonders aggressive Verschmut-
zungen wie beispielsweise Vogelkot
sollten so bald wie möglich entfernt
werden.
Bitte benutzen Sie für keine unserer
Oberächen scheuernde oder
schleifende Reinigungsmittel wie
Stahlwolle, grobe Schwämme oder
Scheuermilch!
Zur normalen Reinigung genügen in
den meisten Fällen warmes Wasser,
gegebenenfalls mit etwas Spülmittel,
ein weiches kratzfreies Tuch (z.B.
Brillenputztuch, Möbelpoliertuch
u.ä.) oder eine weiche Nylonbürste.
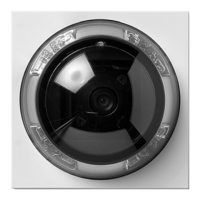
Kunststoffteile wie die Haube der
Kamera oder Namensschilder dürfen
nicht mit einem Metallpegemittel
behandelt werden.
Entfernen Sie nach der Pege alle
Reste und Rückstände von Reini-
gungs- oder Schmiermitteln, um
Flecken oder Verfärbungen zu ver-
meiden!
Reiben Sie alle Oberächen nach
der Reinigung sorgfältig trocken!
Auch Wassertropfen können unter
ungünstigen Umständen zu Flecken
führen.
In the case of video systems, the fol-
lowing mounting situation must be
avoided at all costs:
• direct ajour light
• direct sunlight
• very bright image backgrounds
• highly reective walls opposite the
camera
• lamps or direct light sources
1 Recommended mounting height
appr. 1.60m to centre camera. In
systems without video, the centre of
the ush-mount housing should be
between 1.40mand1.60m.
2 Remove the plaster guard from
the ush mount housing, break out
the cable bushing from the housing
and thread in the cable. Reinforce
the ush mount housing using the
plaster guard and grout in with the
front ush to the outside wall.
3 Grout in the ush mount housing
ush with the surface (note the
mounting position, see marking
in the ush mount housing). The
plaster guard must be inserted in the
housing in order to prevent defor-
mation. It must not under any cir-
cumstances stand proud of the wall,
and must be grouted to a maximum
of 8mm (0.31inch.) in the wall, as
otherwise the xing screws for the
front panel will be too short.
4 Turn the 2 sheet metal supports on
the ush-mount housing to the out-
side and position the front panel.
5 Fasten the front panel in the ush-
mount housing using nylon cord.
Installation and commissioning
Installation, commissioning and pro-
gramming are described in the rel-
evant system manual and enclosed
with the line rectier/server.
6 To ensure tidy wiring, the instal-
lation cable can be fastened on the
module carrier. To do this, break the
moulded-on cable clips out of the
module carrier. The installation cable
is fastened on the module carrier
using the cable guide.
7 Set the volume on the back of the
door loudspeaker, opening with the
Application
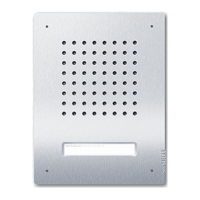
Siedle Classic door station is
designed for ush mounting in
walls.
The installation principle used by
Siedle Classic is structured in the
same way as for Siedle Vario, with
installation taking place using a
terminal block for each module.
On each terminal block, the name
of the module is printed (e.g.
BCMC650-02), and the designation
of each screw terminal is separately
indicated next to the terminal.
Electrical voltage
Mounting, installation and servicing
work on electrical devices may only
be performed by a suitably qualied
electrician.
No external voltages greater than
50V are admissible inside the ush
mount housing of the door station
in compliance with DIN VDE0100/
EN60065.
Scope of supply
• Flush-mount housing made of gal-
vanized sheet steel
• Plaster guard
• Front panel including function
module and call button(s) with inte-
grated lighting
• Allen key size 2.5
• Cleaning cloth
• Nylon cord for xture of the front
panel
• This product information
Accessories
• ZDS/CL Anti-pilfer accessory Siedle
Classic
• ZNSM/CL-02 Metal Classic acces-
sory nameplate
Mounting
• The front panel with the functional
units must not be plastered in with
the housing.
• If the nal plaster is applied at a
later juncture, the front panel must
rst be removed.
English
 Loading...
