the stern rail that the davits are attached to is not straight, then the plastic divider will need to be sanded.
Use a disc sander and sand a 1” wide path on one side of the plastic disc. Place the sanded side to the davit
arm. This will allow clearance and prevent burrs. If a burr occurs, it must be sanded out.
The clamshell that mounts on the stern rail has two small holes in it. When you have determined
the exact mounting locations, drill two 5/32” holes in the stern rail, drill very slow speed so as not to heat
up the S/S. Using your rivet gun, install the rivets. Use your level to make sure the davits are
perpendicular prior to drilling. The upper clamp must be tight prior to drilling. Use the 3” Set-back
Block (Model #413) if you’re mid-rail is in the way. When mounting the upper mount to a bulkhead, use
only the outer half and the setback block then bolt through. There are two eye nuts. Use one on each
mount instead of a nut. See Step 5, and you will see why.
STEP 2 – The lifting points in your inflatable are very important and critical to properly lifting and
securing the boat. They must be low and inside the boat.
STERN – The stern can be rigged in one of 2 ways. If
you want to use a sling at the stern, the lift points must
be low and on the inside of the transom. Another option
is to use the St. Croix Lifting Yoke #220 (see drawing)
and eliminate the sling and eye bolts. This is the best
choice.
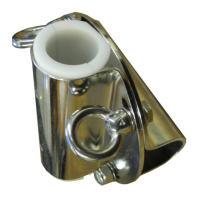
BOW – The bow lifting points must be inside the boat. They should be located back from the bow about 3
feet, in the area where the tube starts to form the bow (See
drawing). Never lift from the removable floor boards or from
the “D” ring on the outside of the hull.
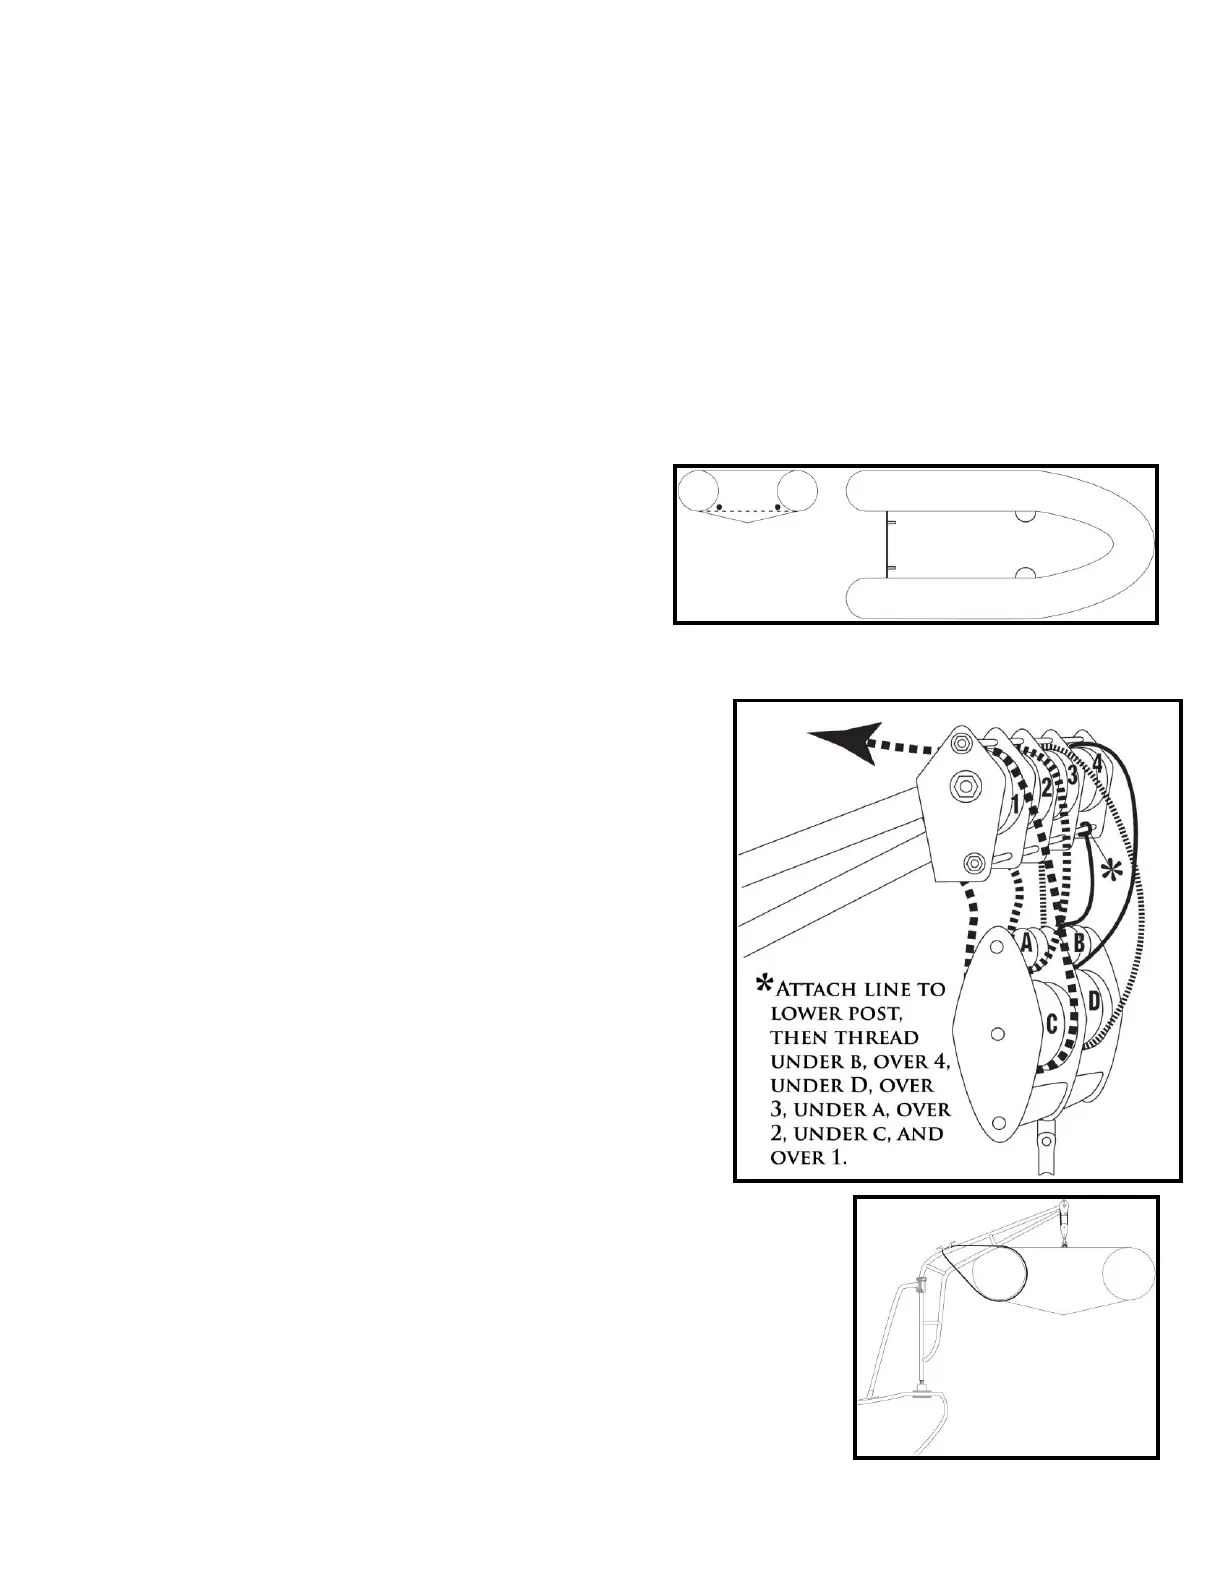
STEP 3 – Lace the head of the davit as shown in the diagram.
STEP 4 – The big lift. Before you lift the inflatable, pull
down on the head of the davit arm to test for deflection in the
fiberglass of your big boat and the stern rail. If you are lifting
alone, first lift the bow of the inflatable a couple of feet and tie
off the line to the cleat on davit arm. Next, lift the stern a
couple of feet and tie off the line to the cleat on that arm.
Alternate lifting the bow and lifting the stern in this manner
until the inflatable tubes come into contact with both davit
arms and the inflatable is level. Stop and re-read rule #7 of
Bill’s Rules and please comply now.
STEP 5 – Restrain the inflatable so it does not move around
when underway. There are two methods available to you. The
first option is to use the lifting lines. Throw a loop around the
tube of the inflatable at the stern and then put that line around the cleat on
that davit arm. Pull the boat in tight. Do this several times to form a rope
belt. Now go to the bow of the inflatable and using the lifting line, run a
loop through the towing ring on the outside of the hull, then back to the
cleat. Again, pull the boat in tight. The boat should not swing and move on
its own.
The second option
is to use the St. Croix ratchet tie-down restraints
to the eye bolt loop on the outside of the transom of the inflatable and the
other end to the eye nut on the upper mount. Tighten with the ratchet. At
the bow, attach one end of the tie-down restraint to the towing ring on the