Mains Power Connection and Power/Standby
The LINK is supplied with a mains DC adaptor with the appropriate plug for different
countries. Connect the DC adaptor to the LINK’s power socket (7) on the rear panel
before connecting to the mains.
Use the Power/Standby Switch (2) on the front panel to turn the LINK on or back
into standby. After switching on, the Power LED (1) will change from red to blue.
The Network LED (3) will light up blue when the LINK is operational and the network
connection is established. This may take up to 60 seconds. Powering down also
takes up to 60 seconds to ensure all files are closed correctly. The Power LED (1)
will blink red and blue during the process and show red when in standby.
Do not disconnect from the mains without powering down fully.
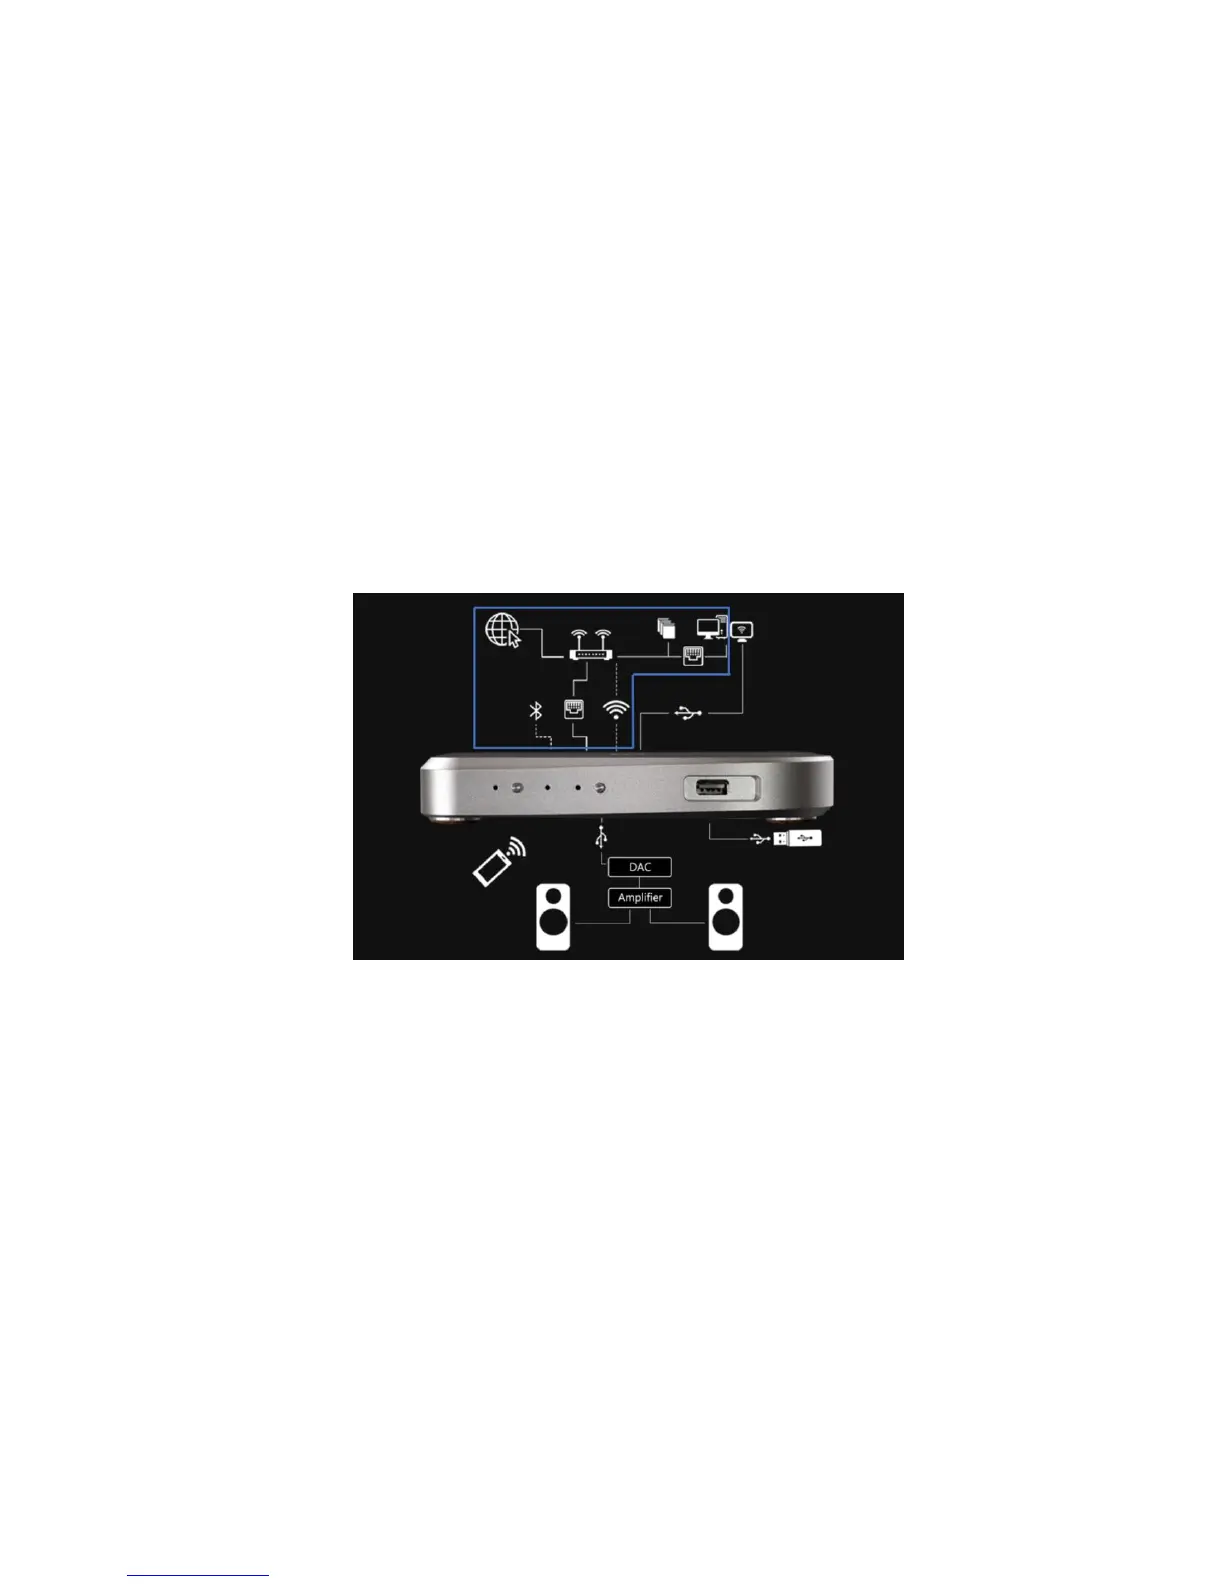
Network Connections
The LINK needs to be connected to a home network (LAN) before it can be used.
Connection can be via ethernet or wi-fi.
The Ethernet port (12) is on the back panel for connecting an Ethernet cable to a
home router. A wired connection is recommended for maximum reliability and
performance, particularly for high-resolution music playback. We recommend using
a CAT5e, 6 or above cable capable of streaming at 1Gb/s.
The supplied wi-fi antenna should be attached to the connector (15) on the rear
panel to enable connection to a router via wi-fi either for streaming or control
purposes.
The Network LED (3) on the front panel will show blue when a stable network
connection has been established and the LINK has successfully booted. To follow
the set-up instructions and see the LINK on your web browser you will need to find
the IP address your router has allocated to the LINK. For instructions on the set-up
procedure refer to section 3 on page 7.