- 12 -
4100PT Unpacking and Assembling
1. Use a razor knife to cut Box 1 along the dotted line marked on the
box. Remove the cover.
2. Use a razor knife to cut the tape on Box 2. Remove the cover.
3. Remove the packing materials from around the Stepper.
4. Verify the all the components and hardware are in the boxes. (See
above Parts List.) .
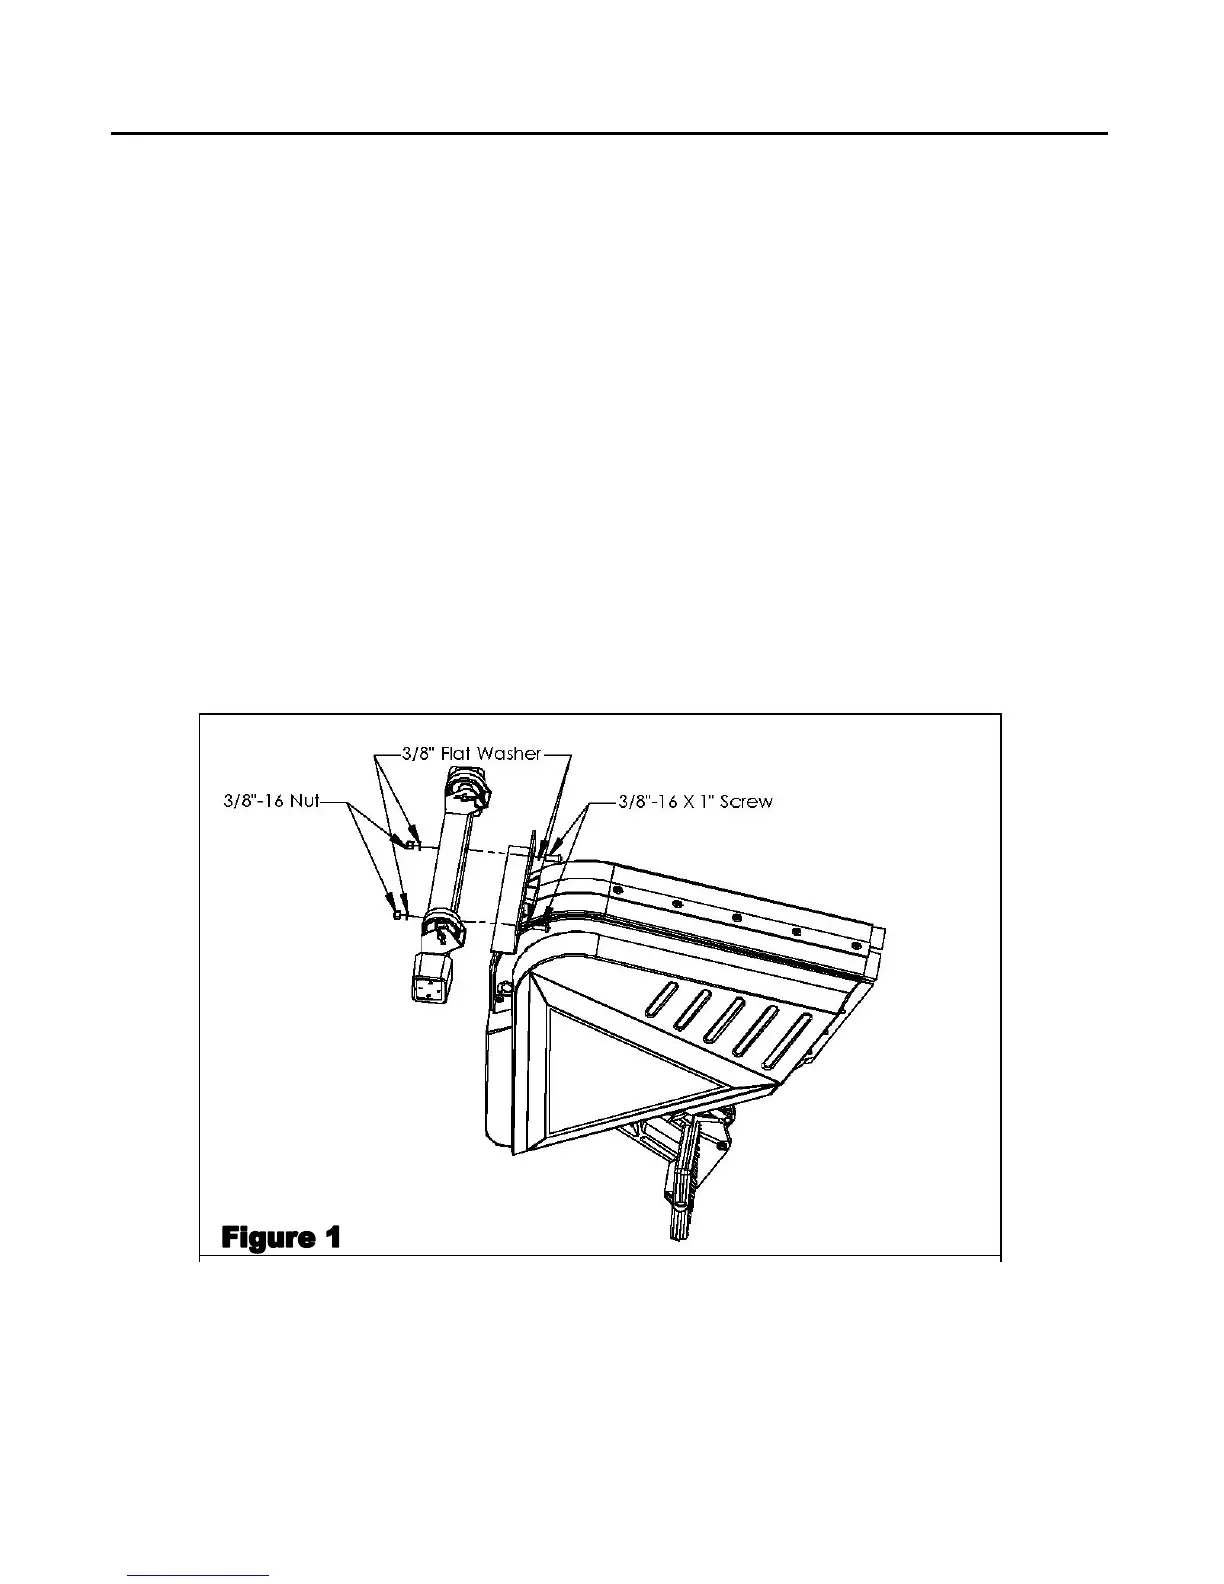
5. Get Main Frame [#25744] and stand it on its back post and pedals.
(See Figure. 1) .
6. Install Front Leg [#25715] on Main Frame as shown in Figure 1.
7. Loosely install (qty 2) 3/8-16 x 1.00” screws [#25796], (qty 4) 3/8
flat washers [#21462], and (qty 2) 3/8-16 hex nuts [#22029] into
front leg and the front top flange of leg bracket on the main frame.
Once both screws are in place, tighten using a 9/16” open end wrench
and a 7/32” allen wrench. (See Figure 1)