- 15 -
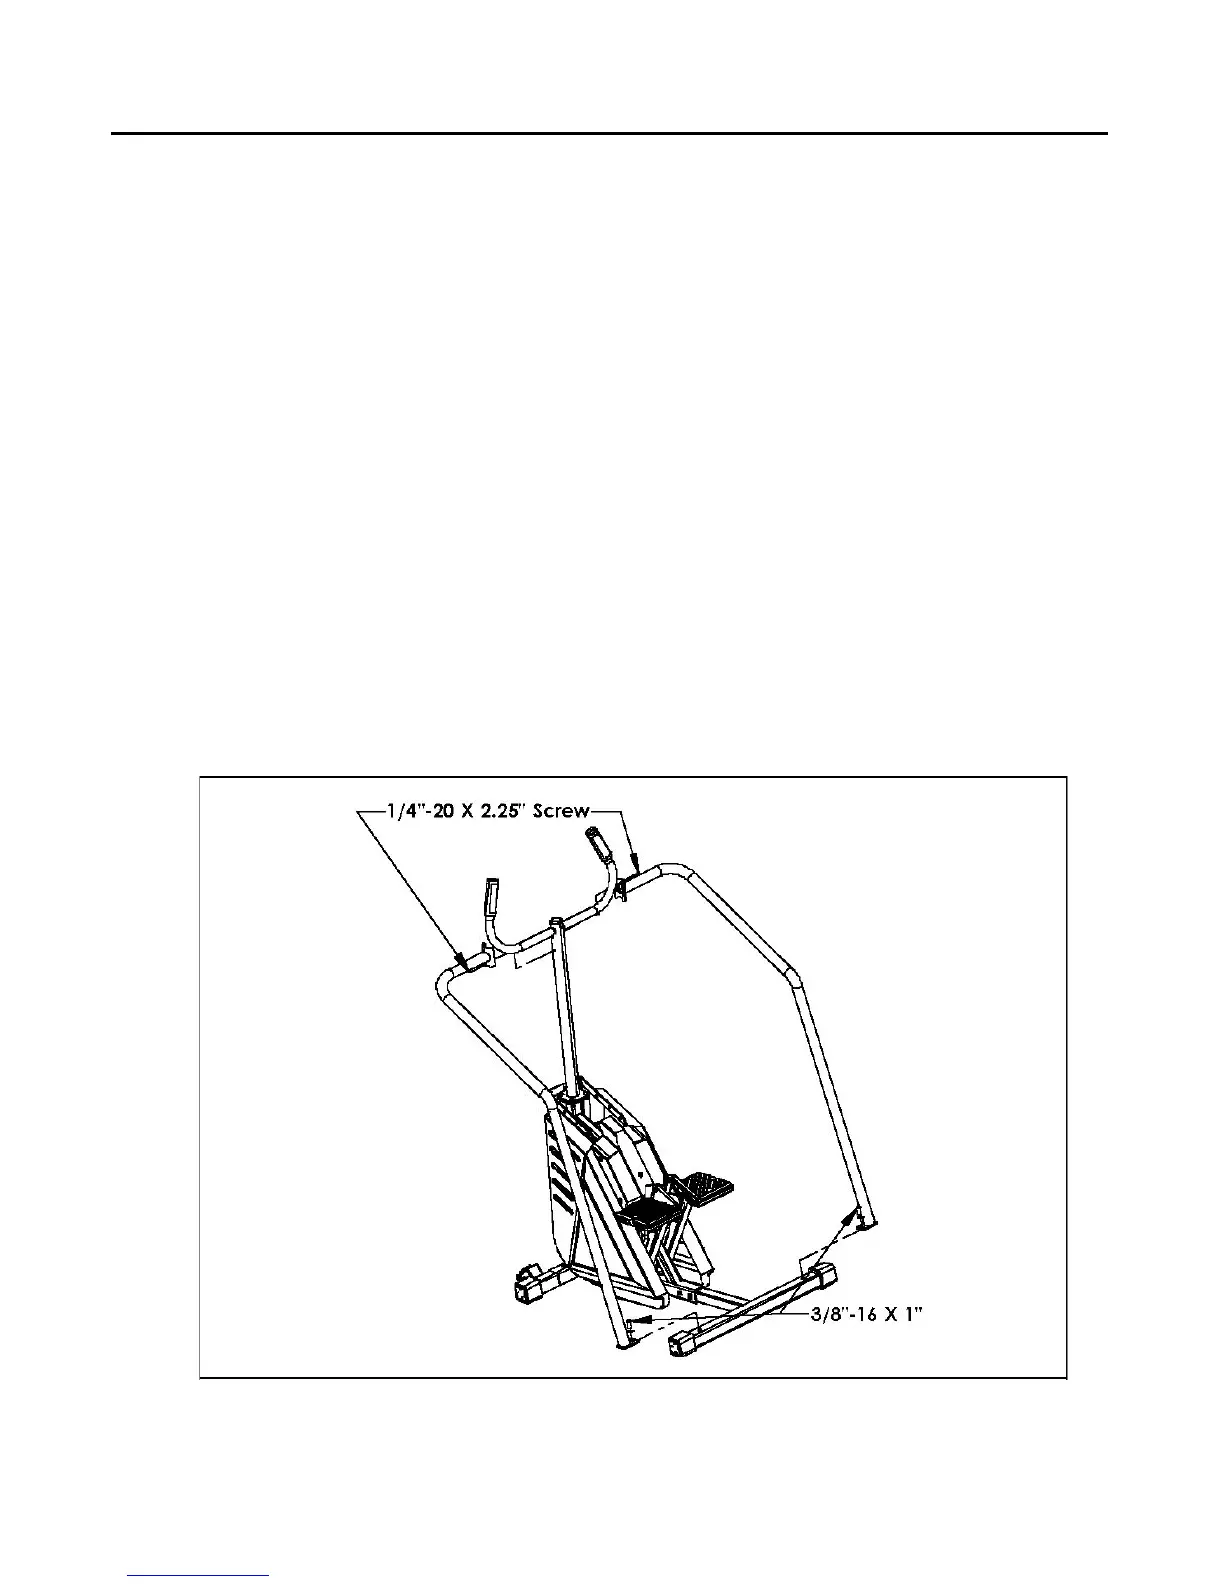
4100PT Unpacking and Assembling
12. Install Left Handrail [#25737] by aligning the hole on the
bottom rear flange of the handrail with the hole on the top of the
rear leg of the stepper. Make sure the top round bracket of the
handrail is cupping the front handle tube. (See Figure 4)
13. Loosely install (qty 1) 3/8-16 x 1” screw [#25796] and (qty1)
3/8 flat washer [#21462]. (See Figure 4)
14. Install Right Handrail [#25740] by aligning the hole on the
bottom rear flange of the handrail with the hole on the top of the
rear leg of the stepper. Make sure the top round bracket of the
handrail is cupping the front handle tube. (See Figure 4)
15. Loosely install (qty 1) 3/8-16 x 1” screw [#25796] and (qty1)
3/8 flat washer [#21462]. (See Figure 4)
16. Loosely install (qty 2) ¼”-20 x 2.25” screws [#25795] in the top
round flange of the handrail. (See Figure 4)
17. Once all four screws are in place, tighten the two 3/8-16 screws
using a 7/32” allen wrench and the two ¼”-20 screws using a 5/32”
allen wrench.
Figure 4