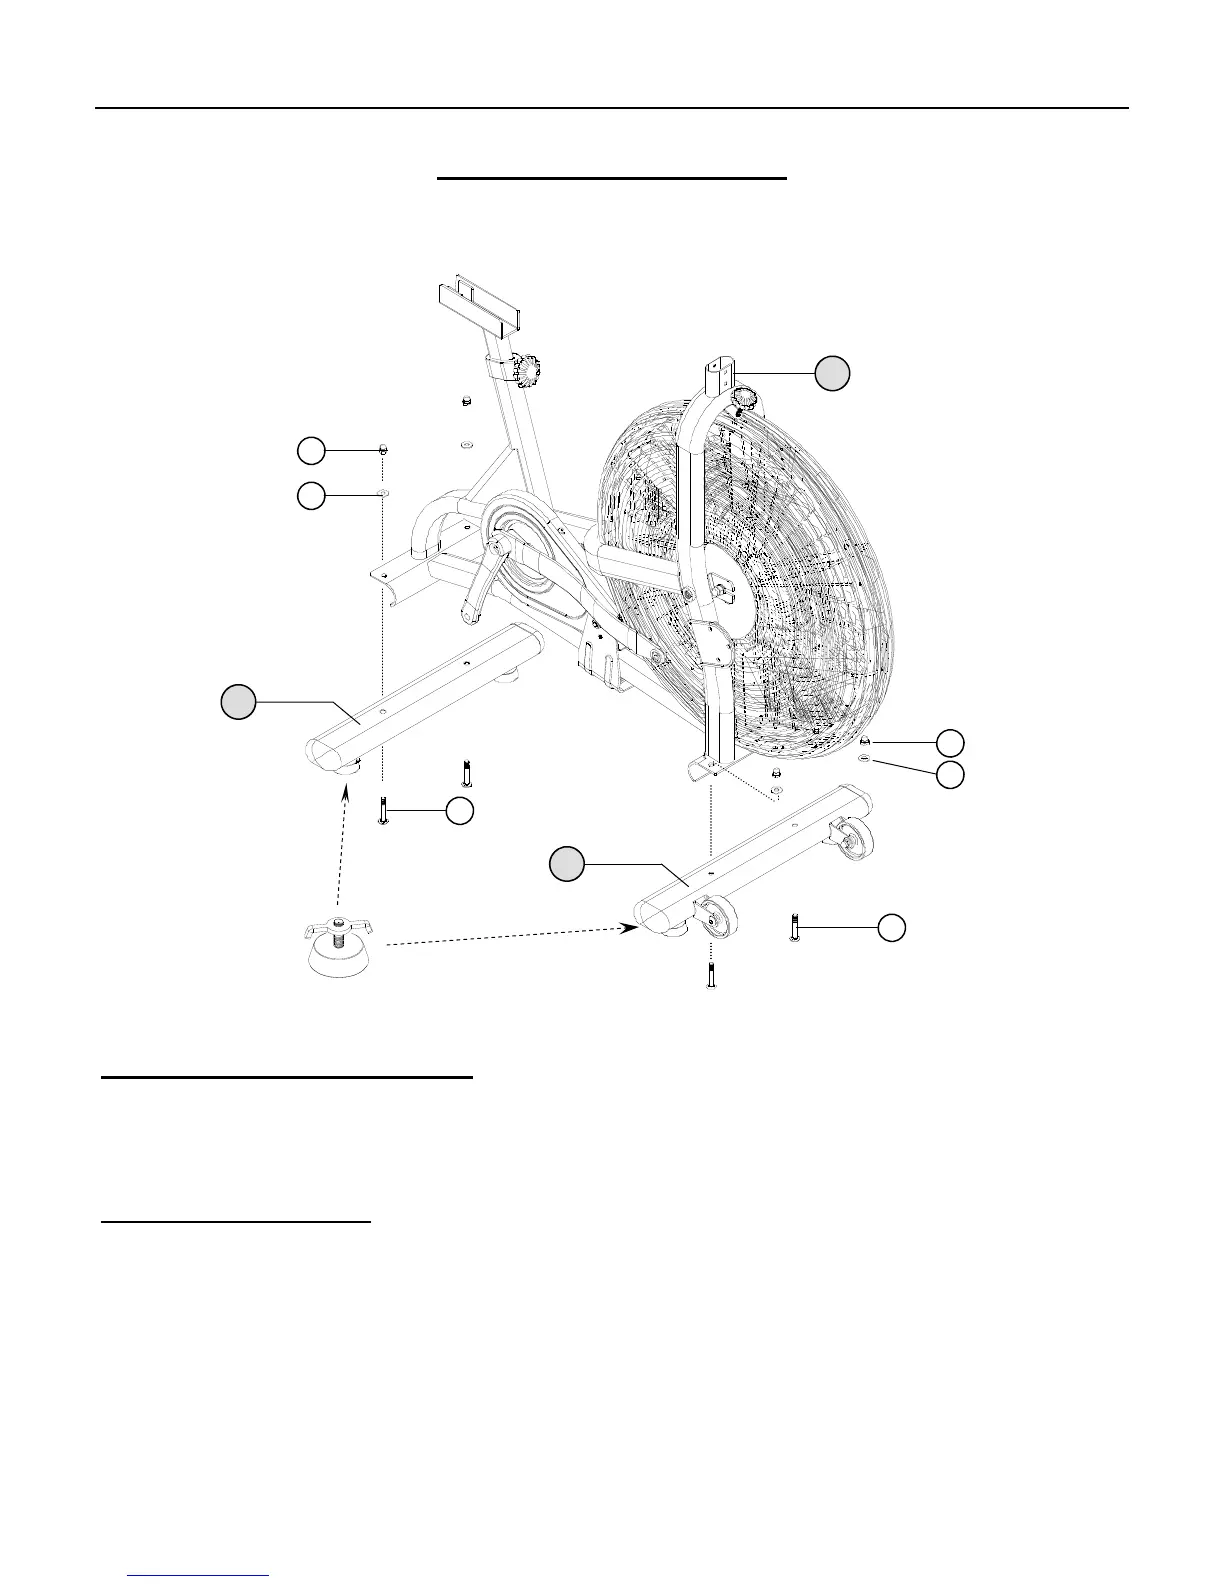
ASSEMBLY STAGE #1
Attach Stabilizers to the Main Base
Assembly Hardware Required:
#22 Carriage Bolt Qty. 4 #24 Acorn Nut Qty. 4
#23 Spring Washer Qty. 4
Assembly Description:
A) Assemble the Front Stabilizer Assembly (#2) to the Main Base Assembly (#1) using 2-Carriage Bolts (#22),
2-Flat Washers (#23), and 2-Acorn Nuts (#24). Note: Make sure that the transport wheels on the Front Stabilizer
are facing away from the Main Base Assembly as shown.
B) Assemble the Rear Stabilizer Assembly (#3) to the Main Base Assembly (#1) using 2–Carriage Bolts (#22), 2
–Flat Washers (#23), and 2–Acorn Nuts (#24).
C) Use the Adjustable Levelers on the bottom of the Stabilizer Assemblies to adjust the bike and keep it from rocking
on an uneven surface (Figure 1).
Assembly Step #1 completed.
A
SSEMBLY INSTRUCTION P AGE 4
24
23
22
3
24
23
22
2
1
Adjustable Levelers
Figure 1