(M10x1.5x140mm)(21), WASHERS(M10)(24), and NYLOCK NUT(M10x1.5)(23).
NOTE: Tighten until snug, the CUSHION RAILS(2) must be allowed to pivot.
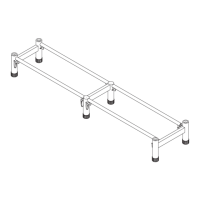
STEP 4
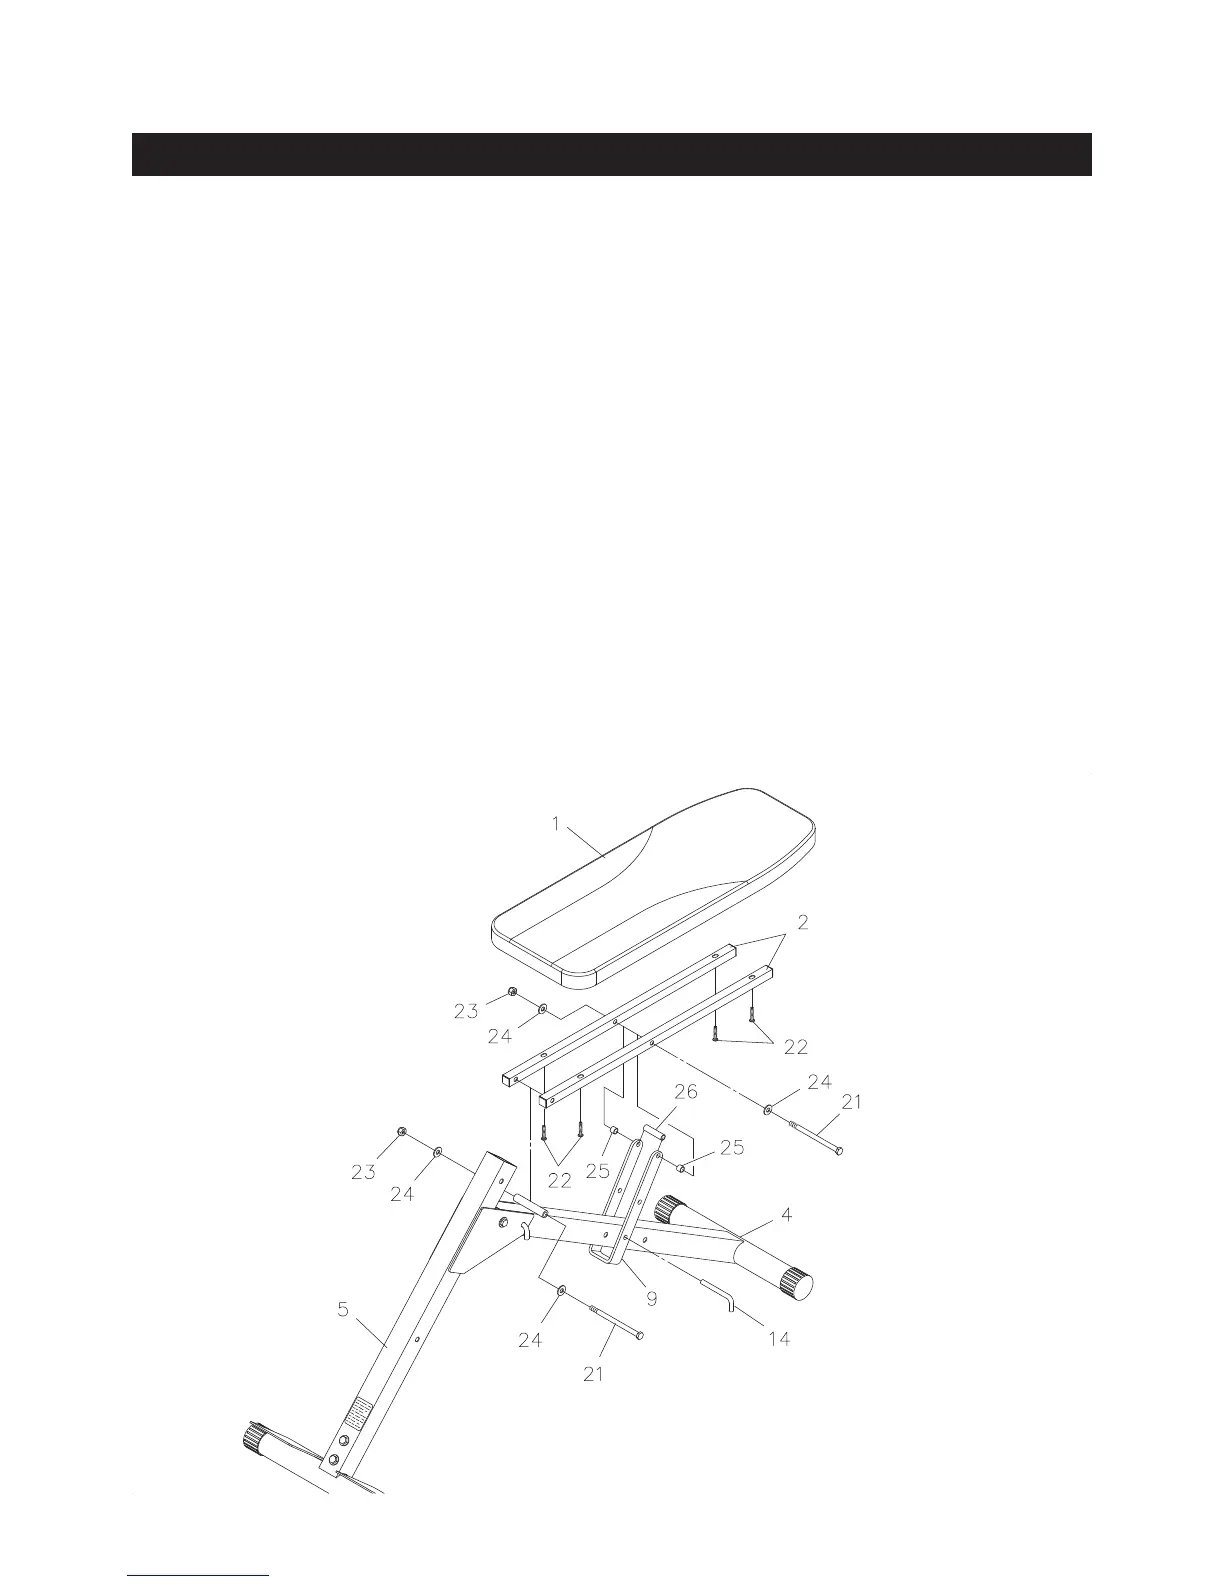
Slide the SEAT ADJUSTMENT(9) around CUSHION SUPPORT FRAME(4) and between the CUSHION
RAILS(2). To attach the open end of the SEAT ADJUSTMENT(9) to the CUSHION RAILS(2), insert the
HEX BOLT(M10x1.5x140mm)(21) through the WASHERS(M10)(24), CUSHION RAILS(2), SPACERS(25),
SEAT ADJUSTMENT(9), LONG SPACER(26), and tighten together with NYLOCK NUT(M10x1.5)(23).
Refer to the Illustration.
NOTE: Tighten until snug, the CUSHION RAILS(2) must be allowed to pivot.
STEP 5
The SEAT CUSHION(1) can be adjusted to three different incline positions. To position the SEAT CUSHION
(1) to desired elevation, select one of the holes in the SEAT ADJUSTMENT(9) and attach the SEAT
ADJUSTMENT(9) to one of the holes in the CUSHION SUPPORT FRAME(4) with the LOCKING PIN(14).
STEP 6
Attach the SEAT CUSHION(1) to the CUSHION RAILS(2) with ROUND HEAD BOLTS(M6x1x34mm)(22).