Note: While calibrating, the Stud Sensor 75 must not be placed directly
over a stud, dense material such as metal, or over a wet or newly painted
area, or it will not properly calibrate. If the Red LED stays lit, move to a
different location and try again.
2.
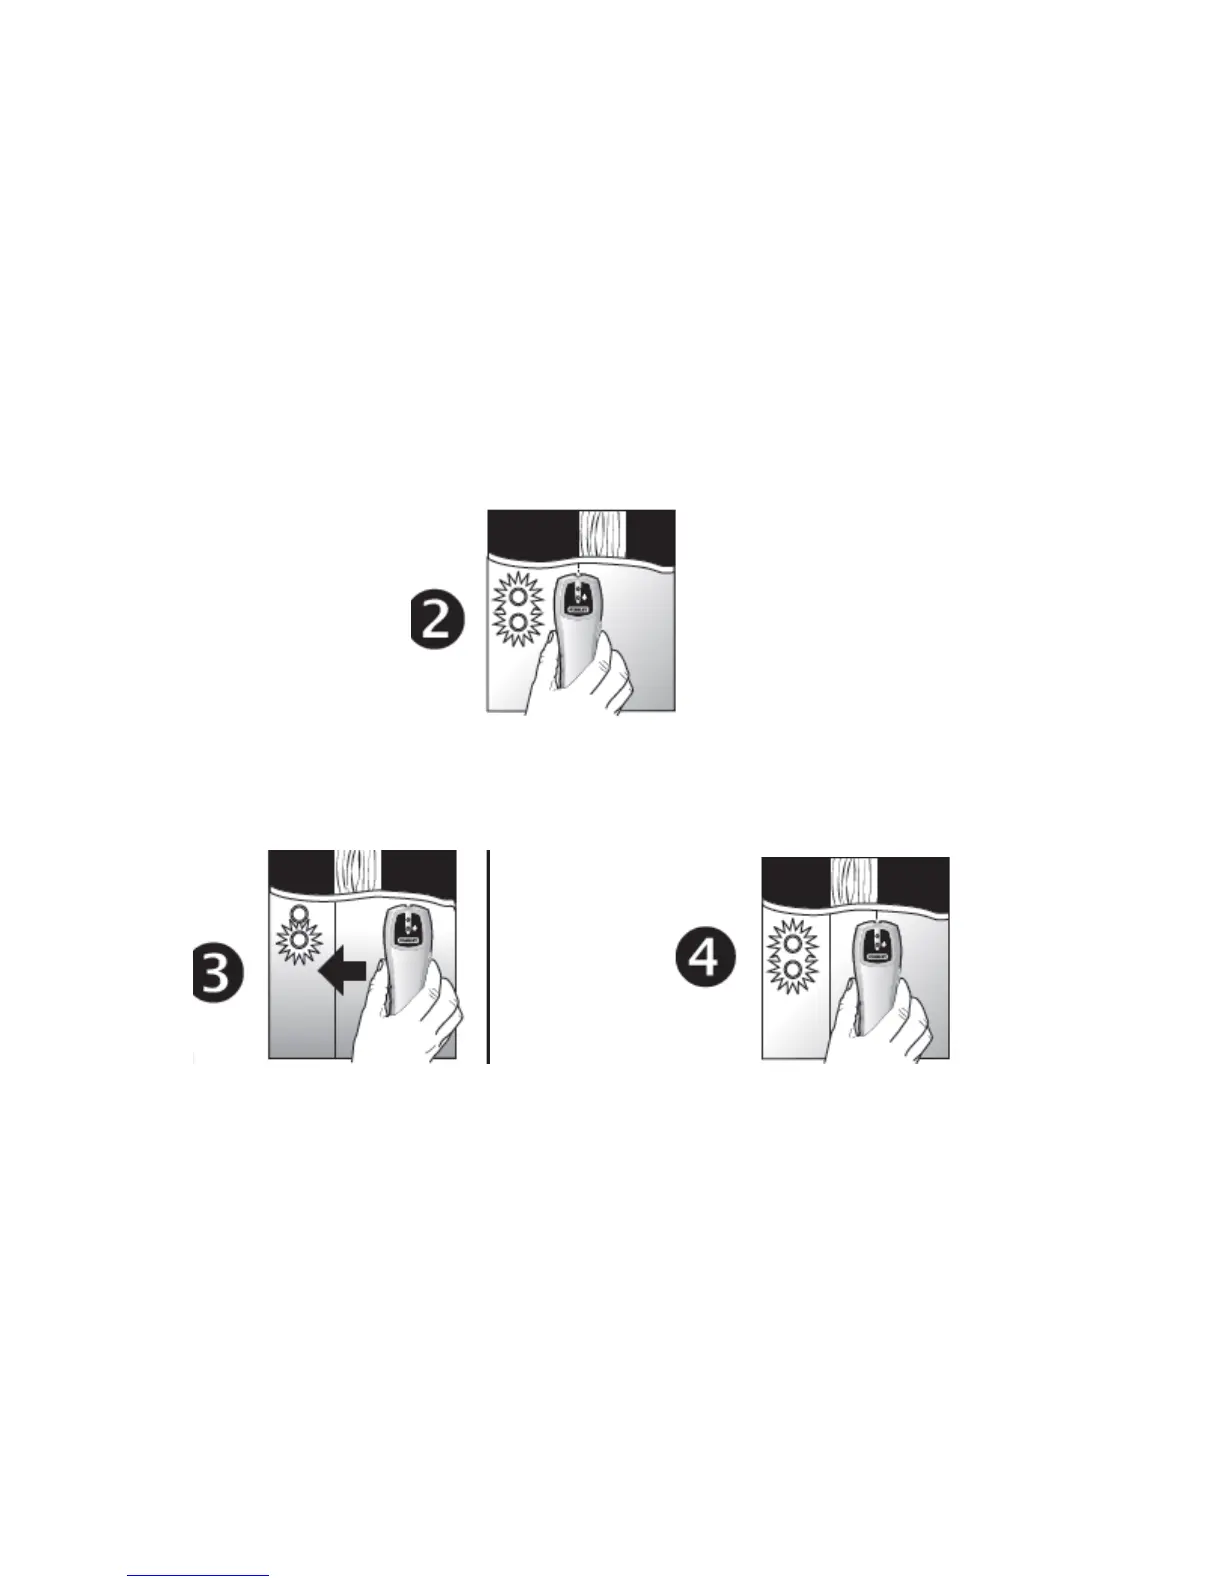
Slide the Stud Sensor 75 slowly across the surface in a straight line. As it
detects a stud edge, the red LED will go on and an audible tone will be
heard.
• Use the handy pencil notch located at the top of the unit to mark the stud
edge
.
3. and 4. Repeat the above steps from the other side of the stud. Coming
from the opposite direction, mark the other edge of the stud. The midpoint
of the two marks indicates the stud center.
Cautions on Operating
The proximity of electrical wiring or pipes to the surface of the wall may
cause the Stud Sensor 75 to detect them as studs. You should always use
caution when nailing, cutting or drilling in walls, ceilings and floors that may
contain these items. Always remember that studs or joists are normally
spaced 16 inches or 24 inches apart and are 1-1/2 inches in width. To
avoid surprises be aware that anything closer together or of a different
width may not be a stud.