English
10
(original instructions)
Electrical safety
#
This tool is double insulated; therefore no
earth wire is required. Always check that the
power supply corresponds to the voltage on the
rating plate.
● If the supply cord is damaged, it must be replaced by
the manufacturer or an authorised STANLEY FATMAX
Service Centre in order to avoid a hazard.
Features
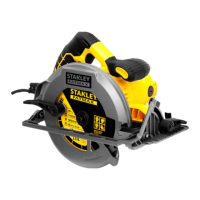
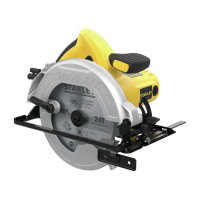
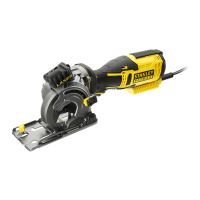
This tool includes some or all of the following features.
1. Trigger On/Off switch
2. Cutting depth scale
3. Clamp for setting cutting depth
4. Lower guard
5. Parallel guide adjustment knob
6. Parallel guide
7. Footplate
8. Clamping ange
9. Blade bolt
10. Trigger lock and shoe release button
11. Ventilation slots
12. Laser sight
13. Connection for dust extraction
14. Spindle-lock button
15. Hex key
16. Diamond saw blade
17. Hardened steel saw blade
18. TCT saw blade
19. Dust extraction hose
20. Line-of-cut indicator
Assembly
Check for damage to the tool, parts and accessories which
may have occurred during transportation.
Take some time to read this manual carefully and understand
all the content prior to assembly and operation.
Use
@
Warning! Let the tool work at its own pace. Do
not overload.
Switching on and off (g. A)
Note: Before engaging the on/off switch, check the saw blade
to see if it is tted properly and runs smoothly, and the blade
clamp screw is well tightened.
● Push the trigger lock and shoe release button (10) to
release the trigger.
● Switch on tool by pulling trigger switch (1).
● Switch off tool by releasing trigger switch (1).
Adjusting cutting depth (0-28,5 mm) (g.B)
● Loosen clamp (3).
● Set desired cutting depth using scale (2).
● Tighten clamp (3)
● For an optimal quality cut, the saw blade should not
extend more than 3 mm below the workpiece
● Be aware that the actual depth of cut of the diamond
disc differs approx. 2 mm from the depth of cut indicated
on scale (2).
Note: Always make trial cuts rst to verify actual line of cut.
Dust suction (g.C)
● Connect vacuum cleaner hose (19) to connection (13) and
vacuum cleaner as illustrated.
@
Warning! Never let the vacuum cleaner hose
interfere with the lower guard or the cutting
operation.
@
Warning! Do not use vacuum cleaner when
cutting metal.
Changing saw blade (g. D - G)
@
Warning! Before changing blades or performing
any maintenance, ensure the tool is off and
disconnected from the power source.
● Set cutting depth to the maximum (g. D).
● Use hex key (15) provided.
● Push spindle-lock button (14) and hold (Fig. E).
Remove blade bolt (9) by turning hex key (15)
CLOCKWISE (= in same direction as arrow imprinted on
the guard) (Fig. F).
● Release spindle-lock button (14).
● Remove ange (8).
● Press button (10) with your thumb
● Lift up foot (7) and remove saw blade.
● Install new blade making sure that rotation of blade is in
same direction as arrow imprinted on the guard.
● Mount ange (8).
● Firmly tighten blade bolt (9) by turning hex key (15)
COUNTER-CLOCKWISE while pushing spindle-lock
button (14).
● Release spindle-lock button (14).
Operating the tool (g. H - M)
● Set desired cutting depth.
● Connect plug to power source.
● Press button (10) with your thumb.
● Place tool with front end of foot at on workpiece.
● Tilt tool forward with line-of-cut indicator (20) lined up with
desired line of cut marked on the workpiece (g. H).
● Ensure that the saw teeth are not engaged into the
workpiece.
● Switch on the tool.
● The tool should run at full speed before the blade enters
into the workpiece.
● Do not force the tool (apply light and continuous
pressure in order to avoid overheating the blade tips and,
in case of cutting plastics, melting the plastic material).
● While working, always hold the tool at the insulated grip
area(s).
● After completing the cut switch off tool by releasing trigger
(1).
 Loading...
