(Original instructions)
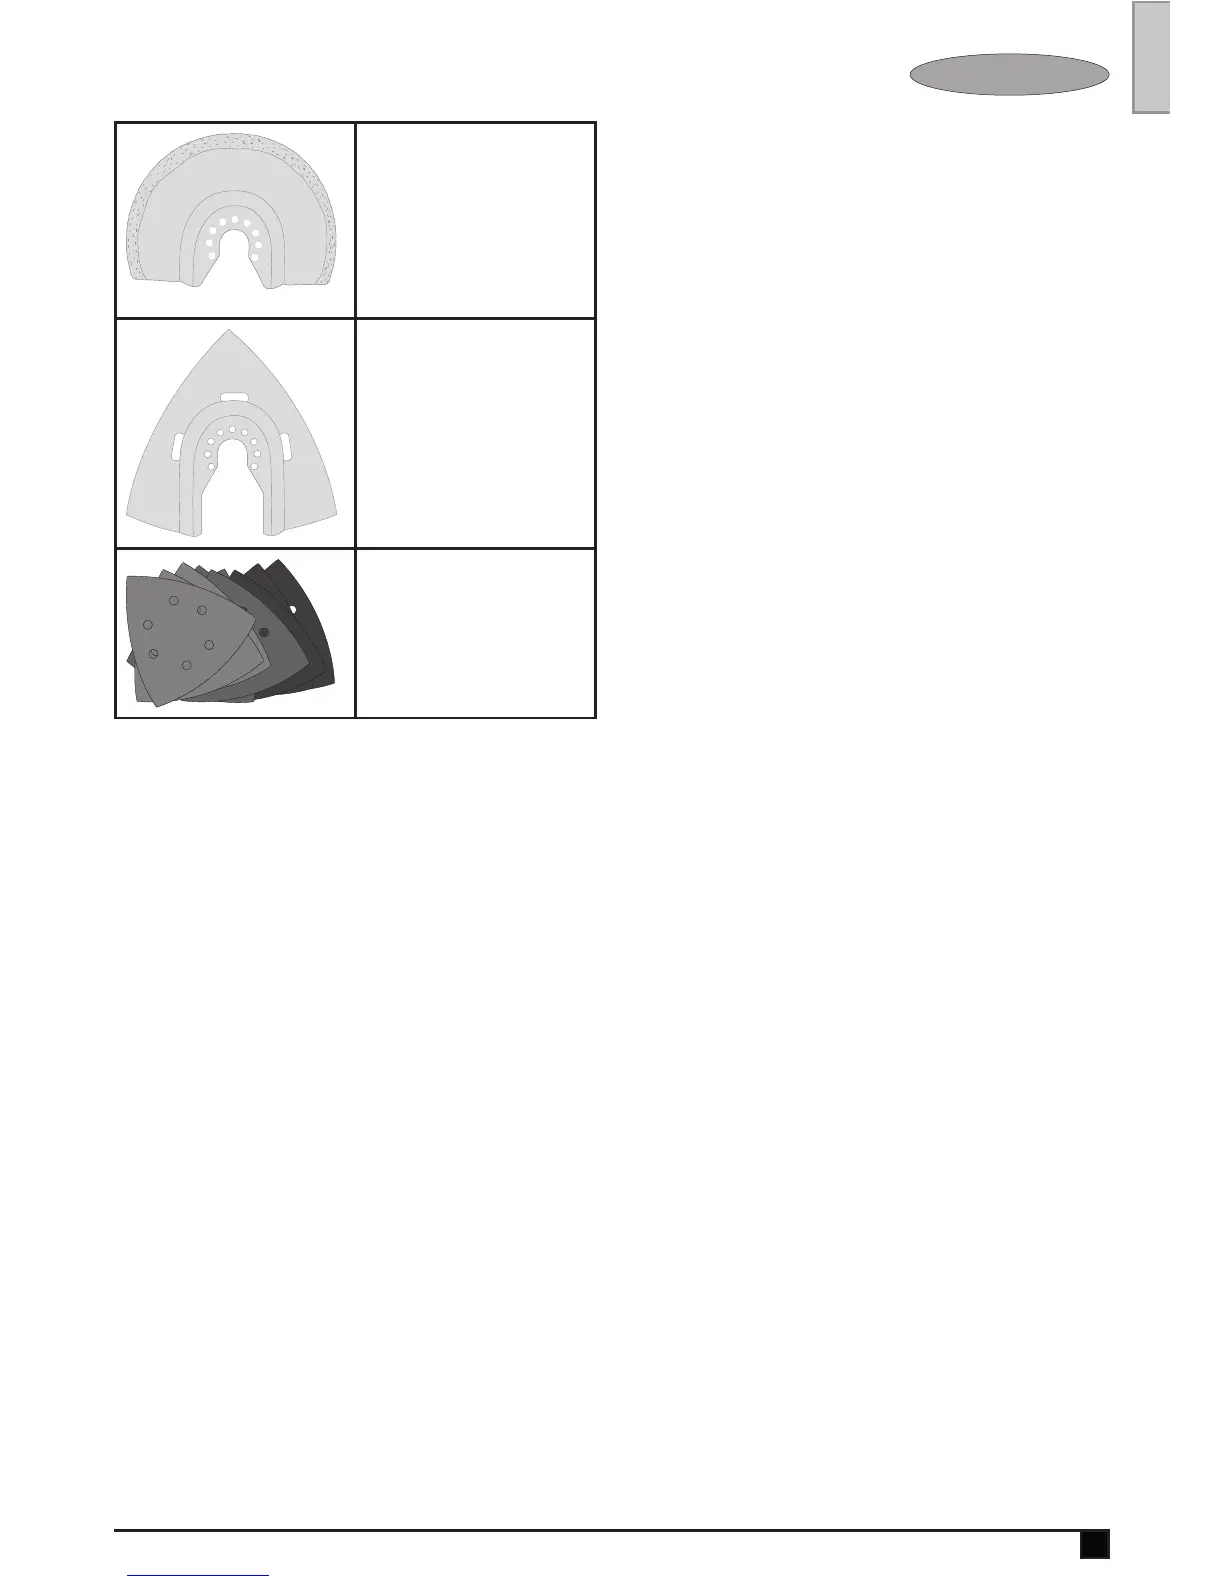
Carbide grout removal blade.
(Part number - STA26125-XJ)
Carbide coated surface ideal for
clearing grout and tile adhesive from
at surfaces and for fast stock
removal of wood, chipboard and
breglass.
Carbide rasp.
(Part number - STA26130-XJ)
Carbide coated surface ideal for grout
removal and for fast stock removal of
plastics, chipboard and breglass.
Sanding Sheets.
(Part number - STA32348-XJ)
Various grades for sanding of wood,
painted and varnished surfaces.
Assembly
Fitting and removing the accessories (g. A - G)
Warning! Before tting an accessory, disconnect the tool from
the mains supply.
Fitting a Stanley Fat Max accessory (g. A - C)
u Hold the tool and squeeze the accessory clamping lever
(3).
u Slide the accessory (9) between the shaft and the acces-
sory holder making sure the accessory engages all eight
pins on the holder and is ush with the shaft.
u Release the accessory clamping lever.
Note: Some accessories, such as scrapers and blades can be
mounted at an angle if required (g. C).
Removing a Stanley Fat Max accessory accessory (g. A)
u Hold the tool and squeeze the accessory clamping lever
(3).
u Pull the accessory from the tool making sure the acces-
sory dis-engages from all eight pins on the holder.
u Release the accessory clamping lever.
Warning: Gloves must be worn when removing accessories
as then may become hot during use.
Fitting a sanding sheet (g. D)
u Line up the sanding sheet (10) with the sanding base (4)
as shown.
u Press the sheet rmly and evenly onto the sanding base,
making sure that the holes in the sheet coincide with the
holes in the base.
Removing a sanding sheet
u Pull the sanding sheet off the sanding base (4).
Warning! Never use the sanding base without a sanding
sheet or accessory in place.
Fitting the dust extraction adaptor (g. E)
u Line up the dust extraction adaptor (5) with the sanding
base (4) as shown.
u Press the adaptor rmly and evenly in to the sanding
base.
u Secure the adaptor by turning the locking nut (11) clock-
wise.
u Connect a vacuum cleaner to the dust extraction adaptor.
Removing the dust extraction adaptor
u Turn the locking nut (11) anti-clockwise.
u Pull the dust extraction adaptor (5) out of the sanding
base (4).
Fitting the depth/cut guide (g. F)
The depth/cut guide allows you to precisely cut material at a
specied depth and more accurately track a marked cut line.
u Attach the depth/cut block (8) by inserting the tabs on the
guide into the slots on the main body.
u Secure the block to the main body with the bolt (12) and
tighten with the supplied hex wrench.
u Insert the guide (13) into the requried position and secure
by turning the depth/cut adjustment knob (14) clockwise.
Fitting alternative accessories (g. G)
u Place the spacer (6) onto the collar (15).
u Place the alternative accessory (16) onto the collar (15).
u Firmly attach the xing bolt (7) into place to ensure a tight
t for the alternative accessory (16).
Note: The spacer and xing bolt are not used to attach
Stanley Fat Max accessories. Stanley Fat Max accessories
are attached using the Super-lok
TM
Tool free accessory clamp-
ing lever.
 Loading...