GB
15
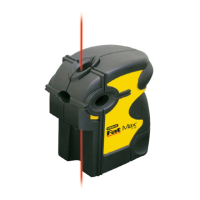
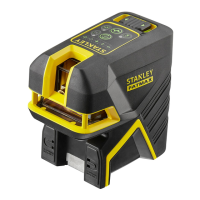
Operating the Laser
Because the laser tool is a high precision instrument, it is
preferable to use the remote (if provided) whenever possible.
Correcting a Tilt Warning
(Not available in Manual Mode)
If the laser is disturbed during operation the Tilt Warning LED
changes from solid RED to ashing RED and the laser
stops rotating and starts ashing. (Tilt Warning is on by default
when the laser tool leaves the manufacturer.)
To correct a Tilt Warning:
1.
Check the laser tool to make sure it is positioned correctly.
2.
Press the key to reset the Tilt Warning.
3.
The laser Auto-Levels then begins rotating.
4.
Check the laser tool's alignment with the original target.
Turning the Tilt Warning Off
(Not available in Manual Mode)
1.
Power on the laser tool and wait for Auto-Leveling to
complete.
2.
Press the key.
3.
The Tilt Warning LED changes from solid RED to off.
4.
To turn the Tilt Warning back on, press the key.
Changing the Tilt Warning Default
Setting
1.
When powered OFF, press and hold the key then press
the key.
2.
Release both keys.
3.
If the Tilt Warning LED is ON (red), the default Tilt Warning
setting is ON. If the Tilt LED is OFF, the default Tilt Warning
setting is OFF.
The Laser tool begins Auto-Levelling.
4.
Repeat the above steps to toggle the Tilt Warning setting
ON/OFF.
Using Manual Mode
Manual Mode allows the laser tool to be placed at a range of
angles. The laser does not Auto-Level and the Tilt Warning is
set to OFF. Because Auto-Levelling is OFF, the beam is not
guaranteed to be level.
1.
After powering on the laser tool, press and hold the key
for ≥ 2 seconds to turn Manual Mode ON/OFF.
Note: When Manual Mode is activated, the rotary laser
plane remains xed with respect to the laser tool.
2.
Manual Mode is indicated by the ashing RED
LED.
Note: Auto-Levelling is OFF in Manual Mode.
3.
The Laser tool can be manually positioned at any angle.
4.
Press and hold the key for ≥ 2 seconds to turn Manual
Mode OFF. The laser tool begins Auto-Levelling.
Using Manual Slope Mode
Manual Slope Mode allows the user to adjust the slope of
the rotary laser in the X-axis and the Y-axis in a horizontal
(Figure Ⓐ) or vertical (Figure Ⓑ) position.
1.
When powered ON, press the key once. Manual Mode
turns on, indicated by the ashing RED LED.
Auto-Levelling is OFF and Tilt Warning is disengaged.
2.
A solid GREEN X/Y Select LED indicates X-axis
adjustment is active. If X-axis adjustment is not required,
proceed to Step
5.
.
3.
Press the key to adjust the X-axis up. Press the key
to adjust the X-axis down. Figure Ⓜ illustrates how and
affect each axis.
NOTE: Holding or down slopes the axis
continuously. The rate of slope change increases over time.
Pressing or once adjusts the slope by 0.01°.
4.
The X/Y Select LED will ash GREEN when the
maximum slope angle is reached. The axis will not move
any further in the X direction.
5.
Press the key again to set the X-axis and activate Y-axis
adjustment.
6.
A solid RED X/Y Select LED indicates Y-axis
adjustment is active. If Y-axis adjustment is not required,
proceed to Step
9.
.

 Loading...