• The air supply must be disconnected.
• Unscrew the Nose Casing (76003-15001), including the Nose Piece, and ORing.
• Using spanners, separate and remove the Pulling Head (76003-15002) and Jaw Guide Assembly from the
Pulling Head Adapter (76003-15003).
• Using spanners, then unscrew the Pulling Head Adapter (76003-15003) from the tool piston.
FITTING THE NOSE EXTENSION ASSEMBLY 76003-20200
IMPORTANT - READ THE SAFETY WARNINGS LISTED IN THE PROSET XT3 AND PROSET XT4 INSTRUCTION
MANUAL CAREFULLY BEFORE PUTTING INTO SERVICE.
IMPORTANT - THE AIR SUPPLY MUST BE TURNED OFF OR DISCONNECTED BEFORE FITTING OR
REMOVING THE NOSE EXTENSION KITS.
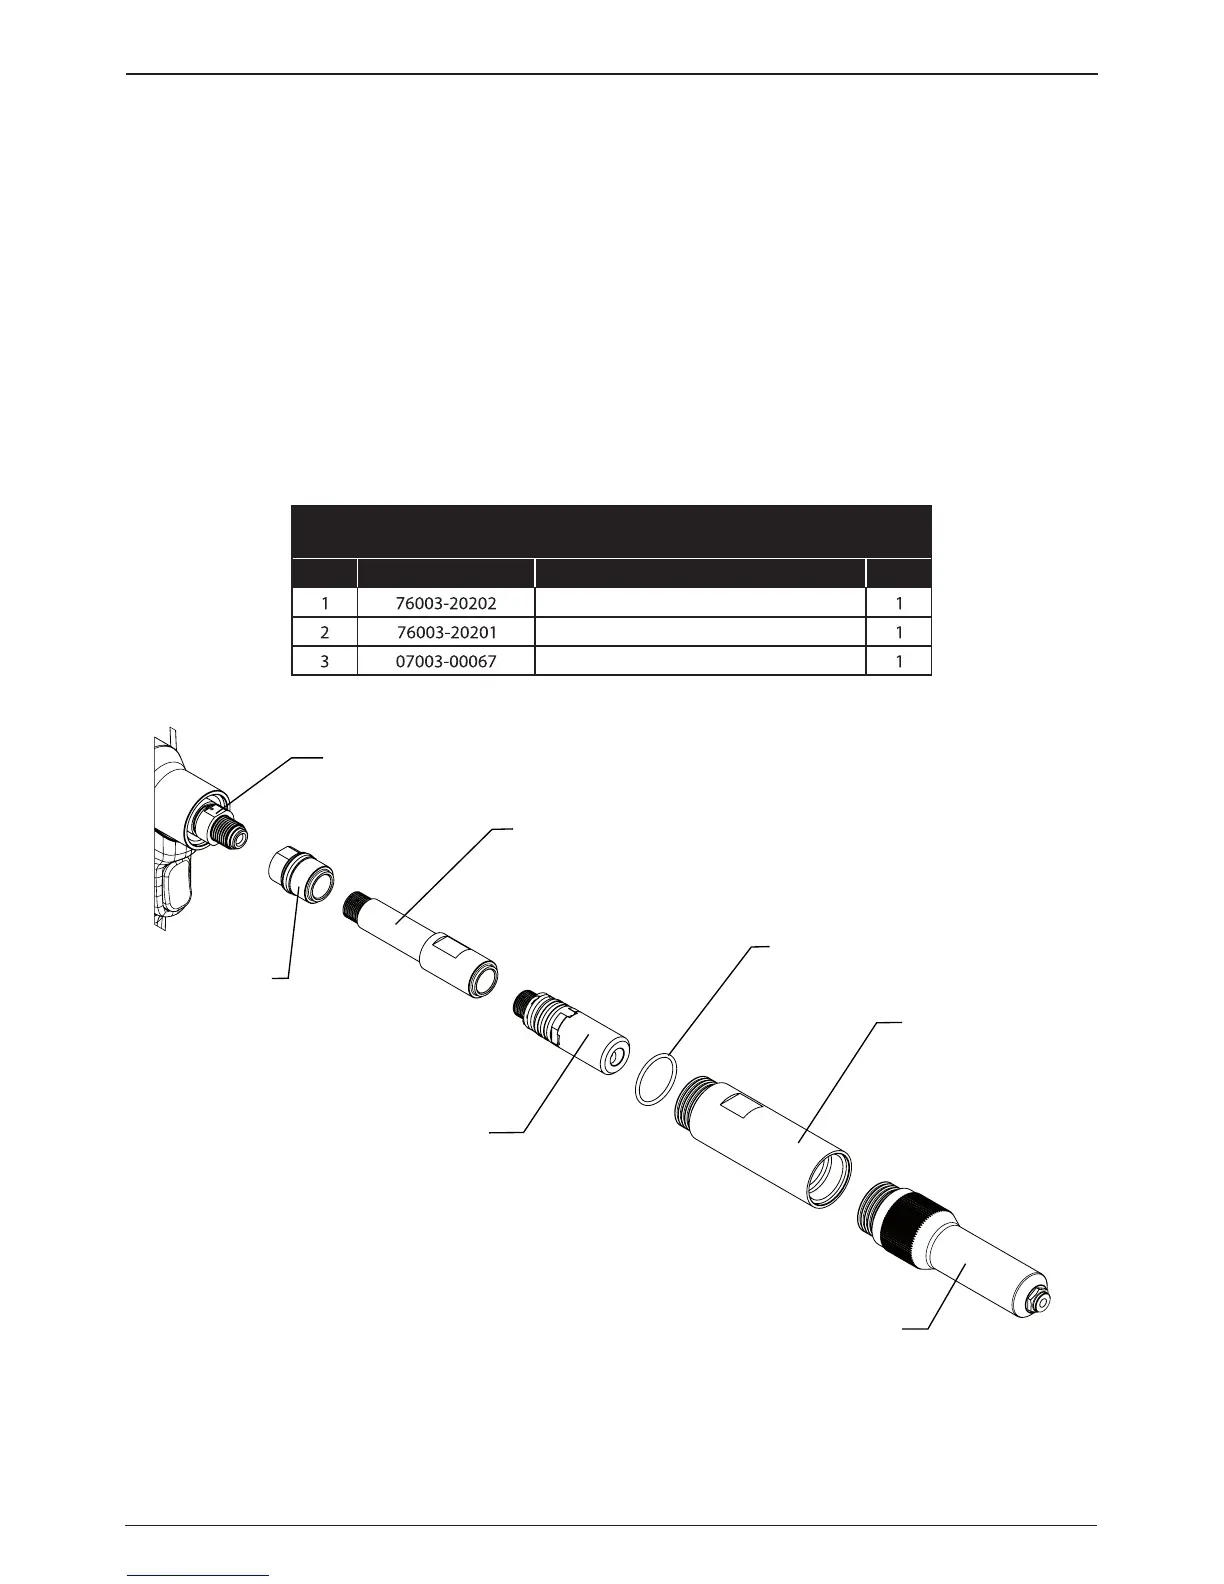
Refer to g. 14 and Table 6.
Table 6 - PARTS LIST - NOSE EXTENSION ASSEMBLY
76003-20200
Item Part Number Description Qty
Nose Casing Extension - XT3
Pulling Head Extension
ORing
FIGURE 2
6
D
C
B
A
E
F
G
H
E
A
B
C
D
F
5
4
3
2
1
7
8
9
10
11
12
1
2
3
4
5
6
7
8
G
Manual Images
WEIGHT
PART
NUMBER
PART
DESCRIPTION
EN 20286/BS 1916-H11
SURFACE
TEXTURE
DRILL
ANGULAR
1/2 DEGREE
N8
DECIMAL
0.13mm
INCH DIMENSIONS IN PARENTHESES
REMOVE ALL BURRS AND SHARP EDGES
DIMENSIONS IN mm UNLESS STATED
LUBRICATION
This document is the property of Avdel UK Limited
and is issued on the express terms that it is to be
treated as private and confidential and is not to
be communicated to any other person.
All patents, manufacturing and design rights are
reserved by Avdel UK Limited.
Avdel UK Limited
Pacific House, 2 Swiftfields,
Watchmead Industrial Estate,
Welwyn Garden City,
Hertfordshire, AL7 1LY
Registered in England: No. 315076
C.N.
ISSUE
DRAWING
DESCRIPTION
SURFACE TREATMENT
DRAWN
DATE
HEAT TREATMENT
LIMITS
UNLESS
STATED
MATERIAL
Sheet:
Manual Images
A2
1 of 1
2:3
DRAWING
NUMBER
Scale:
Revision:
Size:
DO NOT SCALE
Fig. 14
Locknut
71210-02103
2
Pulling Head
Extension
3
ORing
1
Nose Casing
Extension
Nose Casing
76003-15001
& Nose Tip
Pulling Head
76003-15002
& Jaw Guide
Assembly
Pulling Head
Adapter
76003-15003
• The air supply must be disconnected.
• Install the Pulling Head Adapter (76003-15003) fully onto the tool piston and then tighten the locknut
(71210-02103) against it.