14
- Do not connect the power tool before starting the
motor.
- Move the choke lever (13) to position IØI.
- Open the petrol cock (16) by turning it down.
- Move the ON/OFF switch (12) to position "I”.
- Turn the electric starter (15) with the key to the “START”
position until the motor has started.
- Push the choke lever (13) back again after the engine
has started.
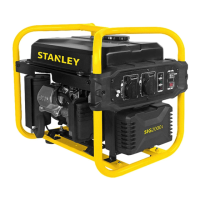
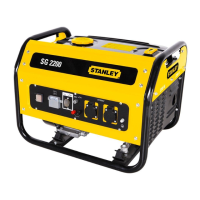
7.3 Connecting consumers to the generator
Connect the equipment you want to use to the socket-
outlets (3/4)
Important:
- These sockets may be loaded continuously (according
S1value) and temporarily (according S2 value).
- Do not connect the generator to the domestic power
network as this may result in damage to the generator
itself or to other electrical appliances in your home.
Note: Some electrical appliances (power jigsaws, drills,
etc.) may have a higher level of power consumption
when used in difficult conditions.
7.4 Switching off the engine
- Before you switch off the generator, allow it to run
briefly with no consumers so that it can "cool down”.
- Move the ON/OFF switch (12) to position "O”.
- Close the petrol cock.
7.5 Overload cut-out for socket-outlets
Important! The generator is fitted with an overload cut-
out.
This shuts down the sockets (3). You can restart the
sockets (3/4) by pressing the overload cut-out (7).
Important! If this happens, reduce the electric power
you are taking from the generator or remove any
defective connected appliances.
Important! Defective overload cut-outs must be replaced
only by overload cut-outs of identical design and with the
same performance data. If repairs are necessary, please
contact your customer service center.
8. Cleaning, maintenance and storage
Switch off the motor and pull the spark plug boot
from the spark plug before doing any cleaning and
maintenance work on the equipment.
Important: Switch off the machine immediately and
contact your service station:
- In the event of unusual vibrations or noise.
- If the engine appears to be overloaded or misfires.
8.1 Cleaning
- Keep all safety devices, air vents and the motor
housing free of dirt and dust as far as possible. Wipe the
equipment with a clean cloth or blow it with compressed
air at low pressure.
- We recommend that you clean the device immediately
each time you have finished using it.
- Clean the equipment regularly with a moist cloth and
some soft soap. Do not use cleaning agents or solvents;
these could attack the plastic parts of the equipment.
Ensure that no water can seep into the device.
8.2 Air filter (Fig. 15-16)
In this connection, please also read the service
information.
- Clean the air filter at regular intervals, and replace it if
necessary.
- Open both clips and remove the air filter cover (Fig 15).
- Remove the filter elements (Fig. 16).
- Do not use abrasive cleaning agents or petrol to clean
the elements.
- Clean the elements by tapping them on a flat surface.
In cases of stubborn dirt first clean with soapy water, and
then rinse with clear water and air dry.
- Assemble in reverse order.
8.3. Spark plug (Fig. 17)
Check the spark plug (item 29) for dirt and grime after 20
hours of operation and if necessary clean with a copper
wire brush. Thereafter service the spark plug after every
50 hours of operation.
- Pull off the spark plug boot with a twist.
- Remove the spark plug with the supplied spark plug
wrench.
8. Cleaning, maintenance and storage
G
B
 Loading...