9
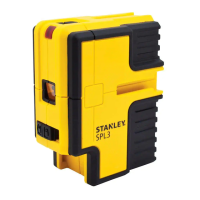
STHT77342
Keypad, Modes, and LED
Keypad /Switch (See figure
C
)
Power On/Pendulum lock off /Self-leveling On
Power Off/ Pendulum lock on /Self-leveling Off
Modes (See figure
D
)
Laser Beam Available Modes
• Horizontal&Plumb,DotBeamsOnly
Unlocked /Self-Leveling (See figures
C
)
• PowerisON,pendulumlockisOFF
andlaserunitis
withinself-levelingrange.
Locked /Self-Leveling (See figures
C
)
• PowerisOFF,pendulumlockisON.
.
LEDs (See figure
A
)
Out of level LED - SolidRED
• Unitisoutoflevel
QuickLink ™ Bracket Overview
Figure F -QuickLink ™ Bracket
10.T-nuttomatewithslotsonLaserUnit.
11.JawTighteningKnob.
12.BracketTighteningKnob.
13.Hangholesforscrewmounting.(34mmapart)
14.1/4-20”threadedmount.
15.AdjustableJaw
Bracket Applications
• TheQuickLinkbracketcanbemountedinvarious
positionsbyclampingthejawstoroundoratobjects
suchasatripodpole,doororbenchandtighteningthe
knobs.( See figure
F
: #11 & #12)
• TheQuickLinkbracketcanbemountedonavertical
surfaceusingthehangholesprovided.(See figure
F
#13)
•
• TheQuickLinkbracketcanbeattachedtothebottom
ofthelaserunitusingthe1/4-20”threadedmount
(Figure
F
#14 and figure
A
#1) orthet-nutand
slotconnection.
Batteries and Power
Battery Installation / Removal
(See figure
B
)
Laser Tool
• Turnlasertooltobottom.Openbatterycompartment
coverbypressingandslidingout.
• Install/Removebatteries.Orientbatteriescorrectly
whenplacingintolasertool.
• Closeandlockbatterycompartmentcoverbyslidingin
untilsecurelyclosed.
WARNING:
• Paycloseattentiontothebatteryholder’s(+)
and(-)markingsforproperbatteryinsertion.
Batteriesmustbeofsametypeandcapacity.
Donotuseacombinationofbatterieswith
differentcapacitiesremaining.

 Loading...