Manual Development Template
GT&S Tech Docs Graphics Req #: XXXX
9
4. If the measurement changes at the point where the crosshair
moves on and off the vertical edge, your laser is correctly
aligned. If this does not happen at the correct point, tap on
the left and right blue arrows ➌ to adjust to the correct point.
5. Turn your device horizontally and aiming at the same two
objects, repeat steps 3 and 4 to align the laser horizontally.
Measuring With Your Smart Measure Pro
Measurements taken with your Smart Measure Pro should be used for estimating purposes. Because
these measurements are reliant on user input, it is recommended you become familiar with the
measurement process and practice the technique prior to using the measurements obtained with your
device.
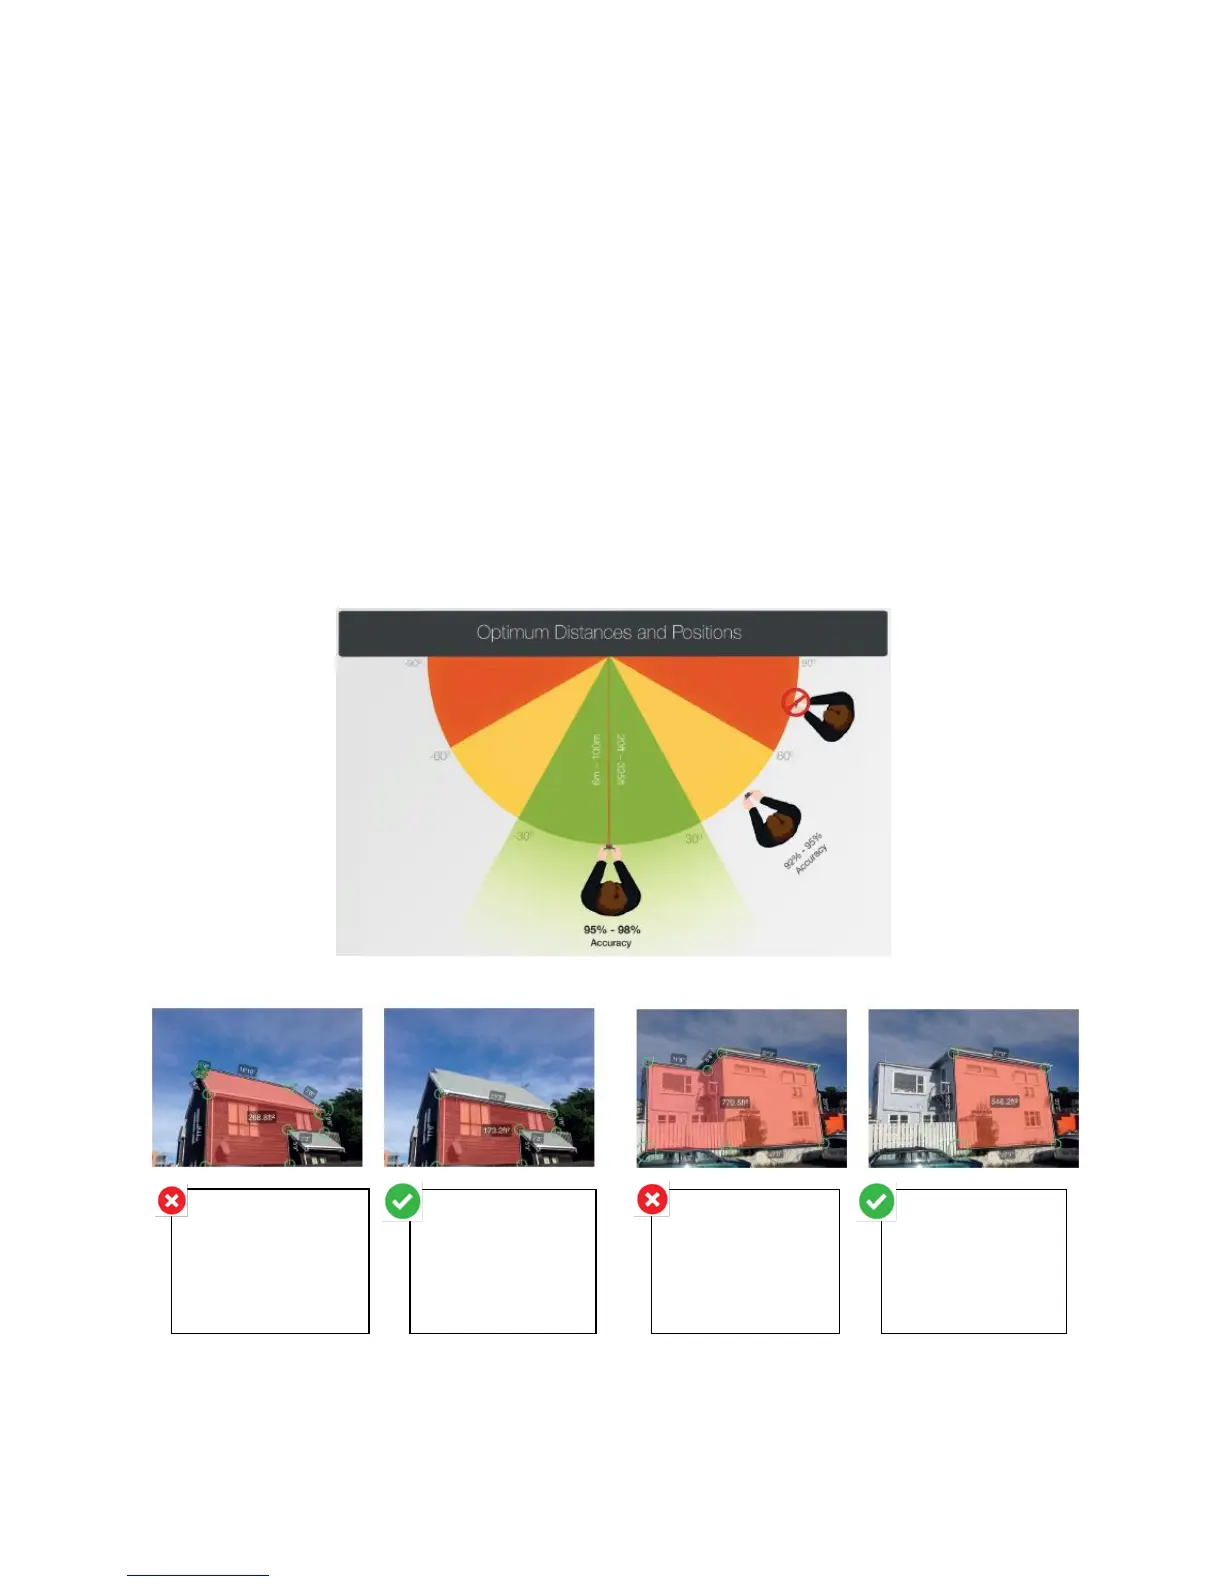
To measure accurately with your Smart Measure Pro, you need to ensure that:
1. Your target is a flat surface and is all on the same plane.
2. Your target is or has a rectangular shape on it (to align the object).
3. Your laser (cross-hair on the screen) is pointed at your target. The crosshair should be on a solid
surface and not a window.
4. You are perpendicular to the target. Please reference the following target distance and
positioning guide when taking a Smart Measure Pro photo.
You cannot measure an object or objects that are on different planes. Below are some examples:
Taking a Photo of the Object to Measure
1. Point your device at the object you wish to measure, ensuring that the crosshair is on the target.
The side of the
house and the roof
are on different
planes, so
measurements will
be incorrect.
The side of the
house is all on the
same plane, so
measurements
will be correct.
The side of the
house is on a
different plane, so
measurements will
be incorrect.
The side of the
house that is all
on one plane is
being measured,
so measurements
will be correct.