GB
13
GB
7.
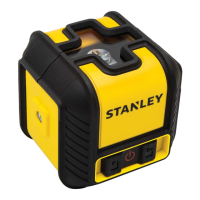
On the keypad, make sure:
•
is solid RED (Figure Ⓗ ①).
•
turns ON (Figure Ⓑ ②).
8.
Use the laser tool.
9.
When you are nished using the laser tool in the Vertical
Position, press
to turn the laser tool OFF.
Performing Accuracy Checks
NOTE:
• The laser tool is sealed and calibrated at the factory to the
Rotary Laser Specications listed in this manual.
• It is recommended that you perform the accuracy checks
before using the laser tool.
• Be sure to allow the laser tool adequate time to Auto-Level (at
least 5 seconds) prior to performing an accuracy check.
• The laser tool should be checked regularly to ensure its
accuracy, especially for precise layouts.
Horizontal Check
1.
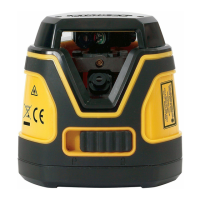
Mount the laser tool in its horizontal position (Figure Ⓐ ①)
on a tripod 5m from a wall, with the front of the laser tool
facing the wall (Figure Ⓝ ①).
2.
Power ON the laser tool in Self-Levelling Mode
(Figure Ⓜ ①).
3.
Wait 5 seconds for the laser tool to Auto-Level and make
sure the rotary laser beam is rotating.
4.
Where the laser line appears on the wall, mark point D
1
(Figure Ⓝ ①). If available, use a detector to more easily
locate the beam.
5.
Turn the laser tool 180° on the tripod. The back of the laser
tool should now be facing the wall (Figure Ⓝ ②).
6.
Where the laser line appears on the wall, mark point D
2
(Figure Ⓝ ②).
7.
Measure the vertical distance between points D
1
and D
2
(Figure Ⓝ ③).
• If the distance between D
1
and D
2
is < 2.0mm,
calibration is not required. You can continue using your
laser tool.
• If the distance between D
1
and D
2
is ≥2.0mm, you must
have your laser tool calibrated at an authorized Stanley
service center. To locate your nearest Stanley service
center, go to www.2helpU.com.
8.
Turn the laser tool 90° so the left side faces the wall
(Figure Ⓝ ④).
9.
Repeat steps
4.
through
7.
for the sides of the laser tool.
Vertical Check
1.
Mount the laser tool in its vertical position (Figure Ⓐ ②) on
a level tripod 1m from a wall that is at least 2m high, with
the left side of the laser tool facing the wall (Figure Ⓞ ①).
2.
Power ON the laser tool in Manual Mode (Figure Ⓜ ②).
3.
Where the rotary laser beam appears on the oor 1m from
the wall, mark point A (Figure Ⓞ ①):
4.
Where the rotary laser beam, the oor, and the wall all
meet, mark point B.
5.
Where the rotary laser beam appears 2m up the wall, mark
point D
1
.
6.
Turn the laser tool 180° on the tripod. The right side of the
laser tool should now be facing the wall (Figure Ⓞ ②).
7.
Move the level tripod to align the rotary laser beam with
points A and B.
8.
Where the laser beam appears on the wall 2m above the
oor, mark point D
2
(Figure Ⓞ ②).
9.
Measure the horizontal distance between points D
1
and D
2
(Figure Ⓞ ②).
• If the distance between D
1
and D
2
is < 1.2mm,
calibration is not required. You can continue using your
laser tool.
• If the distance between D
1
and D
2
is ≥1.2mm, you must
have your laser tool calibrated at an authorized Stanley
service center. To locate your nearest Stanley service
center, go to www.2helpU.com.

 Loading...