EasyManua.ls Logo

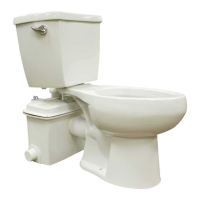
Star PowerFlush Optima S1202 User Manual

Star PowerFlush Optima S1202
22 pages
To Next Page IconTo Next Page
Page #1 background imageLoading...
Page #1 background image
1
POWERFLUSH OPTIMA
MODEL #
S1201/S1202/S1203
ATTACH YOUR RECEIPT HERE
Purchase Date
STOP
For missing, damaged parts or technical help, Call
1-800-742-5044
before returning product
For replacement pump, order N202RP
or see complete repair parts list on page 22
P/N 018547 G
Product information presented
here reflects conditions at time
of publication. Consult factory
regarding discrepancies or
inconsistencies.
MODEL NO. ___________________
DATE CODE: __________________
DATE INSTALLED: _____________
Patent No. 7,203,976,
8,562,287
Quality Products
Since 1866!

Questions and Answers:

Star PowerFlush Optima S1202 Specifications

General IconGeneral
Bowl ShapeElongated
MaterialVitreous China
Installation TypeFloor Mounted
Flush Volume1.28 GPF
Water EfficiencyHigh Efficiency (HET)
Seat TypeSlow-Close

Summary

Product Information and Support

Contact Information

Provides the main customer service phone number for technical help and product inquiries.

Safety Information

Electrical Shock Hazards

Details risks and requirements for proper grounding and GFCI protection for electrical safety.

Electrical Shock Alerts

Emphasizes safety measures regarding ground fault interrupters, extension cords, and circuit protection.

Safety and Precautions

Electrical Shock Alerts (Continued)

Highlights the need for qualified electricians for electrical work and outlet testing.

Dimensions and Site Selection

Toilet Assembly Instructions

Tank to Bowl Gasket Installation

Details on installing the gasket between the toilet tank and bowl.

Securing the Toilet Tank

Instructions for attaching the tank to the bowl using bolts and washers.

Tightening and Leveling Precautions

Guidance on tightening nuts for a watertight seal and avoiding china cracks.

Water Hookup and Exposed Installation

Exposed Installation Details

Hidden Installation Procedure

Piping Installation Guide

Discharge Pipe Fitting

Instructions for cutting and dry-fitting the 1" discharge pipe and marking unit location.

Vent Pipe Installation

Guides on cutting and dry-fitting the 1-1/2" vent pipe with a street elbow.

Fitting Configurations

Details using 90° discharge fitting and street elbow, or straight pipe for hidden installations.

Piping Connections

Checking Pipe Interference

Temporarily places the toilet to check for piping interference before final connection.

Connecting Discharge Piping with Glue

Connects discharge piping using PVC glue, cautioning about the check valve assembly.

Vent Piping Connection

Connects vent piping using a 2-step PVC gluing system for proper venting.

Toilet Installation Steps

Final Toilet Installation

Final System Checks

Operational Flush Test

Tests flushing for proper operation, pump start, venting, and checks for leaks.

Adding Other Fixtures

Troubleshooting Guide

Pump Not Starting or Running

Lists causes like low voltage or bound impeller, with remedies.

Pump Starting Prematurely

Addresses float switch adjustment issues and their solutions.

Excessive Water Level Before Pump

Covers air locks and low water levels, providing remedies for each.

Pump Not Shutting Off

Details issues like debris under the float or faulty switches and their solutions.

Low Water Delivery

Troubleshoots blockages, debris, low voltage, and high vertical lift.

Replacement Parts

Related product manuals