- Although finalized CD-R disc may be played on ordinary CD players, remember that finalized CD-RW disc may not play
on ordinary CD players.
- Owing to the variance of the compatibility of CD-R or CD-RW disc from the market. Please change to other one if you find
the recording performance of existing one is not up to satisfaction. This is not the malfunction of the system.
E-6
v) Erase or un-finalize a CD-RW disc
It is possible to erase the last recorded track or erase a whole record disc.
If erase the last track of the finalized cd-rw, must un-finalized the CD-RW first
A) un finalize a CD-RW disc
1. set at CDII function mode and place the CD-RW disc you would like to un-finalize.
2. Press the “ Erase “ button (34) at CDII stop mode & display will show “UNFin-d” then press the “CDII Play/Pause ”
button (26) to start erasing and “ BUSY “ appear on the CD Recorder operation display area (2).
3. After finish the un-finalized, display will show total track nr. and total playing time of the disc and “ NO TOC ” indicator will
appear.
B) Erase one track
1. set at CDII function mode and place the un finalized CD-RW disc you would like to delete the track.
2. Press the “ Erase “ button (34) at CD stop mode & “Er “ and the last track nr. appear on the CD Recorder operation
display area (2).
3. Press the “CDII Play/Pause ” button (26) to start erasing the last track and “ BUSY “ disappear on CD Recorder
operation display area (2).
4. After finish the track erasing display will show total track nr. and total playing time of the disc and “ NO TOC ” indicator will
appear.
5. Repeat step 2 to 4 to continue the erasing.
C) Erase all track
1. Set at CDII function mode and place the un finalized CD-RW disc you would like to
erase all the tracks.
2. Press the “ CD Erase “ button twice (34) at CD stop mode & “Er ALL “ will appear on
the CD Recorder operation display area (2).
3. Press the “CD Play/Pause ” button (26) to start erasing and display appear
“BUSY” during erasing. Once erasing was finish, the CD Recorder operation display
area (2) will show “ 0000000 “ to confirm the erase process is completed. (Figure 7) (Figure 7)
Remark :
- This operation cannot be undo.
- The copy CD-RW disc from other system cannot be erased one by one in this unit but may be erase all is possible.
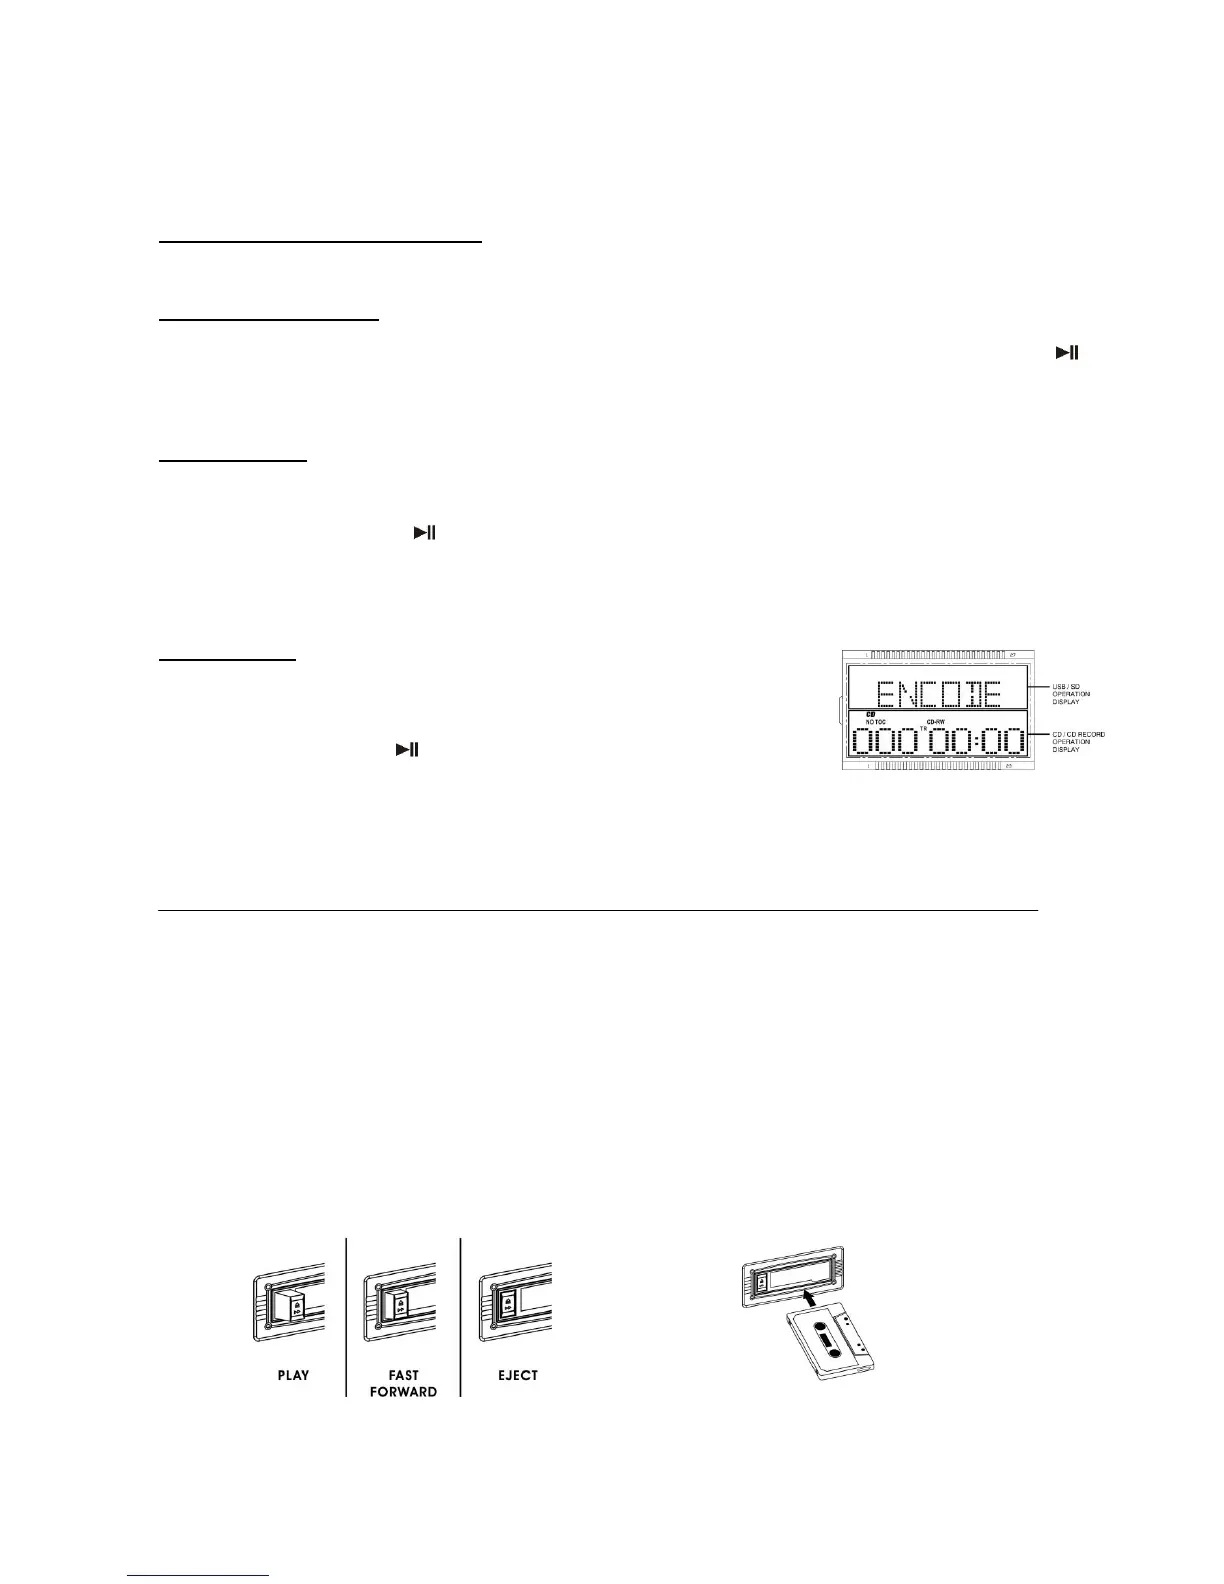
Listing to tape
General operation
Select the function switch (7) to “ SOURCE ” position. The LCD display (2) will show “ PLS SELECT FUNCTION “. Then press
the Tape button (18)
Cassette playback : The system will start the playback automatically after inserting
of cassette tape
Stop and ejection : Press the “ Cassette forward/eject “ button completely inwards
and the cassette tape will be ejected though the cassette door cover. The “ cassette forward /
eject “ button will keeping at lowest height position.
Fast forward : Press the “ tape forward / eject “ button half inwards during
Playback mode, the tape winding forward direction. The “ tape forward / eject “ button will
keeping at middle height position.
Slightly press the “ tape forward / eject “ button again to resume normal playback. The “ tape
forward / eject “ button will resume to the highest position.
Remark
- Make sure the direction is correct when inserting the tape into the system.
- There is some searching noise can be heard and the system cannot perform normal playback function during fast
forward mode.
 Loading...