NOTES:
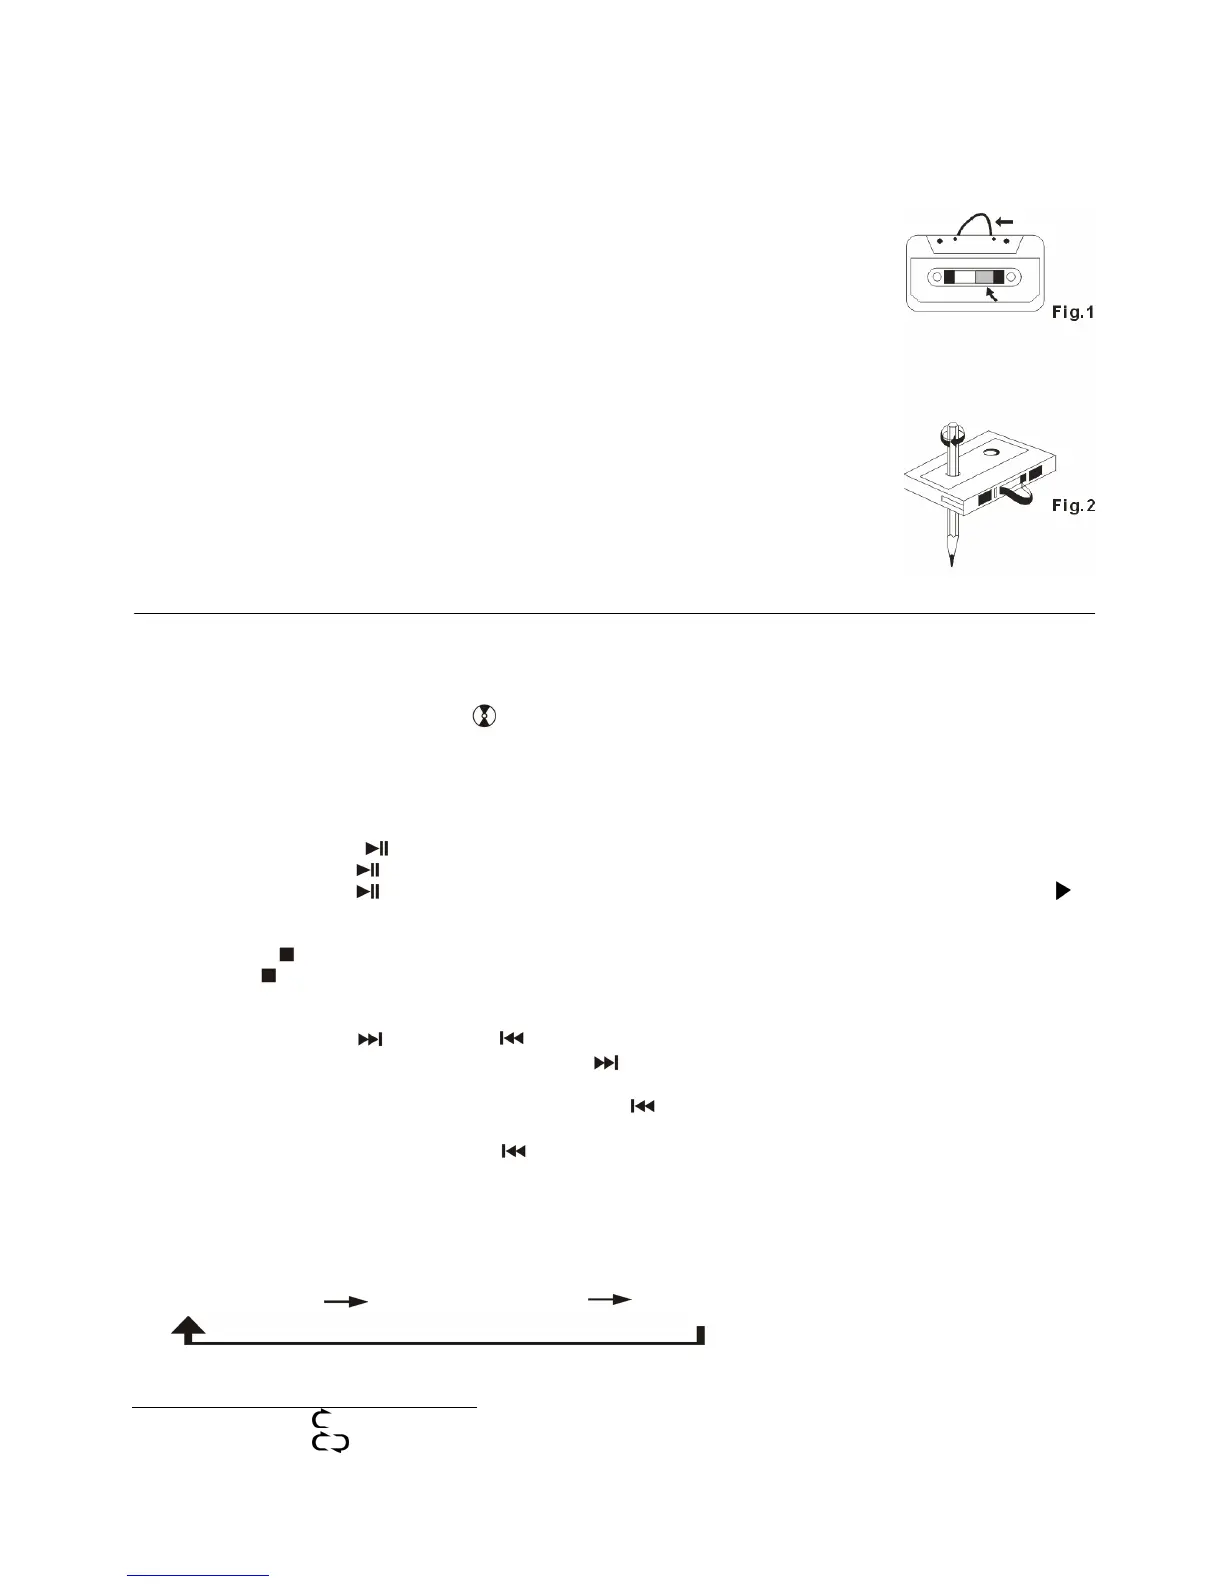
- Make sure the direction is correct when inserting a tape into the cassette slot – see line drawing.
- Some searching noise will be heard, this is quite normal.
- The system cannot perform the normal playback function during Fast Forward mode.
- It is strongly recommended the cassette tape is removed from the Cassette Player slot after each use - don’t
leave the cassette tape inside the system when you do not intend to play it
.
CASSETTE CARE
Two common causes of trouble experienced when using cassettes are:
1. Tape jamming, leading to uneven speed during playback.
2. Tape entangling, when the tape wraps itself around vital parts of the mechanism.
To avoid these problems occurring, take the following precautions:
a) Check that there are no loose layers of tape visible through the cassette centre window
(see fig. 1).
b) Take up any loose layers, using a pencil or hexagonally barrelled ballpoint pen, before
inserting the cassette (see fig. 2).
NOTES: If the cassette feels tight whilst performing this operation (see fig. 2), the tape
may be jamming due to ridges formed in the winding of the tape (visible through the centre
window). In most cases, these may be removed by fast rewinding of the cassette from
one end to the other, turning it over and repeating this action again.
Do not expose cassettes to direct sunlight, dust or oil, and do not touch the tape surfaces.
PLAYING A COMPACT DISC IN THE CD I DECK
The system has two CD Decks, CD I for playback and CD II for recording - CD I function is described below:
z GETTING STARTED
1. Slide the OFF/ON/RADIO switch (7) to the ON position, the display will show “PLS SELECT FUNCTION “.
2. Press the CD
I/AUX function button (19) to select “CD I /AUX “ Mode. The display will show “ bUSY “ for
several seconds and then display “ CD 1/AUX ” and two dashes “ - - “.
3. Press the “Open/Close” button (9) to open the CD
I drawer (15).
4. Place a pre-recorded CD with the printed side facing up inside the tray & then close the CD
I door.
5. After the unit has read the disc, the LCD display (2) will show the total number of tracks on the CD.
z PLAY / PAUSE MODE
1. Press the Play/Pause
button (10) while in Stop Mode, the first track will be played.
2. Press the Play/Pause button during playback - the music will pause temporarily and the play indicator “ ”
will start flashing on the LCD display (2). Press (10) again to resume normal playback.
z STOP MODE
1. If the Stop
button (11) is pressed during Play or Pause Mode, the music will stop playing and the total
number of tracks on the CD will show on the LCD display (2).
z SKIP MODE (SKIP UP /SKIP DOWN )
1. During play or pause Mode, press the CD
I Skip Up button (12) to go to the next track - the track number will
be displayed and the music will either continue playing or remain in pause Mode.
2. During play or pause Mode, press the CD I Skip Down
button (12) to go back to the start of the track, the
same track number is displayed and the music will either continue playing or remain in pause Mode.
3. After step 2, press the CD
I Skip Down button again if you wish to skip to the previous track, and continue
playing the music or remain in pause Mode.
z REPEAT PLAY MODE FOR CD
Press the CD
I REPEAT Play button (14) (or 17 on the RC) before or during playback, a single track or all the tracks
on the CD can be played in different Modes, as follows
:
(1) REPEAT 1 TRACK (2) REPEAT ALL TRACKS
(3) OFF MODE
INDICATOR
PLAY MODE ON LCD DISPLAY
REPEAT 1 TRACK
REPEAT ALL
OFF MODE --------------
E-4
 Loading...