7
SHA8
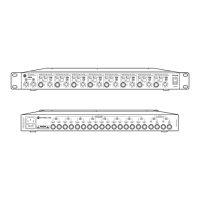
PROFESSIONAL 8-CHANNEL HEADPHONE AMP
OPERATION
A. CONNECTIONS
For connecting this unit to AC mains, please note:
Check whether the AC mains voltage and frequency is the
same as this product is specified for (see rear panel of product).
Whenever the specified voltage or your AC plug should not
match the local conditions, do NOT plug the AC cable into the
wall outlet and contact your Sterling Audio retailer immediately.
Do not operate this unit without the line cable earth ground
connected. To do so may increase the risk of electric shock and
increase line cable conducted emissions.
For making audio signal connections, always remember that
good and reliable connections are a basic requirement for
good sound and reliable operation. Bad soldering of cables
can result in intermittent audio signals or temporarily lost
ground connections, hence always use good cables. In case of
doubt about making proper connections, please see check the
standard pin assignments required for proper operation in the
following section of this manual.
B. POWERING UP
Following a proper power-up sequence protects your equipment
– specifically speakers – and your ears. Follow the below
procedure:
• Turn down all output volume controls of any equipment in
your audio system.
• Switch on your audio source(s) first.
• Switch on the audio mixer Switch on any audio processor
between the mixer and the amplifier(s) [if any].
• Switch on the amplifier(s).
• Turn up the audio level on your sources if such controls are
provided.
• Set the audio output of your mixer to a low level.
• Set the audio output of any audio processor between the
mixer and the amplifier(s) to a medium level [if any such
processors].
• Turn up the volume controls of your amplifier(s)
slowly. Make adjustments to all volume settings as needed.
• For switching off, follow the inverse sequence – always
switch off your amplifier(s) first, then any processors
between mixer and amplifier(s), then the mixer, then the
sources.
C. USE
Apart from using good equipment, good sound comes from
using it correctly. Level setting mistakes are one of the common
reasons why even good equipment may not perform as desired.
For setting levels, please be reminded that two guidelines need
to be followed:
• Avoid distortion by leaving some headroom. Never overrun
any audio-equipment’s inputs. Level meters and displays
allow you to make sure that signals do not enter critical
levels.
• Avoid unnecessary amplification by using as little gain as
possible. For example, if you turn down the input gain of
a mixer to minimum, and then increase the main output
of the mixer to maximum to drive your amplifier properly,
you will create unnecessary noise, as you first dispose of
some already existing signal level, and then later apply
amplification (tainted with noise) to make it up.
Obviously, these two requirements are marking a leveling
window that the operator must match to achieve a good sound
with as little distortion and noise as possible.
TECHNICAL SPECIFICATIONS
Max Output Power
Per Channel: .............+21dBm (load impedance 100 Ω)
Signal/Noise: ............>90dBu (unweighted 22Hz-22KHz)
THD: ........................... less than 0.01% (Line)
Frequency Response: .....................20Hz – 20KHz
AC Input: .............................. 120V AC, 60Hz
Power Consumption: .....................30W, maximum
Dimensions: ..................W: 19.1” x H: 1.75”x D: 6.69”
Weight .......................................6.0 lbs.
 Loading...