14
RU
KZ
EN
• Keep instruction manual in a dry area for further consultation.
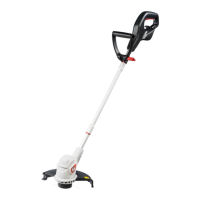
4.2 INSTALLATION
Assemble the shaft : illustration
2.1
Join the shaft to the motor and install the bolt by a hexagon wrench. Do not over tighten. Ensure the
shaft coupler is xed securely.
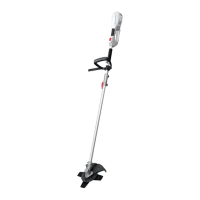
Assemble the handle : illustration
2.2
NOTE : There are three position notches on the stem, choose
the best comfortable position when holding the tool.
1. Loosen the handle bolt.
2. Loosely clamp the lower handle on the upper stem.
3. Attach the upper and lower handles with the bolts by a hexagon wrench. Please note that there are
two stickers "L" and "R" for left handle and right handle.
4. Adjust the handle to a position along the stem which is suitable for you to hold and guide the product.
5. Fix the handle by rmly tightening the bolts.
Install the harness : illustration
3.7
The harness with quick release function can be hooked behind the hand.
Use the harness at all times adjust both harness and harness clamp on the unit so that the unit hands a
few inches above ground level. Harness the unit on the right side of your body.
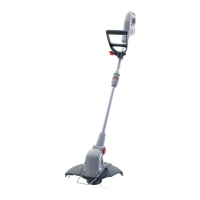
Assemble the cutting head shield : illustration
2.7
1. Install the cutting head shield on the neck of the head collar.
2. Install the three bolts to attach the shield by a hexagon wrench. Tighten securely.
CAUTION ! The metal blade has sharp edges. Use the protective
gloves when installing or removing the blade
Assemble the cutting head : illustration
2.3
1. Insert a hexagon wrench into the locking hole until the head collar stops.
2. Screw the spool in place and turn clockwise until it cannot rotate any more with the locked hub.
Changing the cutting head to the cutting blade : illustration
2.5
to
2.6
1. Rotate the head collar until the outer visible locking hole aligns with the inner locking hole beneath
the head collar.
2. Insert a hexagon wrench into the locking hole until it stops.
3. Turn the head counterclockwise to unscrew and remove the head from the arbor.
4. Holding the wrench tight so the mounting disc does not move. Install the blade and x plate.
5. Screw down the locknut and tighten it clockwise by holding the socket spanner .
6. Remove the spanner and the wrench and check for freedom of motion of the blade.
7. To remove the blade, unscrew the locknut counterclockwise and remove the x plate.

 Loading...