INSTALLATION
Safety
10 | CK Plus & CK Premium www.stiebel-eltron-usa.com
Problem Cause Solution
Window open de-
tection does not
respond (Premium
models only).
Heater does not detect a
pronounced temperature
drop when venting. (Win-
dow open detection re-
quires a previously stable
room temperature.)
Wait a while after making
settings on the heater, until
the room temperature has
fully stabilized.
Avoid obstructions to air
changes between heater and
indoor air.
Manually switch the heater
to standby mode for the du-
ration of venting.
Window open detection
is not enabled.
Switch on window open
detection in the standard
menu.
“Adaptive start”
function does not
work as required.
(Premium models
only)
This function is only
effective with a time pro-
gram activated.
Use the time programs for
optimized heating conve-
nience.
Severely fluctuating room
temperature or the heat-
er learning procedure
has not been completed.
Wait a few days for the be-
havior to stabilize.
“Adaptive start” function
is not enabled.
Switch on the “Adaptive
start” function in the stan-
dard menu.
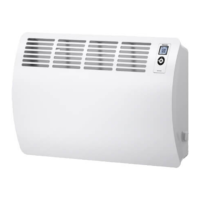
"Err" or "E..." is dis-
played. (Premium
models only)
Internal fault detected.
Notify a qualified contractor.
If you cannot remedy the fault, contact your qualified contractor.
To facilitate and speed up your request, provide the number from
the type plate (000000-0000-000000).
INSTALLATION
10. Safety
Only a qualified contractor should carry out installation, commis-
sioning, maintenance and repair of the heater.
10.1 General safety instructions
We guarantee trouble-free function and operational reliability only
if original accessories and spare parts intended for the heater
are used.
DANGER Electrocution
Carry out all electrical connection and installation
work in accordance with all national, state and local
building code.
CAUTION Burns
- Only mount the heater on a vertical wall that is tem-
perature-resistant to at least 185 °F (85 °C).
- Maintain the minimum clearances to adjacent ob-
jects.
Material losses
- If connecting the heater via a wall outlet plug, en-
sure that it is easily accessible once the heater has
been installed.
- Never install the heater directly below a wall socket.
- Ensure that the power cable is not in contact with
any heater components.
10.2 Instructions, standards and regulations
Note
Observe all applicable national and regional regulations
and instructions.
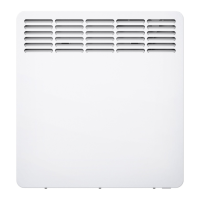
11. Heater description
11.1 Standard delivery
The following are delivered with the heater:
- Wall mounting bracket (hooked into the heater)
- Power cord with 120 V plug (120 V models only, attached)
12. Installation
12.1 Minimum clearances to hard surfaces
WARNING Fire
Combustible materials such as furniture, papers, clothes
and curtains must be kept at least 3 feet (0.9 m) from
the heater.
Never place any flammable, combustible or insulating
objects or materials, such as laundry, blankets, maga-
zines, containers with floor polish or gasoline, spray cans
or similar on the appliance or in direct proximity to it.
≥12˝
(≥30.5 cm)
Min. ≥4˝
(≥10 cm)
Recommended
≥6-8˝
(≥15.2-20.3 cm)
≥4˝ ≥4˝
(≥10 cm) (≥10 cm)
≥20˝
(≥50 cm)
ANY HARD SURFACE
FLOOR
D0000074797
12.2 Installing the wall mounting bracket
The heater is intended for wall mounting using the supplied wall
mounting bracket.
Never install the heater directly below a wall outlet.
 Loading...