INSTALLATION
Safety
14 | FEK 2
INSTALLATION
8. Safety
Only a qualied contractor should carry out installation, com-
missioning, maintenance and repair of the appliance.
8.1 General safety instructions
We guarantee trouble-free function and operational reliability
only if original accessories and spare parts intended for the
appliance are used.
8.2 Instructions, standards and regulations
Note
Observe all applicable national and regional regula-
tions and instructions.
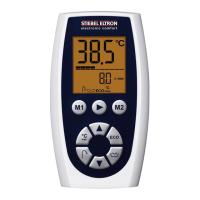
9. Appliance description
The appliance is a remote control unit for the connected heat
pump manager. This appliance can operate one heating circuit.
The heat pump manager uses the measured room tempera-
ture and the selected set temperature to regulate the heating
temperature.
10. Installation
10.1 Installation location
Observe the following installation location requirements to
ensure correct function.
Fit the appliance to an internal wall, but not in a recess.
Never cover the appliance with curtains, etc.
Ensure the appliance is not directly exposed to external
heat sources (e.g. the sun or central heating).
Avoid direct draughts coming from windows and doors.
10.2 Preparation
For installation, remove the appliance from the wall mounted
enclosure:
26_04_01_0401
Release the snap-in tab found in the opening on the un-
derside of the wall mounted enclosure. Press the snap-in
tab with a screwdriver.
Route a four-core data cable from the heat pump manag-
er to the mounting position of the appliance.
The data cable must protrude 20 to 30cm out of the wall to
allow installation.
10.2.1 Installation with a ush box
For securing to a wall we recommend using a ush box that
can accommodate the data cable.
Make sure that the screws supporting the ush box are
arranged either vertically or horizontally opposite one
another.
10.2.2 Installation without a ush box
To secure the wall mounted enclosure, drill four holes
(Ø5mm).
When routing the data cable, be careful not to damage it
when drilling the xing holes.
In the area around the cable entry (behind the wall mounted
enclosure), a reservoir needs to be made to hold 20 to 30cm
of data cable.
D0000064577
Break out one of the knock-outs in the wall mounted en-
closure.
Route the data cable through the hole from the back.
 Loading...